


While full review widgets include summary graphs and submission forms, modern websites often need to display standalone customer testimonials on homepages, landing pages, marketing funnels, or comparison tables. The ReviewX Review List Elementor widget gives you a dedicated widget designed exclusively to render verified review feeds with custom filtering, pagination, and grid layouts.
Thank you for reading this post, don't forget to subscribe!In this guide, you will learn how to embed and style standalone review lists anywhere across your WordPress site using Elementor.
When to Use the Standalone Review List Widget
- Homepage Social Proof: Highlight your best 5-star product reviews directly on the homepage.
- Dedicated Testimonials Page: Build a high-converting customer proof hub with verified buyer badges.
- Promotional Landing Pages: Showcase curated reviews for a specific flagship product without displaying an unnecessary submission form.
Step 1: Insert the ReviewX Review List Widget
- Open any page or template with the Elementor Editor.
- Search for ReviewX Review List in the widget drawer.
- Drag the widget into your desired column or section.
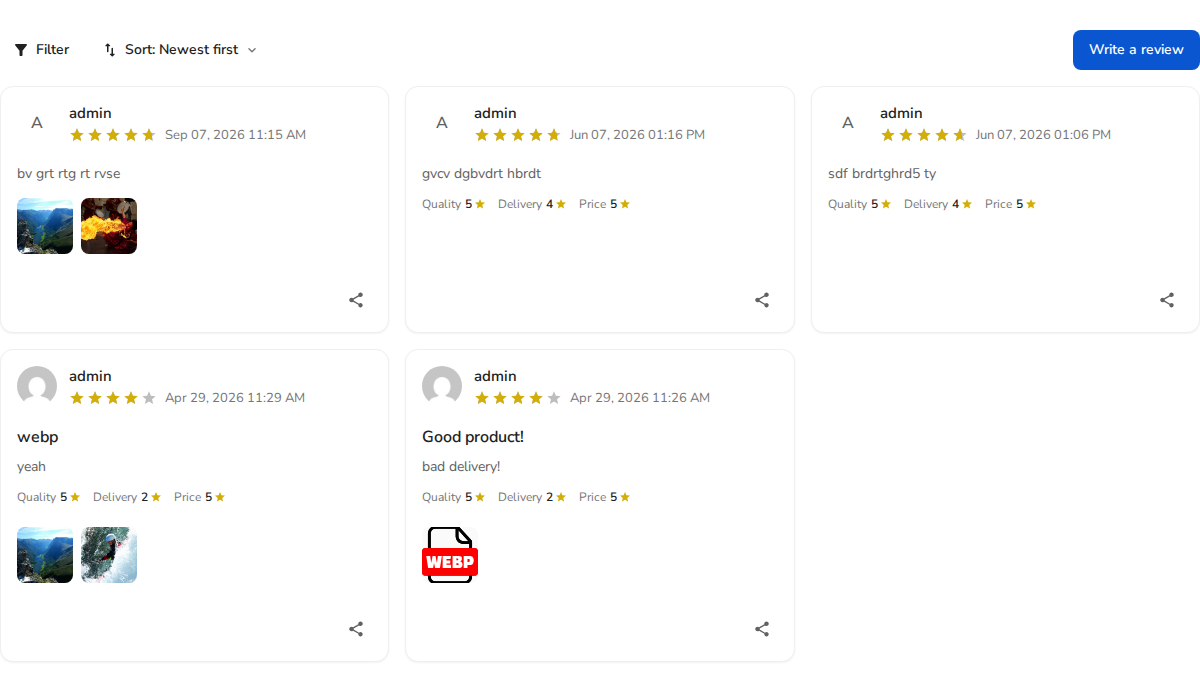
Figure 1: Standalone ReviewX Review List rendering verified customer reviews with media galleries and rating metrics.
Step 2: Configure Review Source & Query Controls
In Elementor’s Content settings:
- Review Source:
- Current Product/Post: Automatically inherits the active item when placed on single product or CPT templates.
- Specific Product ID: Enter a WooCommerce product ID or post ID to pull reviews from a specific item on any general landing page.
- Layout Mode: Choose between List View (classic linear flow) and Grid View (multi-column cards).
- Reviews Per Page: Specify how many reviews to display before pagination kicks in (e.g. 6 or 12).
- Filter & Sort Bar: Toggle whether visitors can filter by rating stars, view photo-only reviews, or sort chronologically.
Step 3: Styling Review Cards & Elements
Switch to the Style tab to customize the visual presentation:
- Card Styling: Configure card background color, box shadow, padding, border radius, and hover transitions.
- Reviewer Avatar & Name: Adjust avatar size, border shape (circle vs rounded), name typography, and verified purchaser badge colors.
- Star Rating Display: Set custom colors for active rating stars and sizing.
- Helpful Voting: Customize like/dislike buttons, thumbs-up counts, and social share icons.
Step 4: Publish & Verify
- Click Update to save your page.
- Preview the page on desktop, tablet, and mobile devices to verify grid wrapping and touch friendliness.


