


If you prefer displaying the complete review experience as a standalone hero section on your product page rather than hiding it inside a tab, the ReviewX Woo Review Elementor widget is the ideal solution. It embeds the entire review ecosystem — rating distribution graph, multi-criteria breakdown, recommendation badge, filter/sort controls, verified reviews list, and submission form — directly into any Elementor column or container.
This guide walks you through inserting, styling, and optimizing the ReviewX Woo Review widget on your WooCommerce storefront.
Key Features of the Woo Review Widget
- Complete Standalone Ecosystem: Delivers customer reviews, statistics, media galleries, and review forms in a single unified widget.
- Dual Template Styles: Choose between modern multi-column card layouts and compact list arrangements.
- Interactive Filtering & Sorting: Allows shoppers to filter by star rating, reviews with photos/videos, or sort by most recent feedback.
- Mobile Responsive Design: Automatically rearranges columns on tablets and mobile screens for seamless touch navigation.
Step 1: Insert the Widget in Elementor
- Navigate to Templates → Theme Builder → Single Product and click Edit with Elementor.
- Search for ReviewX Woo Review in the widget drawer.
- Drag and drop the widget into a full-width container or dedicated section on your product page canvas (typically below the main product summary and purchase CTA).
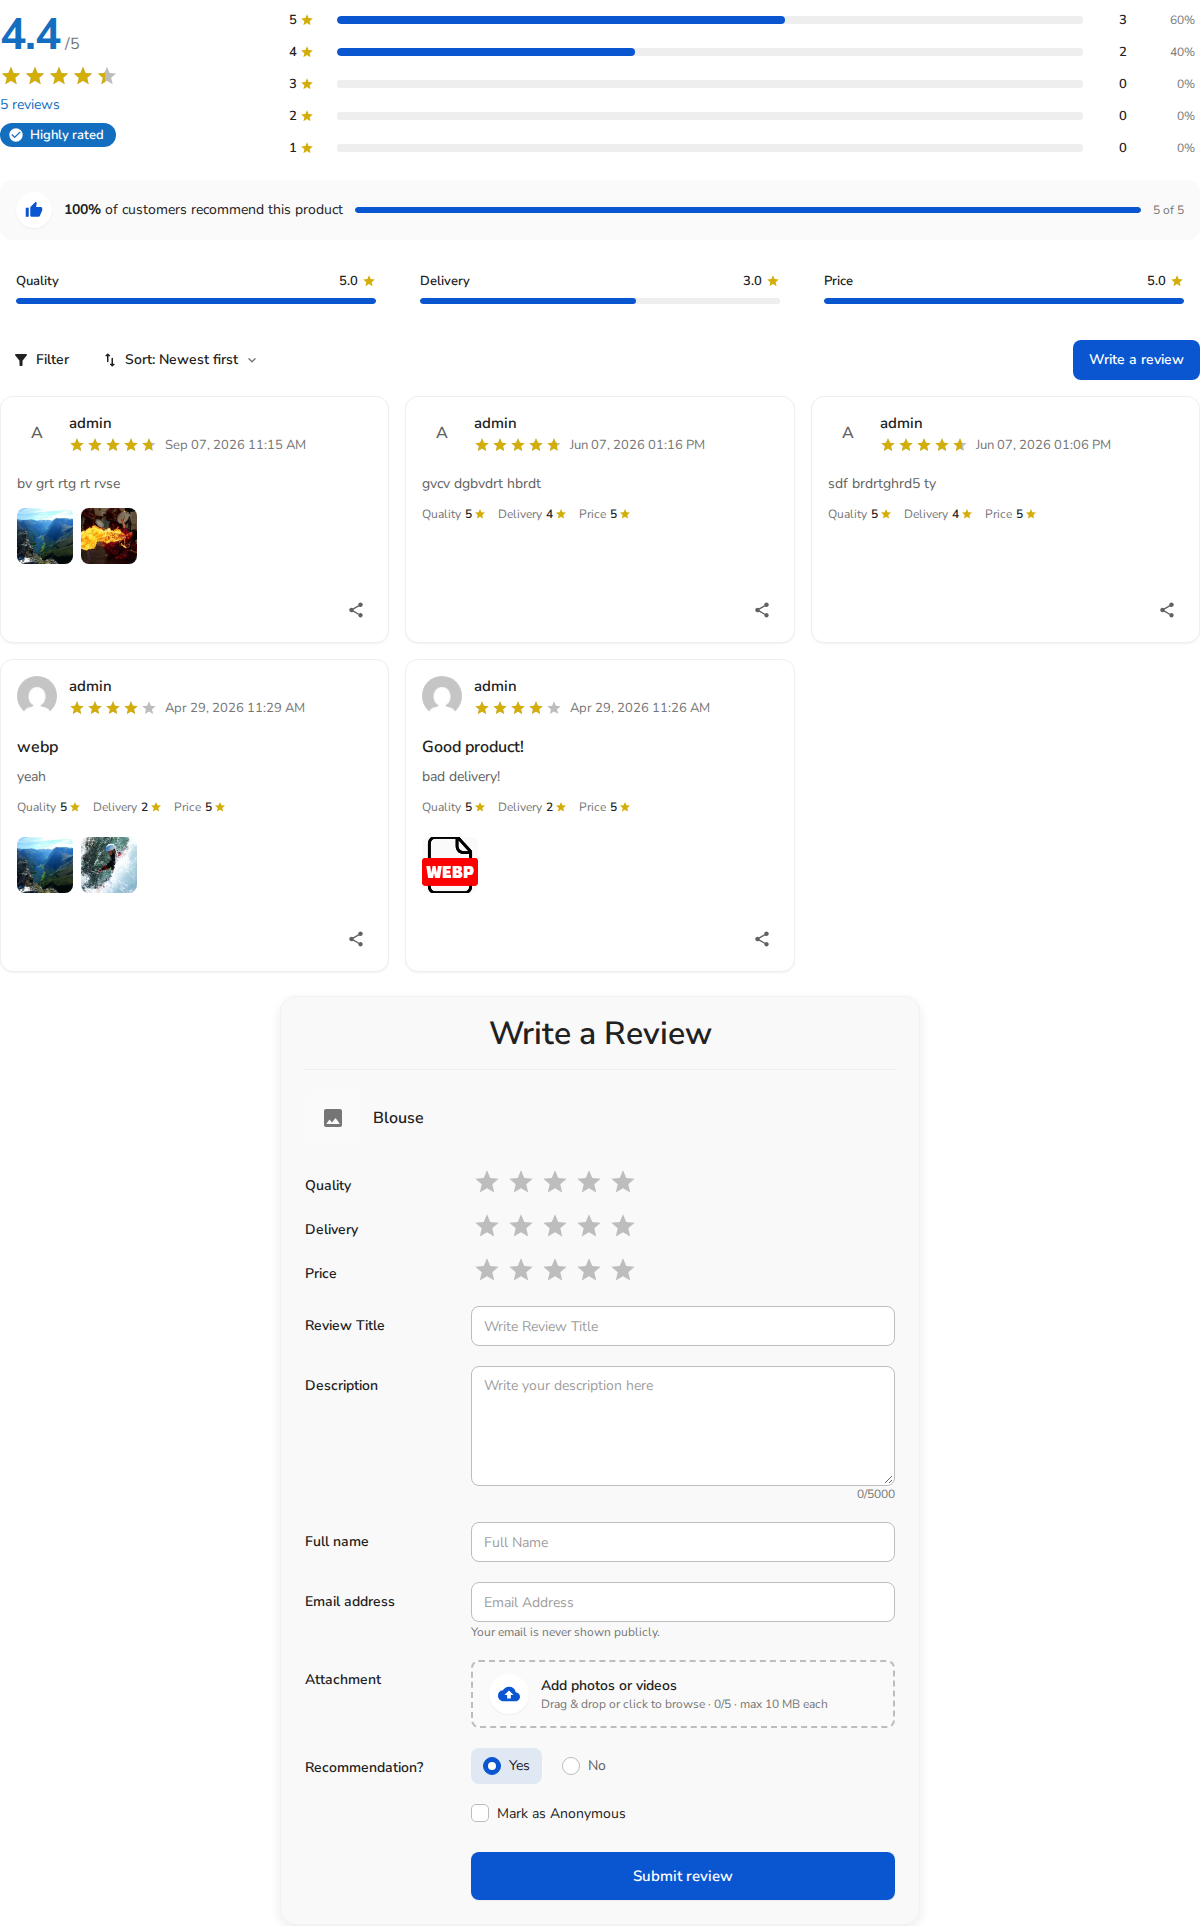
Figure 1: Full standalone ReviewX Woo Review widget showcasing rating breakdown, recommendation percentage, review cards, and submission form.
Step 2: Choose Template & Layout Controls
Under the Content tab in Elementor:
- Template Style: Toggle between Style 1 and Style 2 to select the structural hierarchy of summary metrics versus review items.
- Layout Arrangement: Choose whether review items display as a List View (traditional vertical feed), Grid View (multi-column cards), or Masonry.
- Header Statistics: Toggle display of total review count, average rating score, and recommended percentage.
- Review Form Placement: Choose whether the “Write a Review” form appears before or after the review list, or in a popup drawer.
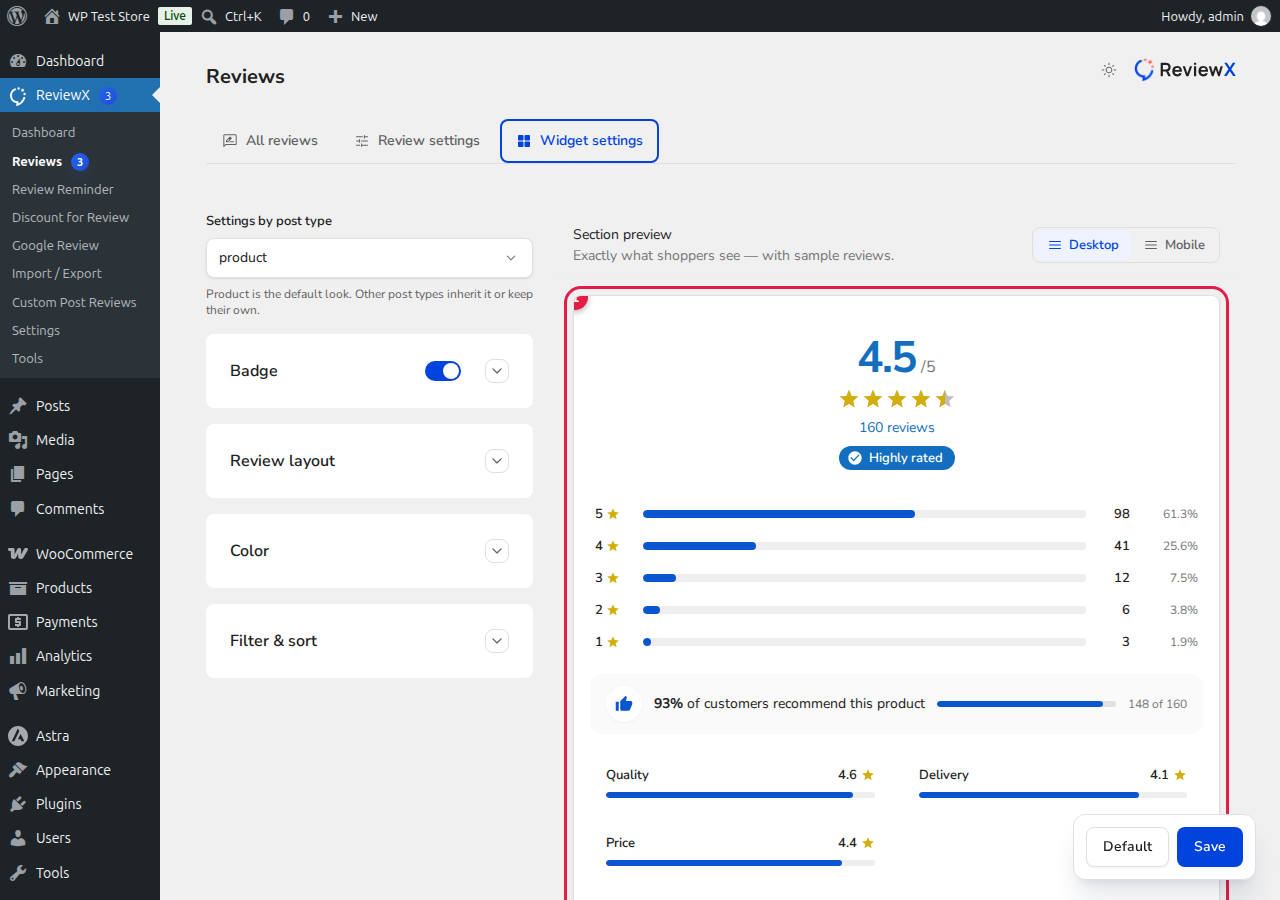
Figure 2: ReviewX Widget Settings panel allowing live desktop and mobile layout customization.
Step 3: Elementor Visual Styling Controls
The Style tab provides comprehensive visual customization:
- Typography: Custom font families, weights, letter-spacing, and line-heights for titles, review text, criteria labels, and metadata.
- Colors & Themes: Define primary brand accent colors, star fill colors, progress bar gradients, and card backgrounds.
- Button Styling: Customize the “Write a Review” and “Submit Review” buttons with hover animations, padding, and border radius.
- Photo / Video Thumbnails: Configure thumbnail dimensions, border radii, and lightbox trigger effects.
Step 4: Save & Test Live Responsiveness
- Click Update to save your template.
- Toggle Elementor’s Responsive Mode (Tablet and Mobile view) to verify that criteria progress bars and review cards stack gracefully on smaller screens.
- Open an active WooCommerce product in a private browser window to test the live user experience and submission form.


