


When you install ReviewX for the first time, an intuitive 5-step Onboarding Wizard guides you through essential store branding and review configurations before you ever touch the full settings panel. This ensures your store is ready to collect verified customer reviews in minutes.
Thank you for reading this post, don't forget to subscribe!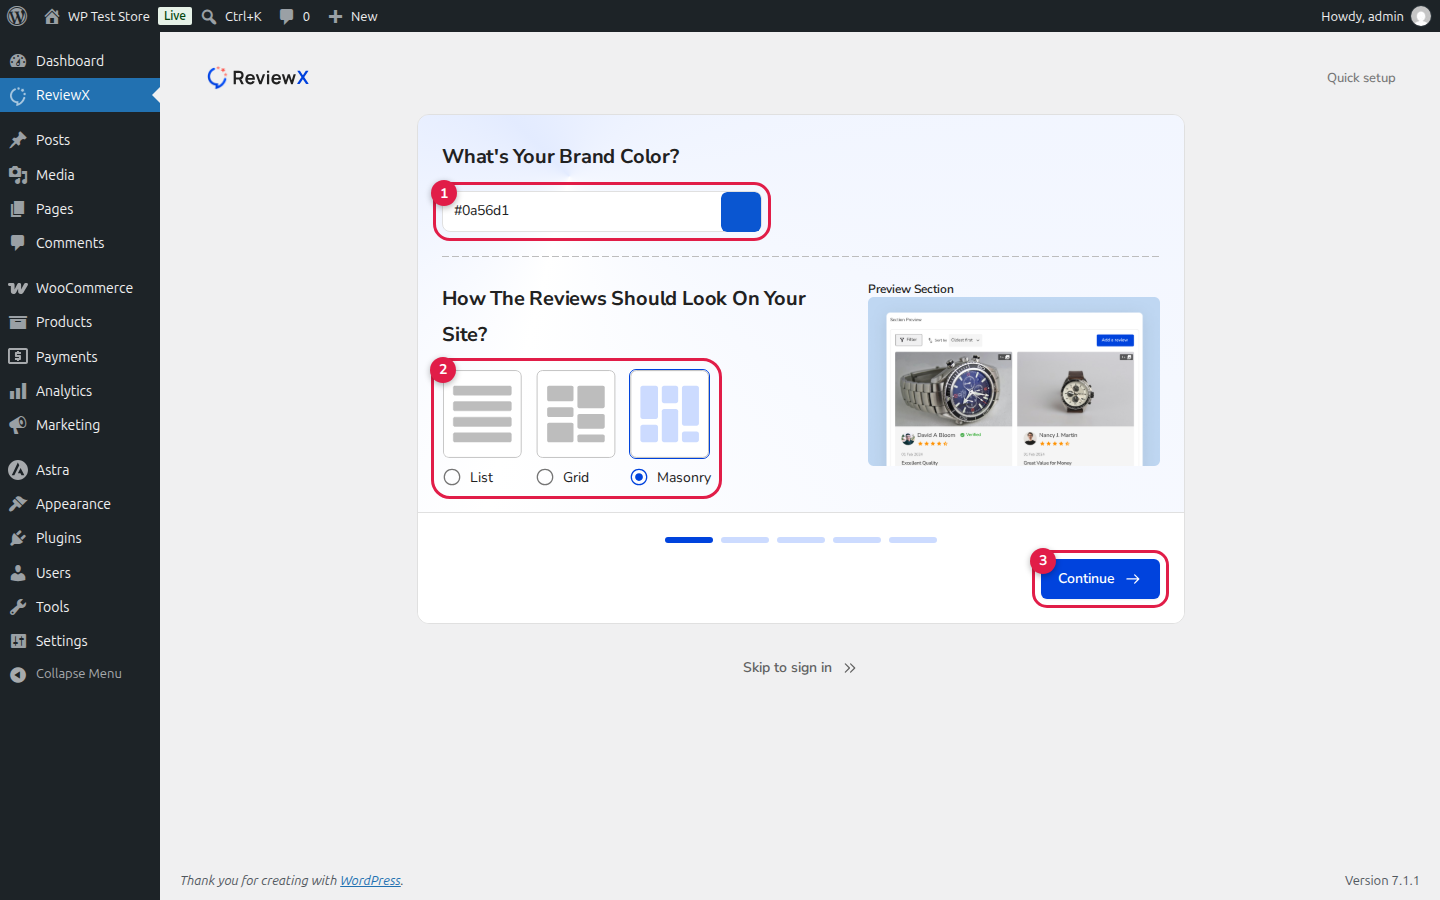
Step 1: Choose Your Brand Color and Review Layout
The wizard opens on the Quick Setup screen:
- What’s Your Brand Color? (Callout [1]): Enter your brand’s hex color code (e.g.
#0a56d1) or use the interactive color picker. This color is applied across review submission stars, buttons, and progress bars. - How The Reviews Should Look On Your Site? (Callout [2]): Select your preferred storefront review layout:
- List: Clean vertical stack, ideal for traditional single-column product pages.
- Grid: Multi-column cards, great for compact browsing.
- Masonry: Pinterest-style dynamic grid that beautifully accommodates reviews of varying text and photo heights.
- Review the live mockup in the Preview Section on the right, then click Continue → (callout [3]).
Step 2: Set Up Multi-Criteria Reviews
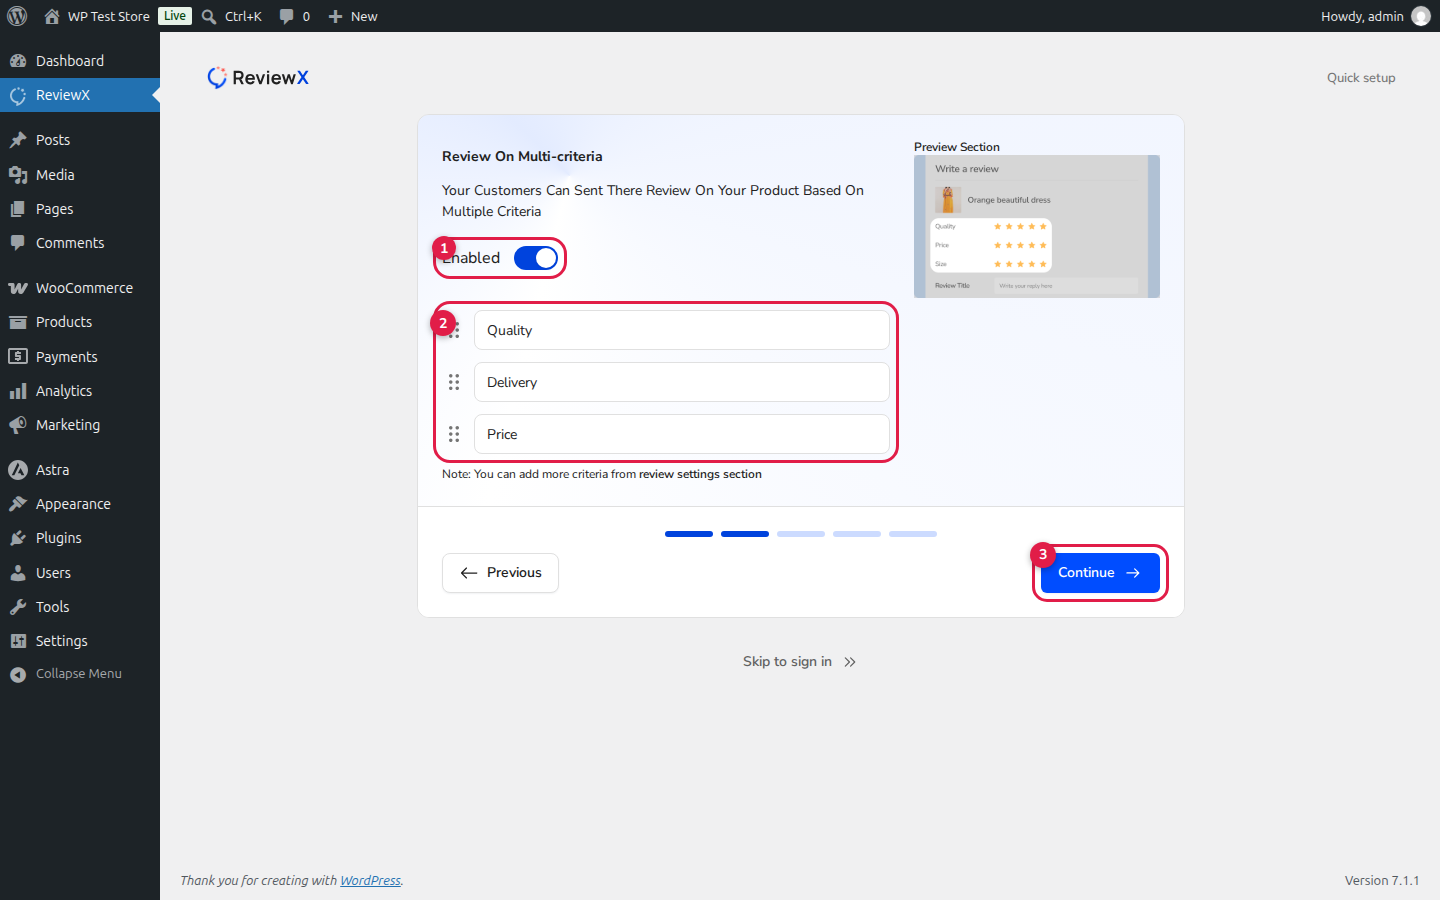
ReviewX allows customers to rate products across multiple attributes (such as Quality, Delivery, and Price) rather than a single generic star rating:
- Multi-Criteria Toggle (Callout [1]): Switch the toggle to Enabled to activate multi-criteria evaluations.
- Criteria Items (Callout [2]): Reorder or rename the default criteria (Quality, Delivery, Price) using the drag handles and text inputs. You can add more criteria anytime later from Review Settings.
- Click Continue → (callout [3]).
Step 3: Enable Photo Reviews
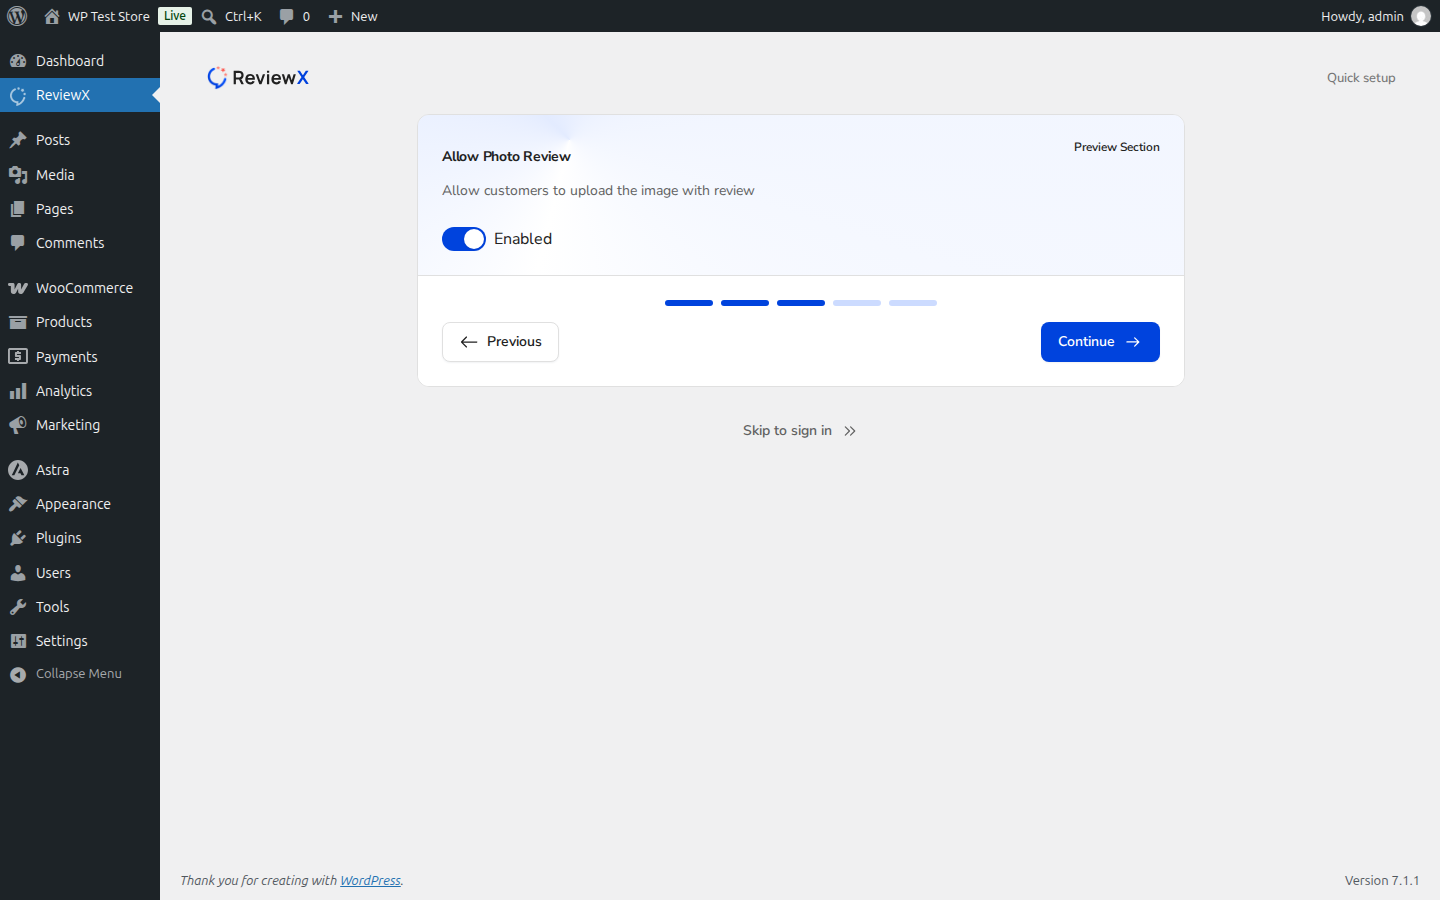
Allow customers to attach authentic images of received products with their feedback. Switch the Allow Photo Review toggle to Enabled and click Continue →.
Step 4: Automate Review Request Emails
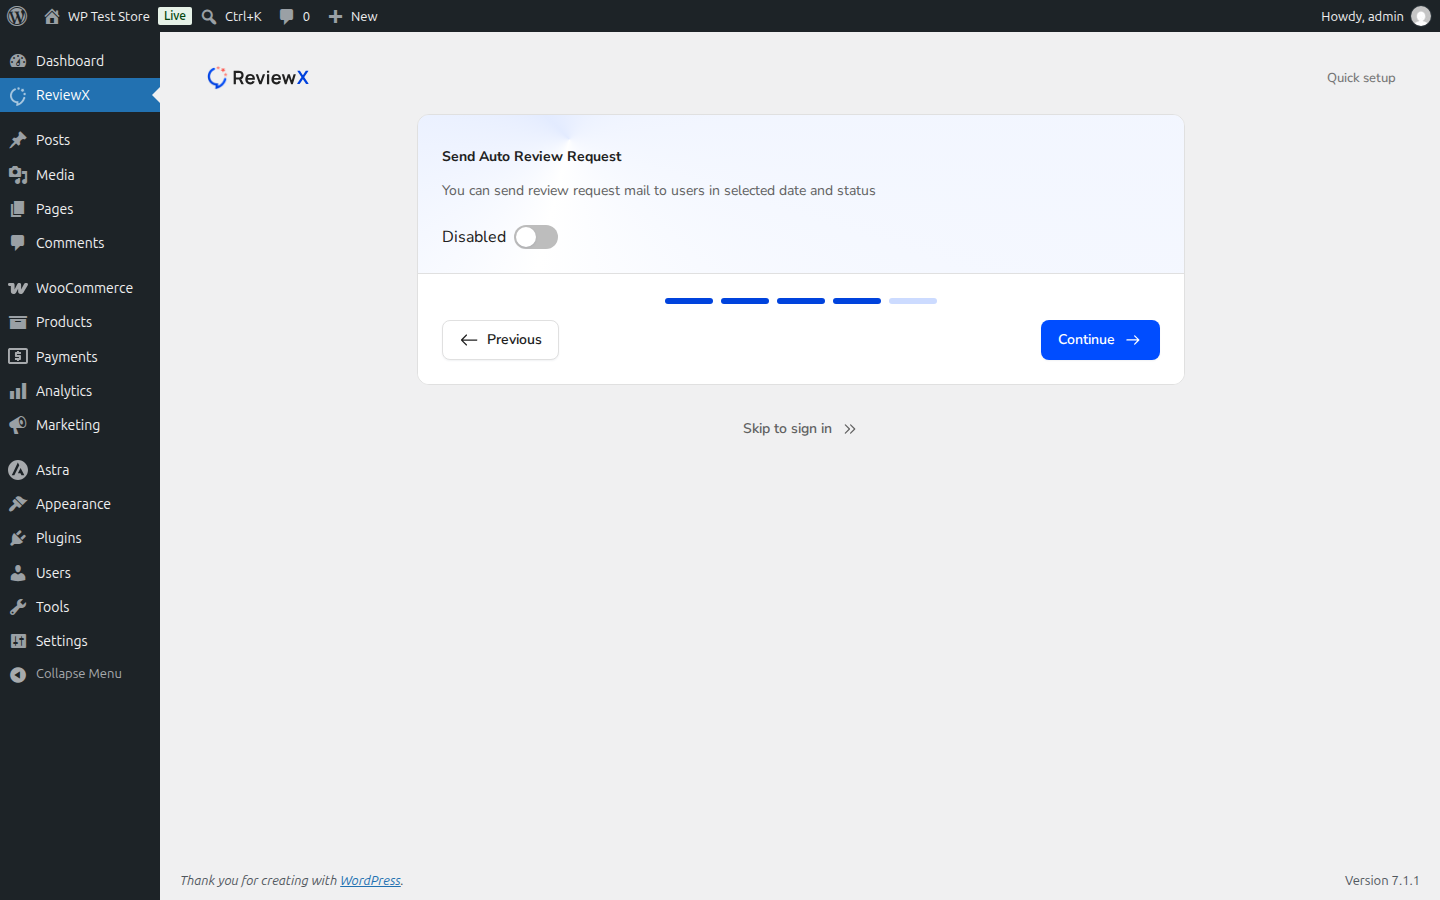
Toggle Send Auto Review Request to automatically dispatch review request emails to customers after their orders reach Completed status, eliminating manual outreach.
Step 5: Connect Your License Key or Account
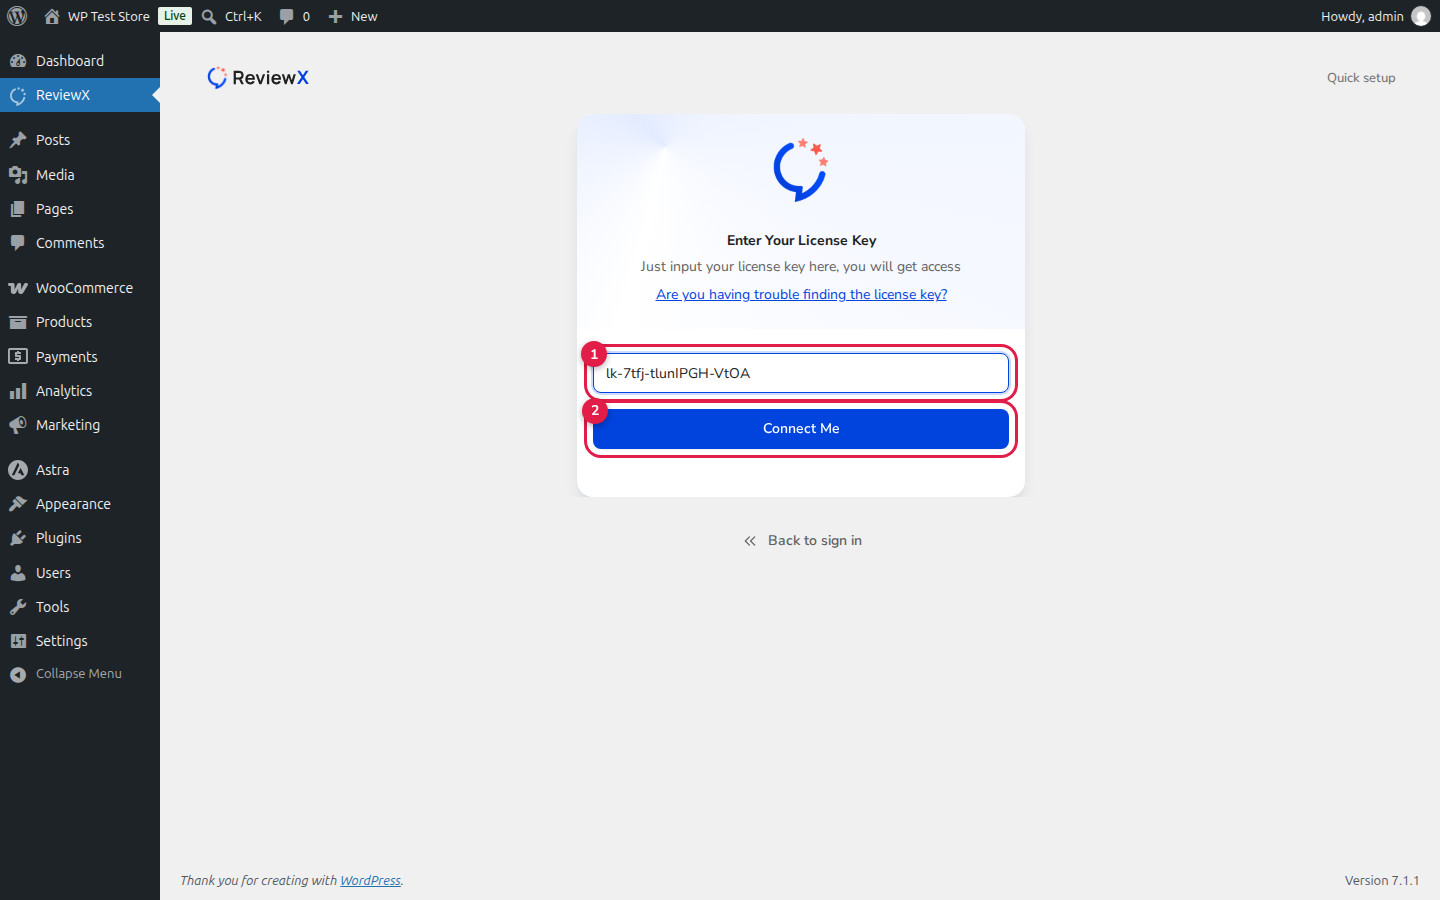
The final step connects your WordPress installation to the ReviewX SaaS platform:
- Click I have my license key on the sign-in card.
- Enter your Pro license key (format:
lk-xxxx-xxxxxxxx-xxxx) into the input field ([1]). - Click Connect Me ([2]).
Upon connection, the wizard completes and launches your live ReviewX dashboard!


