


Building a cohesive, trustworthy brand image requires consistent visual cues across all touchpoints of your e-commerce store. When store administrators respond to customer reviews, showing an official, high-resolution company logo alongside merchant replies looks far more professional than displaying a generic WordPress avatar or personal Gravatar.
Thank you for reading this post, don't forget to subscribe!ReviewX makes it easy to upload a branded Shop icon that dynamically replaces the default admin avatar across all public review replies on your storefront.
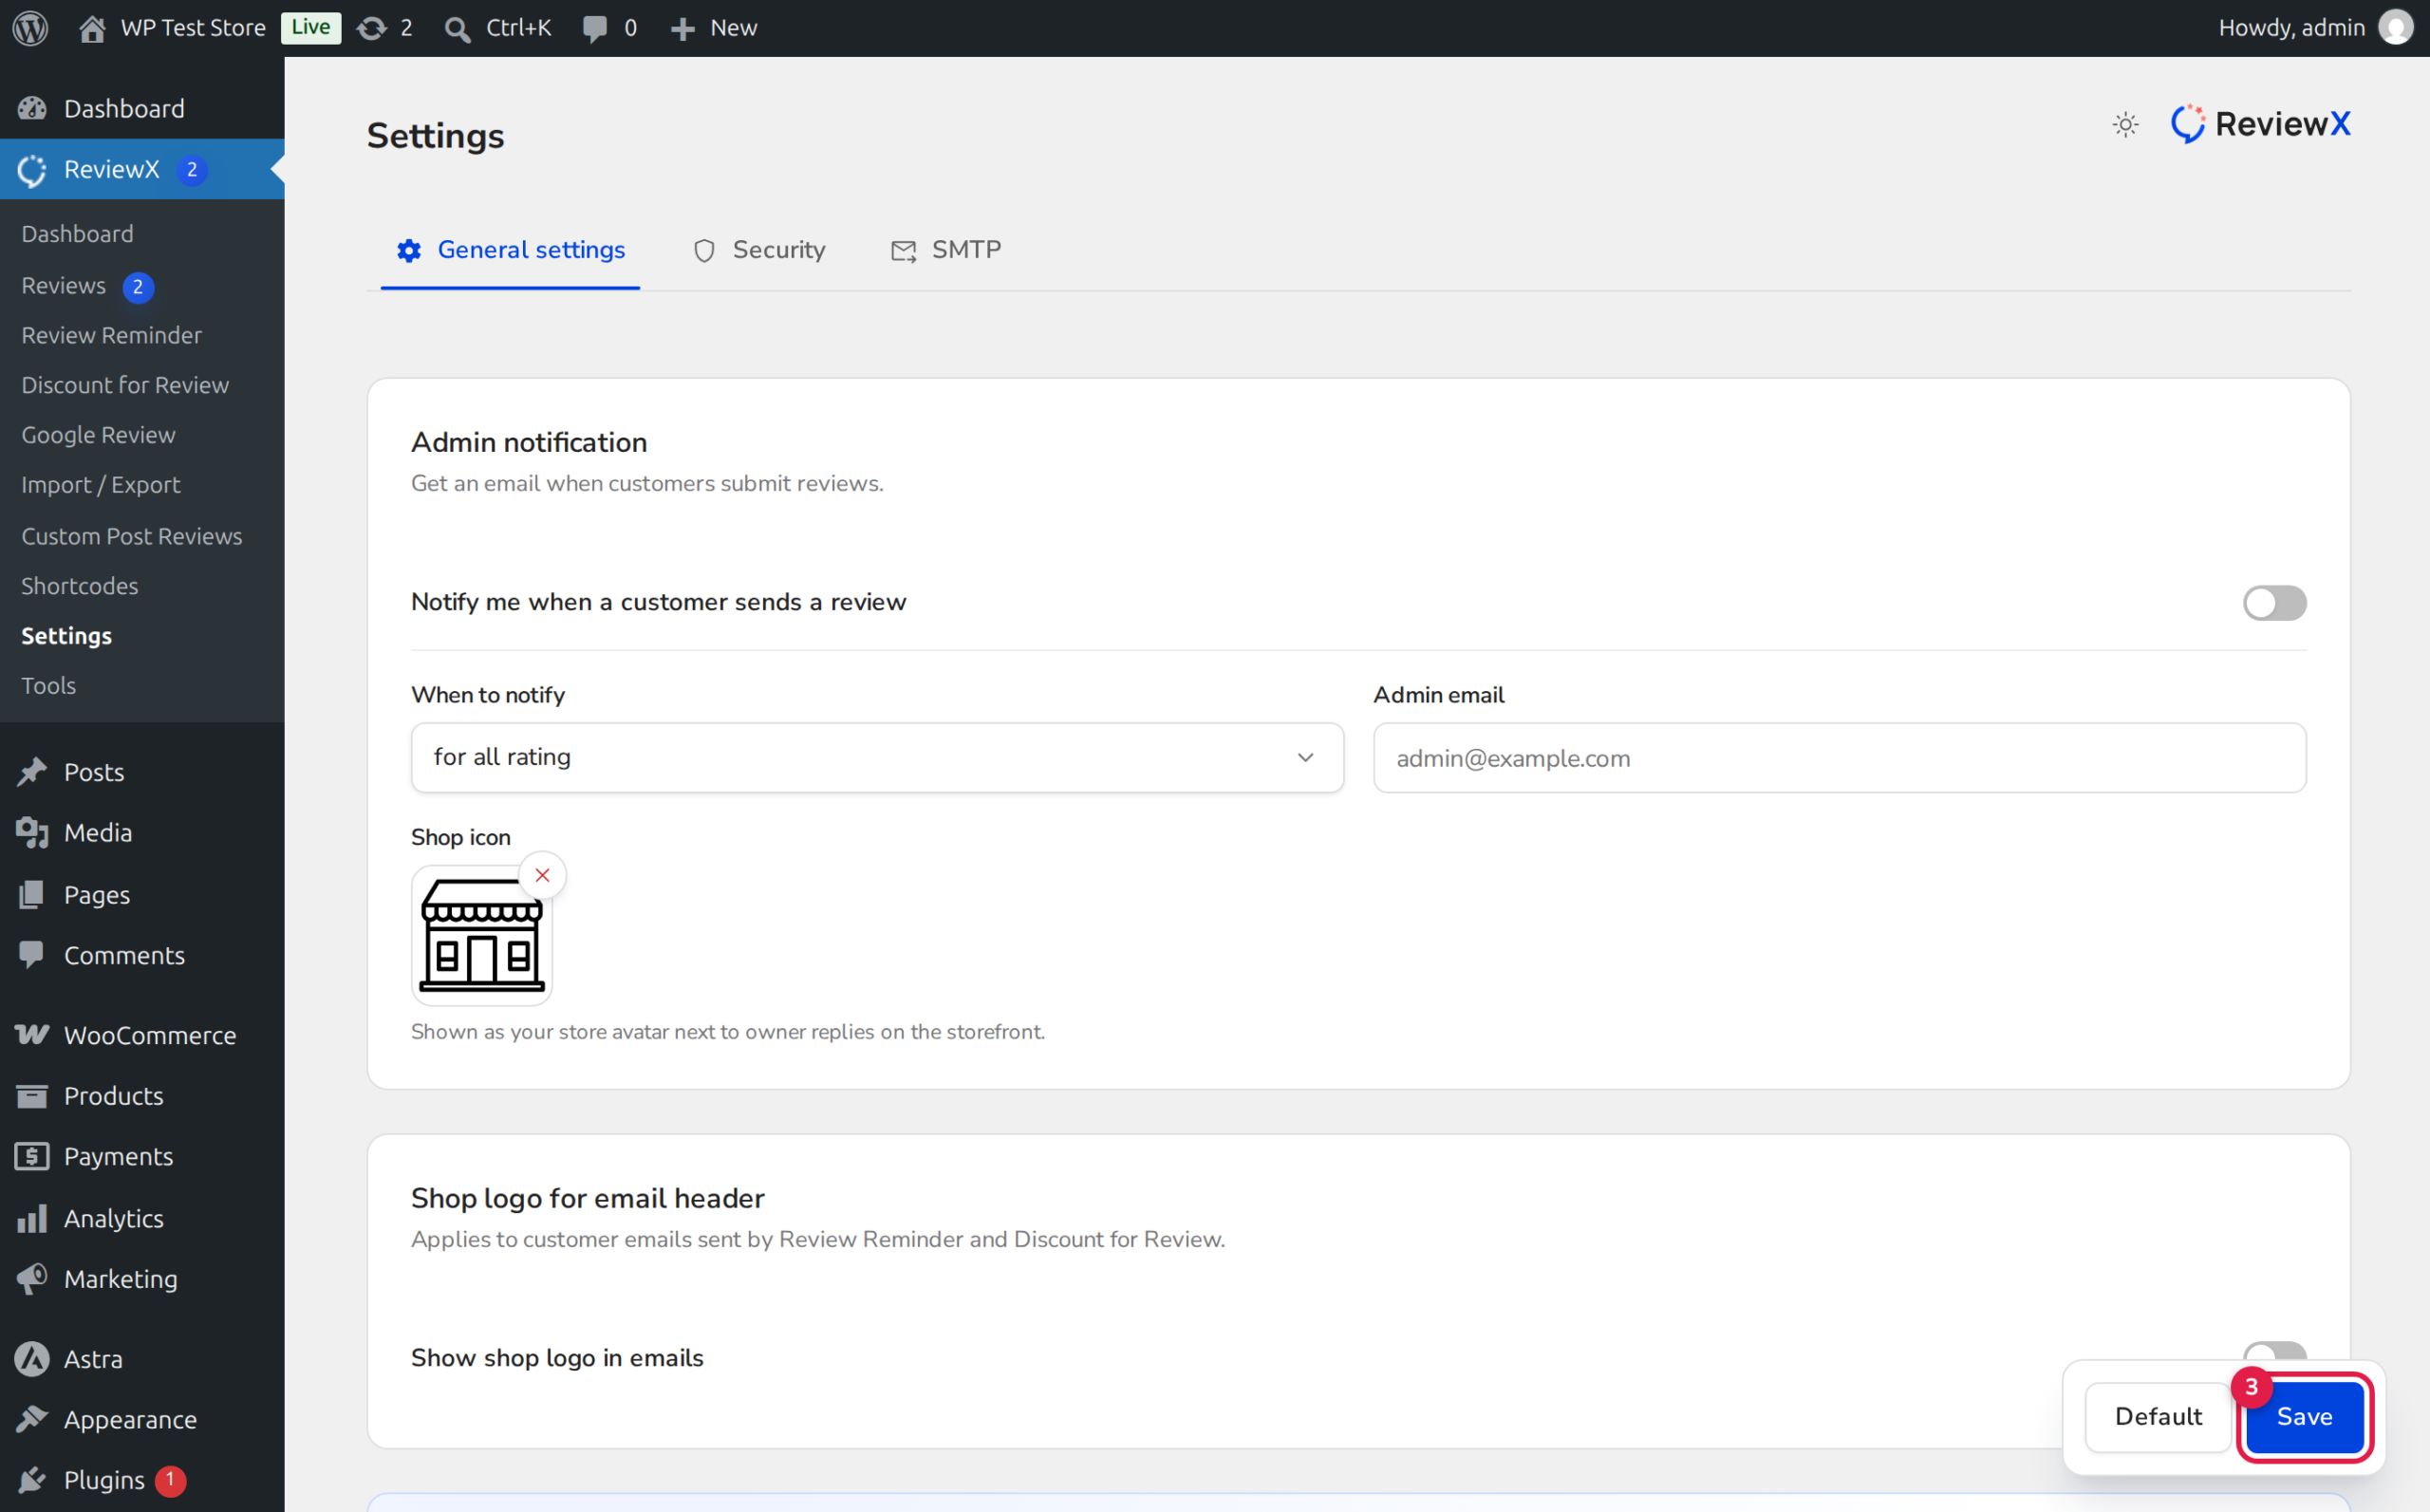
Consistent Branding Builds Authority
Displaying your verified business logo next to replies instantly signals to shoppers that the response comes directly from the official store team. This visual distinction eliminates ambiguity and reinforces store legitimacy.
How the Custom Reply Logo Works
When ReviewX renders an admin reply on the storefront widget, it checks the global configuration:
- Custom Shop Icon Configured: If a custom image is uploaded in General Settings, ReviewX injects this URL directly into the avatar container for all admin responses.
- Fallback Behavior: If no custom logo is specified, ReviewX falls back to your WordPress Site Icon (configured under Appearance → Customize → Site Identity) or the administrator user’s registered Gravatar.
- Responsive Scaling: The logo is automatically scaled to fit standard avatar dimensions (typically 40x40px or 48x48px) with modern rounded styling.
Step-by-Step Guide: Uploading a Custom Admin Reply Logo
Step 1: Open General Settings
From your WordPress admin dashboard, navigate to ReviewX → Settings and select the General Settings tab at the top.
Step 2: Locate the Admin Notifications Card
Scroll down to the Admin notifications configuration card. This section governs administrative alerts and merchant identity settings.
Step 3: Upload Your Shop Icon
Find the Shop icon option (marked with Badge 1 in the screenshot above). Click the Upload button (Badge 2) to open the WordPress Media Library:
- Select an existing high-resolution store logo or upload a new file from your computer.
- Click Select to attach the image. A thumbnail preview of your logo will immediately appear in the settings field.
Step 4: Save Changes
Click the Save button at the bottom of the page to apply your custom logo across all past and future admin replies.
Recommended Image Specifications
To ensure crisp visual rendering across all screen resolutions and retina displays, adhere to these recommended guidelines:
| Property | Recommended Value | Why It Matters |
|---|---|---|
| Aspect Ratio | 1:1 (Square) | Prevents distortion or awkward cropping when rendered inside circular or rounded containers. |
| Image Dimensions | 120x120px to 300x300px | Provides high DPI crispness on mobile and retina screens while keeping file weight minimal. |
| File Format | PNG, WebP, or SVG | Supports clean transparency, allowing your logo mark to blend seamlessly into light or dark widget themes. |
| File Size | Under 50 KB | Ensures lightning-fast page loading and optimal Core Web Vitals performance. |
Frequently Asked Questions
Does updating the shop icon update old replies?
Yes. Because the logo URL is referenced dynamically by the ReviewX widget template, updating your Shop icon immediately updates all past and future merchant replies across your entire catalog.
Can different administrators have different reply avatars?
The Shop icon is a global setting designed to present a unified brand identity across all official store replies. If you prefer individual staff avatars, leaving the Shop icon empty allows ReviewX to display each administrator’s personal WordPress Gravatar.
Where can I adjust the avatar styling and border radius?
You can fine-tune avatar styling, borders, and margins using the WordPress Live Customizer under Appearance → Customize → ReviewX → Review List.


