


Get your WooCommerce store ready to collect and display verified customer reviews in under five minutes by following this essential ReviewX setup checklist.
Thank you for reading this post, don't forget to subscribe!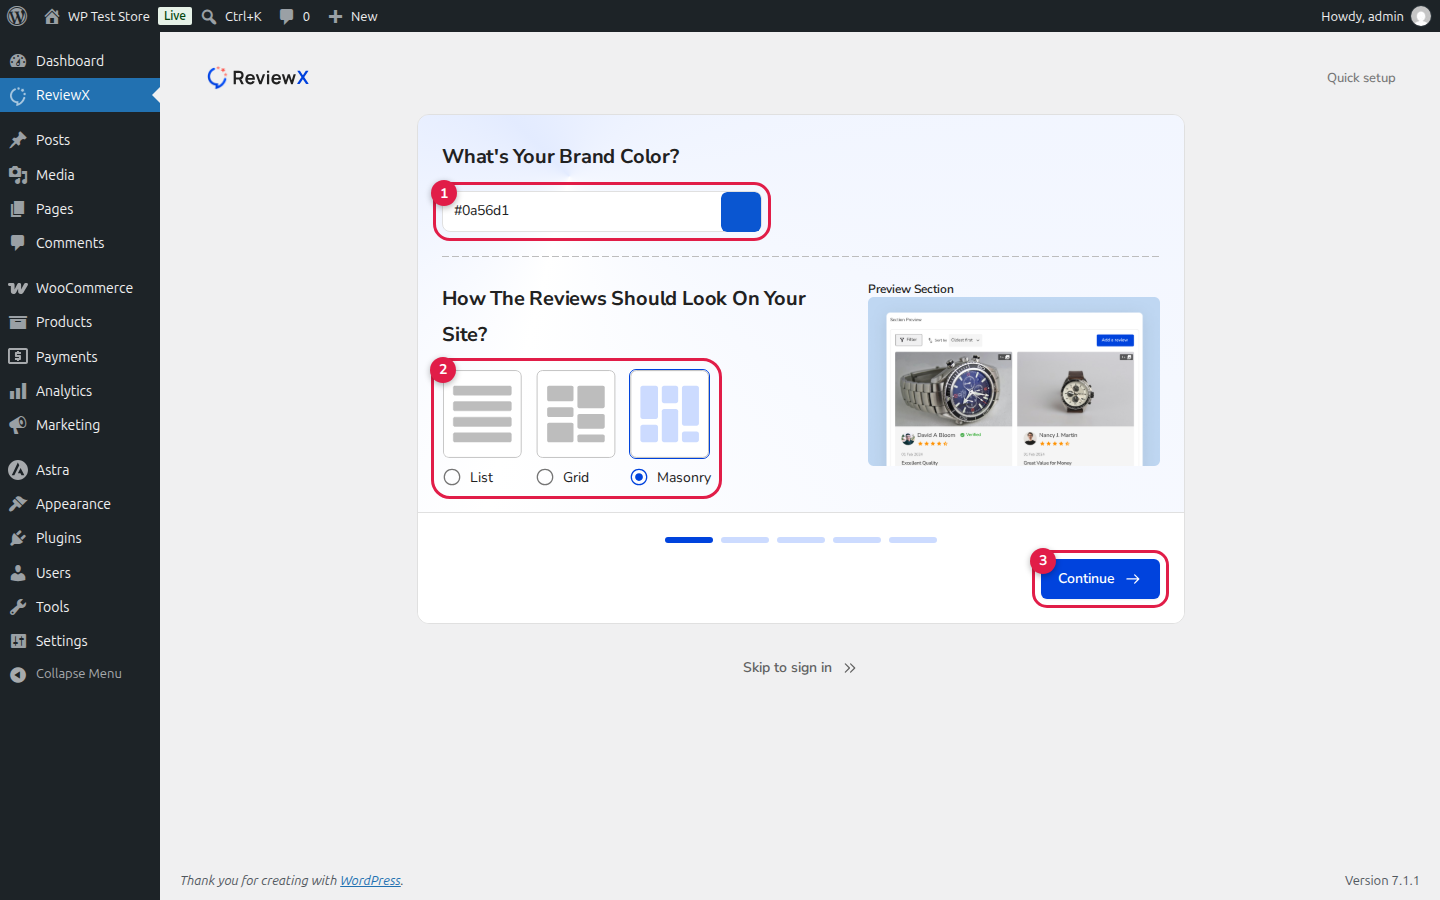
The 5-Step Quick Start Checklist
1. Install and Activate the Plugin
Upload reviewx-saas-wp.zip via WordPress Admin → Plugins → Add New Plugin → Upload Plugin and click Activate Plugin. ReviewX operates as a single unified plugin for both Free and Pro editions.
2. Complete the Onboarding Wizard & Activate License
Click on ReviewX in the admin menu. Follow the wizard to set your brand color and review layout style (List, Grid, or Masonry). At the account screen, click I have my license key, enter your Pro key (lk-...), and click Connect Me to link your store with the ReviewX SaaS platform.
3. Set Your Review Submission Policy
Head to ReviewX → Reviews → Review settings. Decide whether to accept reviews from Anyone or restrict submissions exclusively to Only verified owners who completed an order on your store.
4. Configure Storefront Widget Appearance
Open ReviewX → Reviews → Widget settings. Fine-tune your layout, star styling, review graph display, and storefront pagination limits.
5. Enable Automated Review Reminders
Navigate to ReviewX → Review Reminder → Reminder settings. Enable the First review request automated email schedule to prompt customers for feedback automatically after order fulfillment.


