


Installing ReviewX is quick and straightforward. In ReviewX v2, both Free and Pro editions use the exact same unified plugin codebase — eliminating the complexity of managing separate free and pro zip files.
Thank you for reading this post, don't forget to subscribe!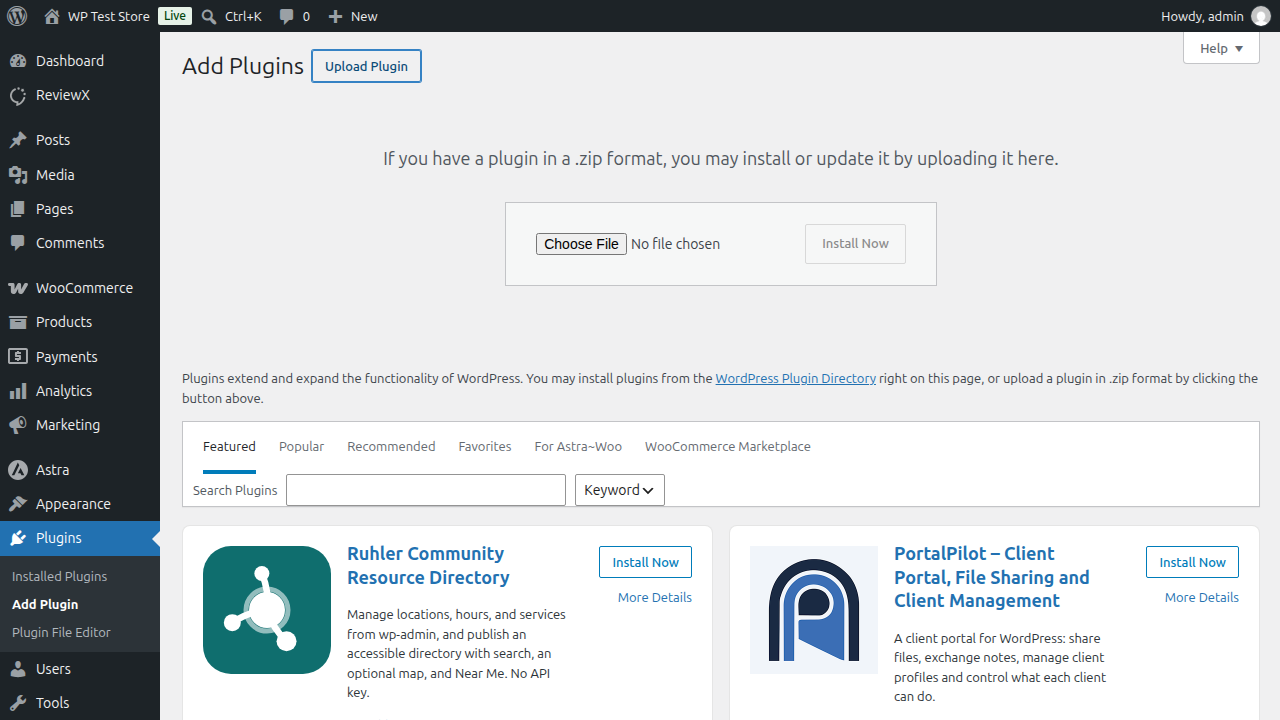
Installation Steps
- Download the latest release zip file (
reviewx-saas-wp.zip) from your ReviewX Client Portal (portal.reviewx.io) or the official WordPress plugin repository. - In your WordPress administration dashboard, navigate to Plugins → Add New Plugin.
- Click the Upload Plugin button at the top of the page.
- Select the downloaded
reviewx-saas-wp.zipfile from your computer and click Install Now. - Click Activate Plugin.
Unlocking Pro Features via Onboarding
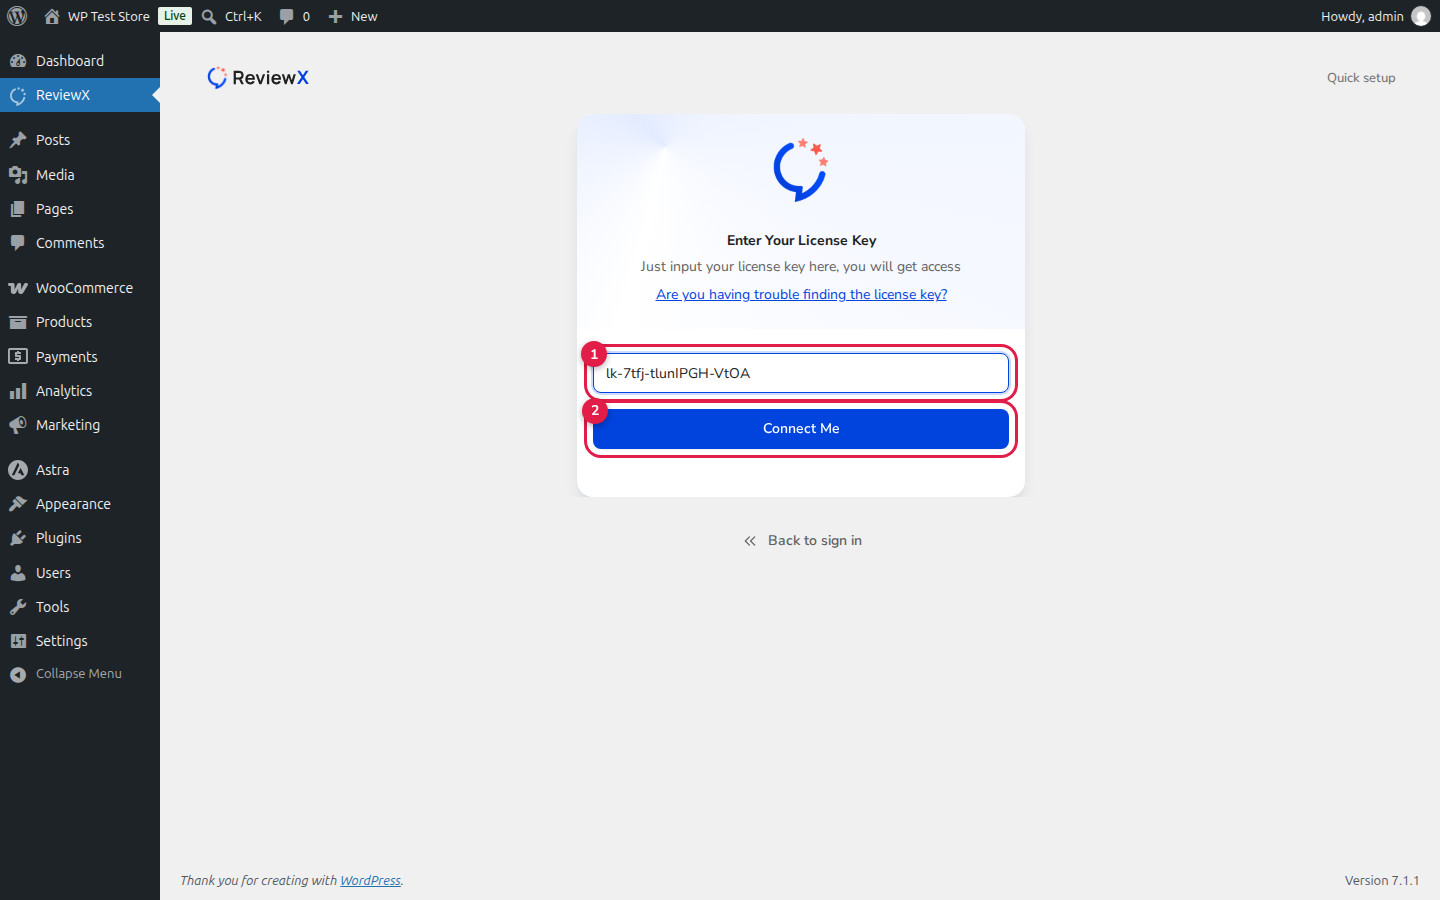
Immediately after plugin activation, navigate to ReviewX in your WordPress sidebar. The Onboarding Wizard launches automatically:
- Follow the quick setup steps or click Skip to sign in.
- Click I have my license key on the sign-in screen.
- Enter your Pro license key (format:
lk-xxxx-xxxxxxxx-xxxx) into input field [1]. - Click Connect Me ([2]).
Entering your Pro license key during onboarding instantly unlocks all premium features — including AI Review Generation, Video Reviews, Multi-Criteria Ratings, and Custom SMTP — without ever needing to install any secondary add-on plugins.


