


Once ReviewX is installed and activated on your WordPress site, connecting it to the ReviewX Cloud platform is the final step to unlock all features — both Free and Pro — and begin syncing your products, orders, and reviews.
Thank you for reading this post, don't forget to subscribe!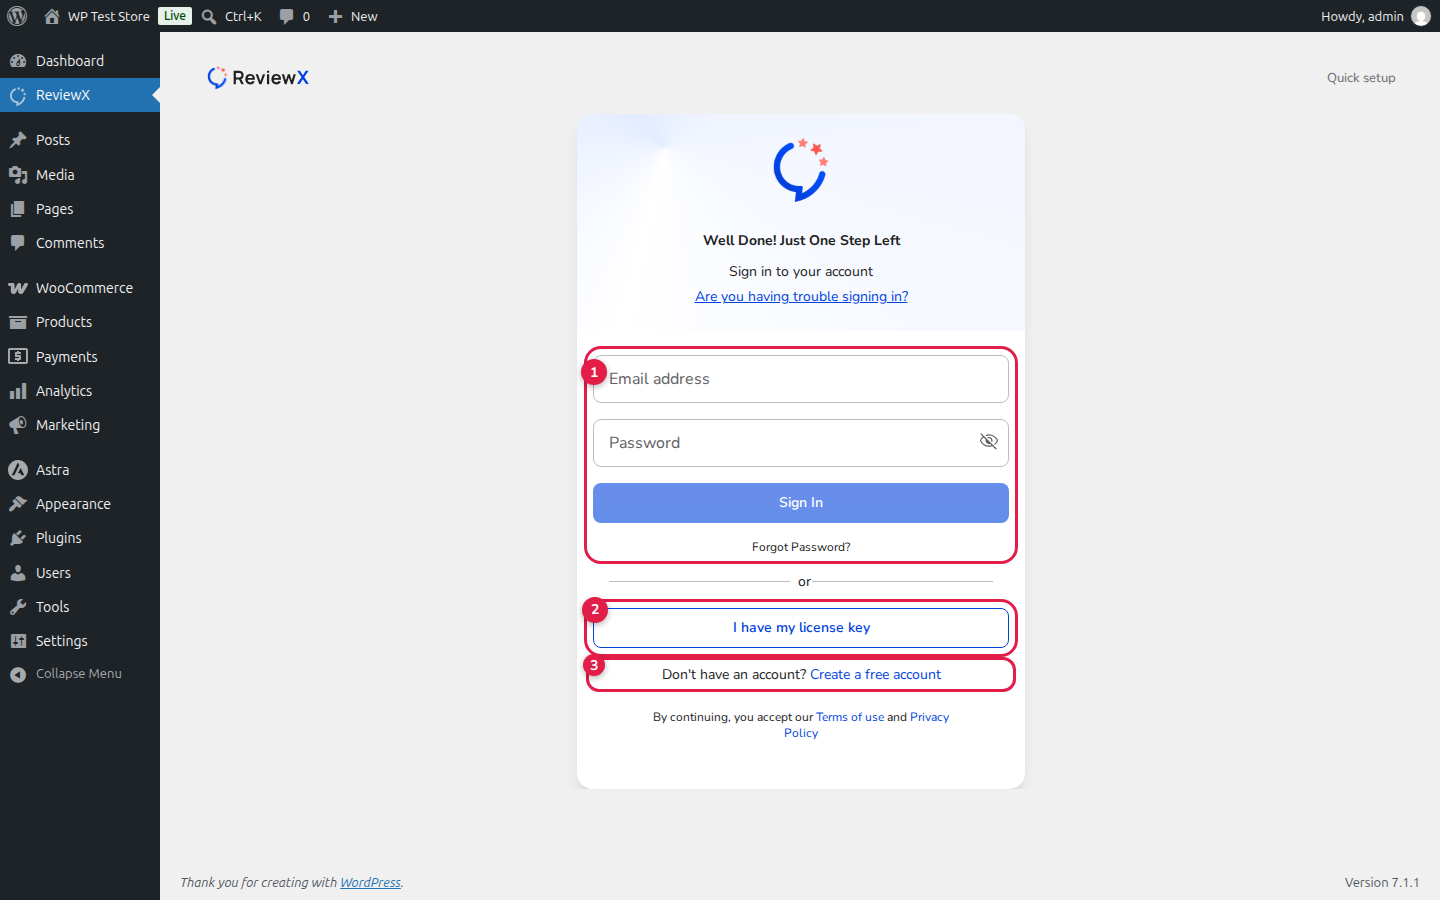
Two Flexible Activation Methods
ReviewX gives store owners and agencies two convenient ways to authenticate during onboarding:
Method 1: Sign In with Client Portal Credentials
If you already registered an account at portal.reviewx.io:
- In the onboarding card under callout [1], enter your Email address and Password.
- Click Sign In.
- ReviewX verifies your login credentials, links the store to your client account, and unlocks your plan features immediately.
Method 2: Activate with a License Key (Recommended for Agencies)
If you manage multiple client sites or prefer not to share account passwords with store staff:
- Click the outlined button labeled I have my license key marked by callout [2].
- ReviewX transitions to the dedicated license key input screen:
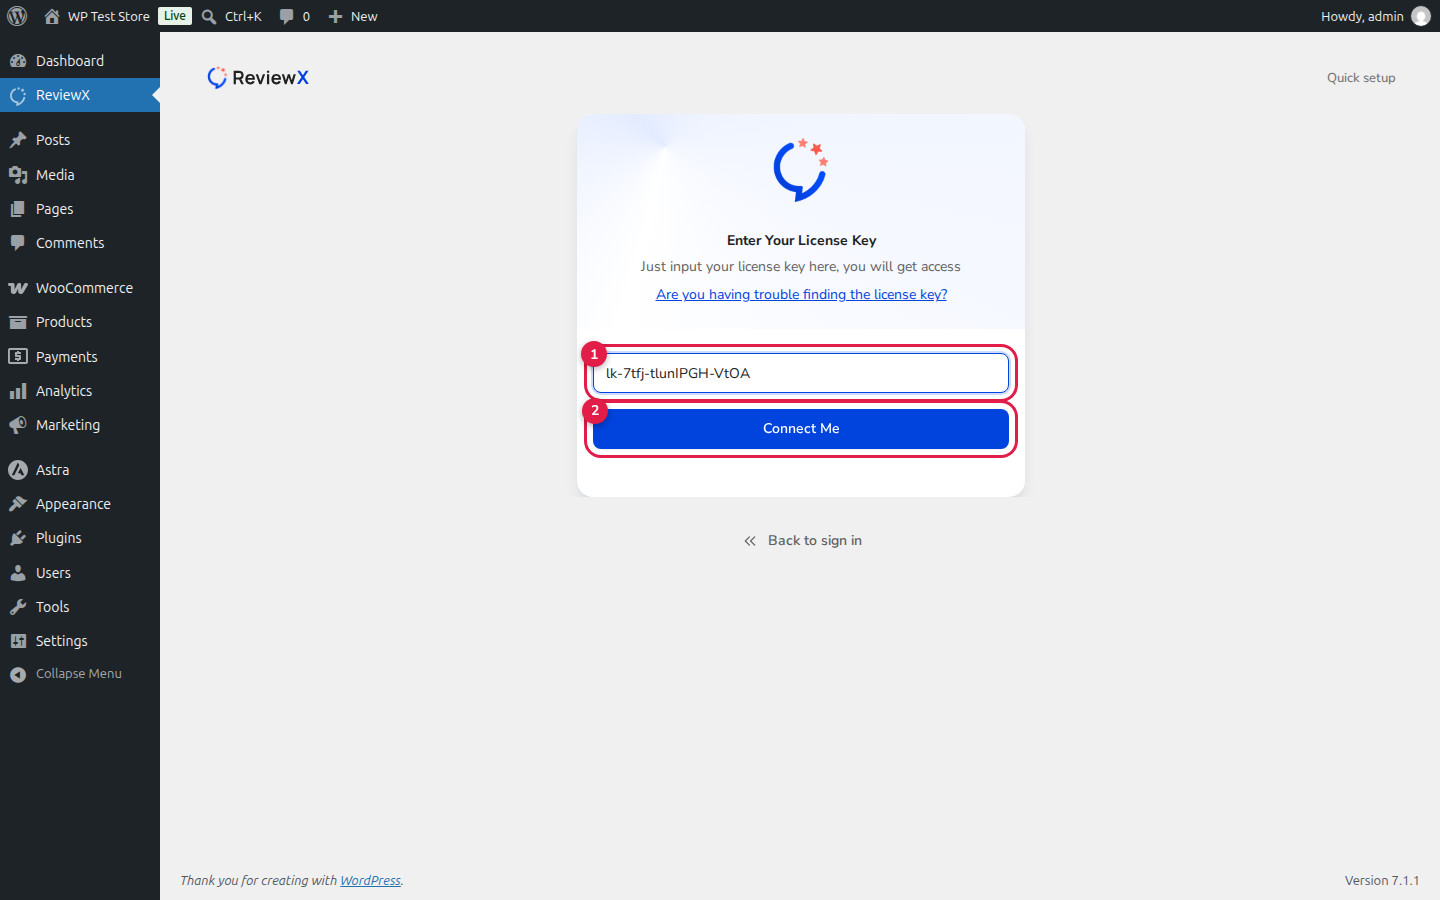
- Enter your unique license key (format:
lk-xxxx-xxxxxxxx-xxxx) into input field [1]. - Click Connect Me (callout [2]).
Method 3: Create a Free Account Directly from WP Admin
If you are a brand new user without an account:
- Click Create a free account marked by callout [3] at the bottom of the sign-in card.
- The wizard presents an inline registration screen:
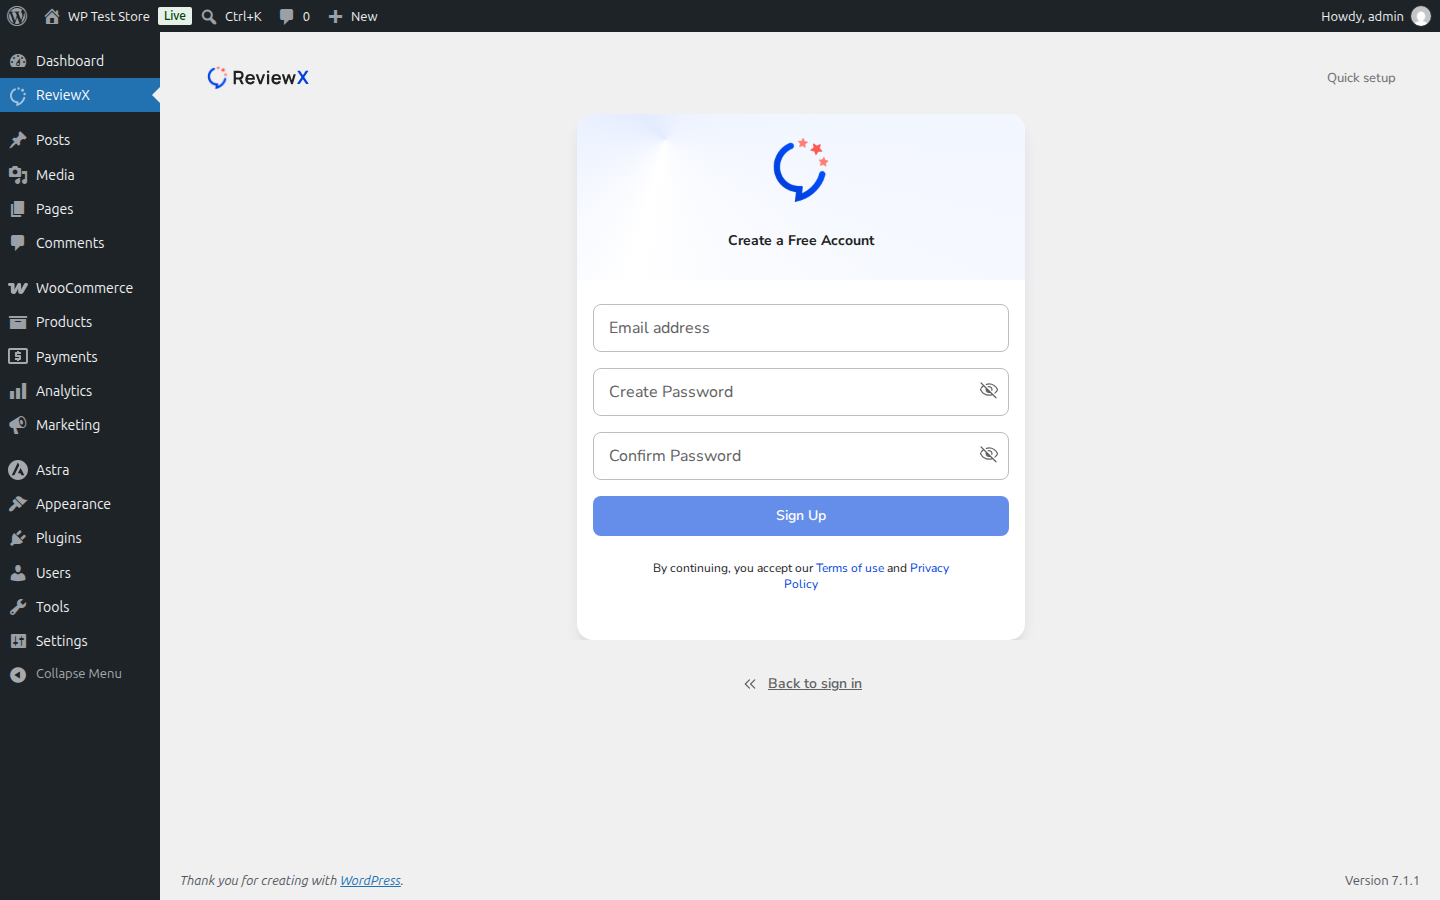
- Enter your Email address, create a password, confirm your password, and click Sign Up. Your account is created and linked instantly!
What Happens After Activation?
Once connected via either method:
- The Onboarding Wizard completes and redirects to the ReviewX Dashboard.
- An asynchronous background sync initiates to catalog existing WooCommerce products and orders.
- All widgets, multi-criteria forms, automated reminder campaigns, and review discounts become fully functional.


