


The ReviewX settings architecture provides a powerful, centralized control panel for configuring every aspect of your review collection, display, moderation, email automation, and site security.
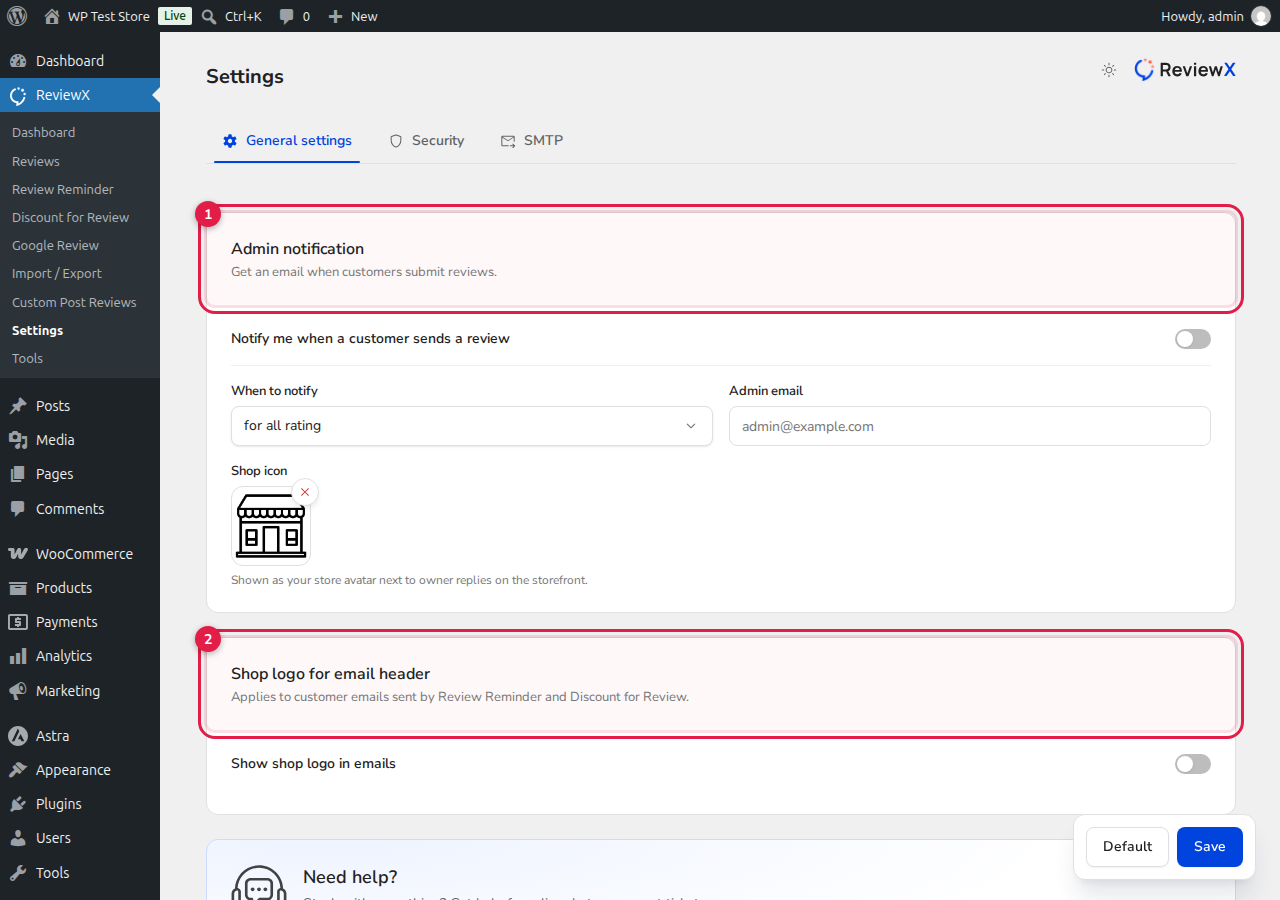
1. General Settings Panel #
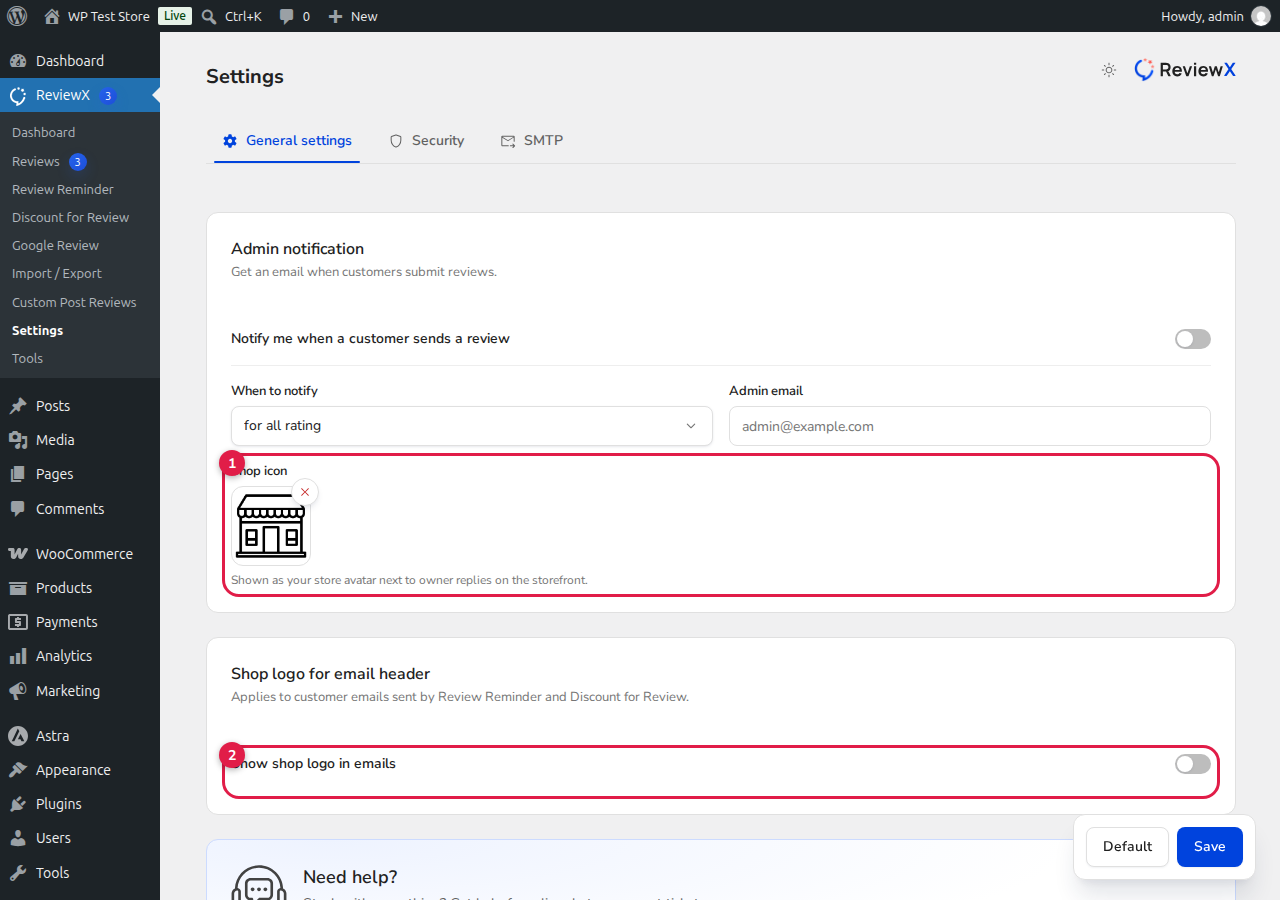
Navigate to ReviewX → Settings → General settings to configure foundational store branding:
- Shop Logo (Callout [1]): Upload your store’s high-resolution brand logo. This logo appears automatically in customer review reminder emails, discount voucher notifications, and admin reply badges.
- Brand Color Code: Define your brand’s primary accent color (hex code) used across buttons, star filters, and review highlights.
- Date Format: Select how review submission timestamps are displayed to visitors (e.g. F j, Y or Y-m-d).
- Review Admin URL: Specify the custom admin landing URL for managing customer submissions.
2. Review & Widget Settings #
Open ReviewX → Reviews to access storefront display and moderation rules:
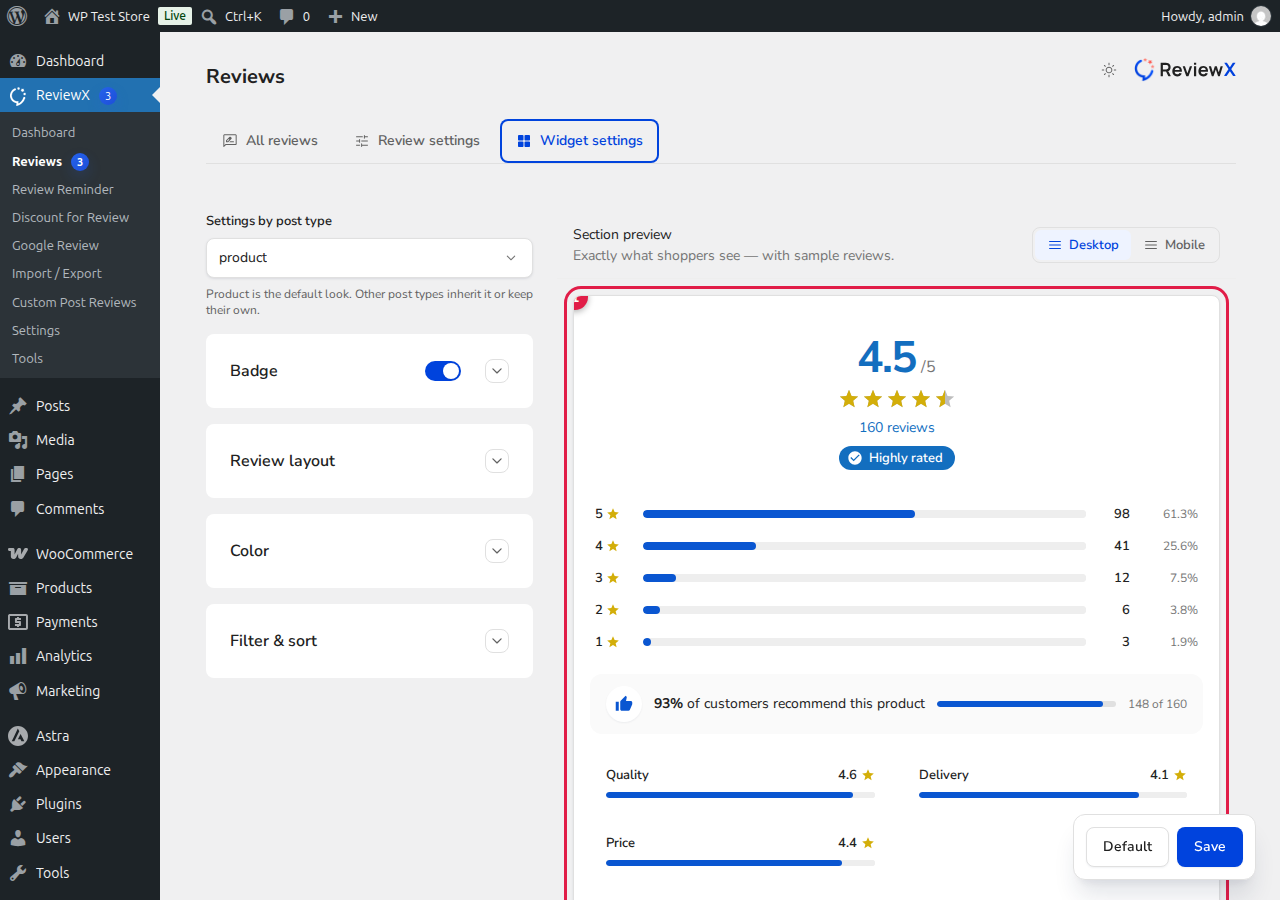
- Widget Settings: Switch between List, Grid, or Masonry storefront layouts (callout [1]). Customize rating star fill colors, criteria graph bars, and pagination limits.
- Multi-Criteria Management: Create granular rating criteria (e.g. Quality, Delivery, Price) so customers provide detailed, multi-dimensional feedback.
- Submission Policies: Choose whether to accept reviews from Anyone or restrict submissions strictly to Only verified owners who completed a purchase.
- Auto-Approval: Decide whether reviews publish immediately or queue for admin moderation.
3. Security & Spam Protection #
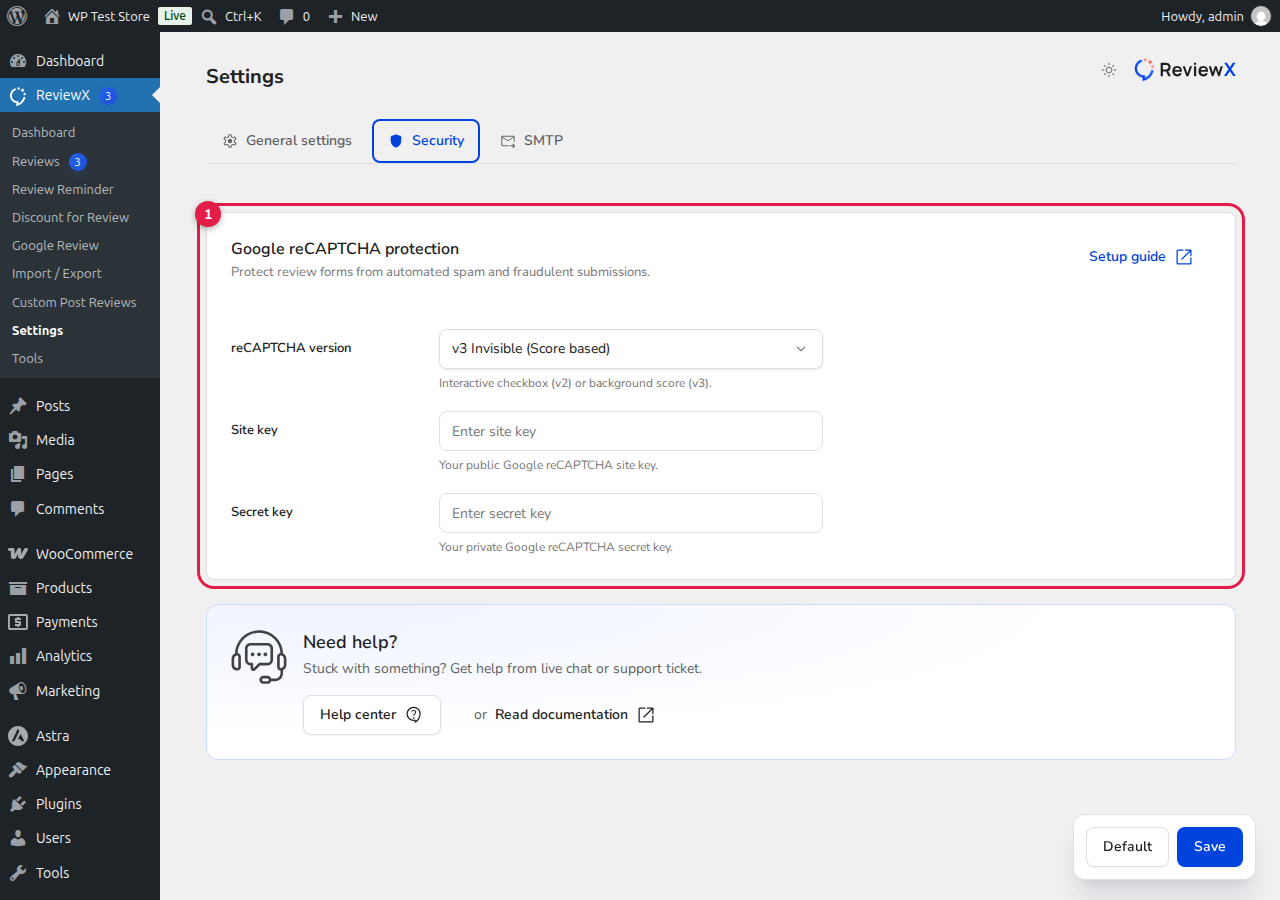
In ReviewX → Settings → Security:
- Enable Google reCAPTCHA (v2 Checkbox or v3 Invisible) on your review submission forms to block automated spam bots and fraudulent reviews.
- Enter your Google reCAPTCHA Site Key and Secret Key, select your threshold sensitivity, and save settings.
4. Custom SMTP Integration #
In ReviewX → Settings → SMTP:
- Connect your dedicated SMTP server (SendGrid, Mailgun, Amazon SES, or Gmail) to ensure review request emails and discount coupons achieve 100% inbox deliverability.
- Enter your SMTP Host, Port (587 / 465), Username, Password, and Encryption type (TLS / SSL).
- Send an automated test email to confirm successful server connection.


