


Email deliverability and customer open rates depend heavily on sender trust. When customers receive a review reminder or coupon email sent from a generic address like wordpress@yourserver.com, they are significantly more likely to ignore it or mark it as spam. Setting up a verified, branded sender identity—such as “Apex Store Customer Care” <reviews@apexstore.com>—reassures recipients, aligns with anti-spam standards, and dramatically boosts review submission rates. ReviewX features dedicated Sender Identity controls within its custom SMTP engine.
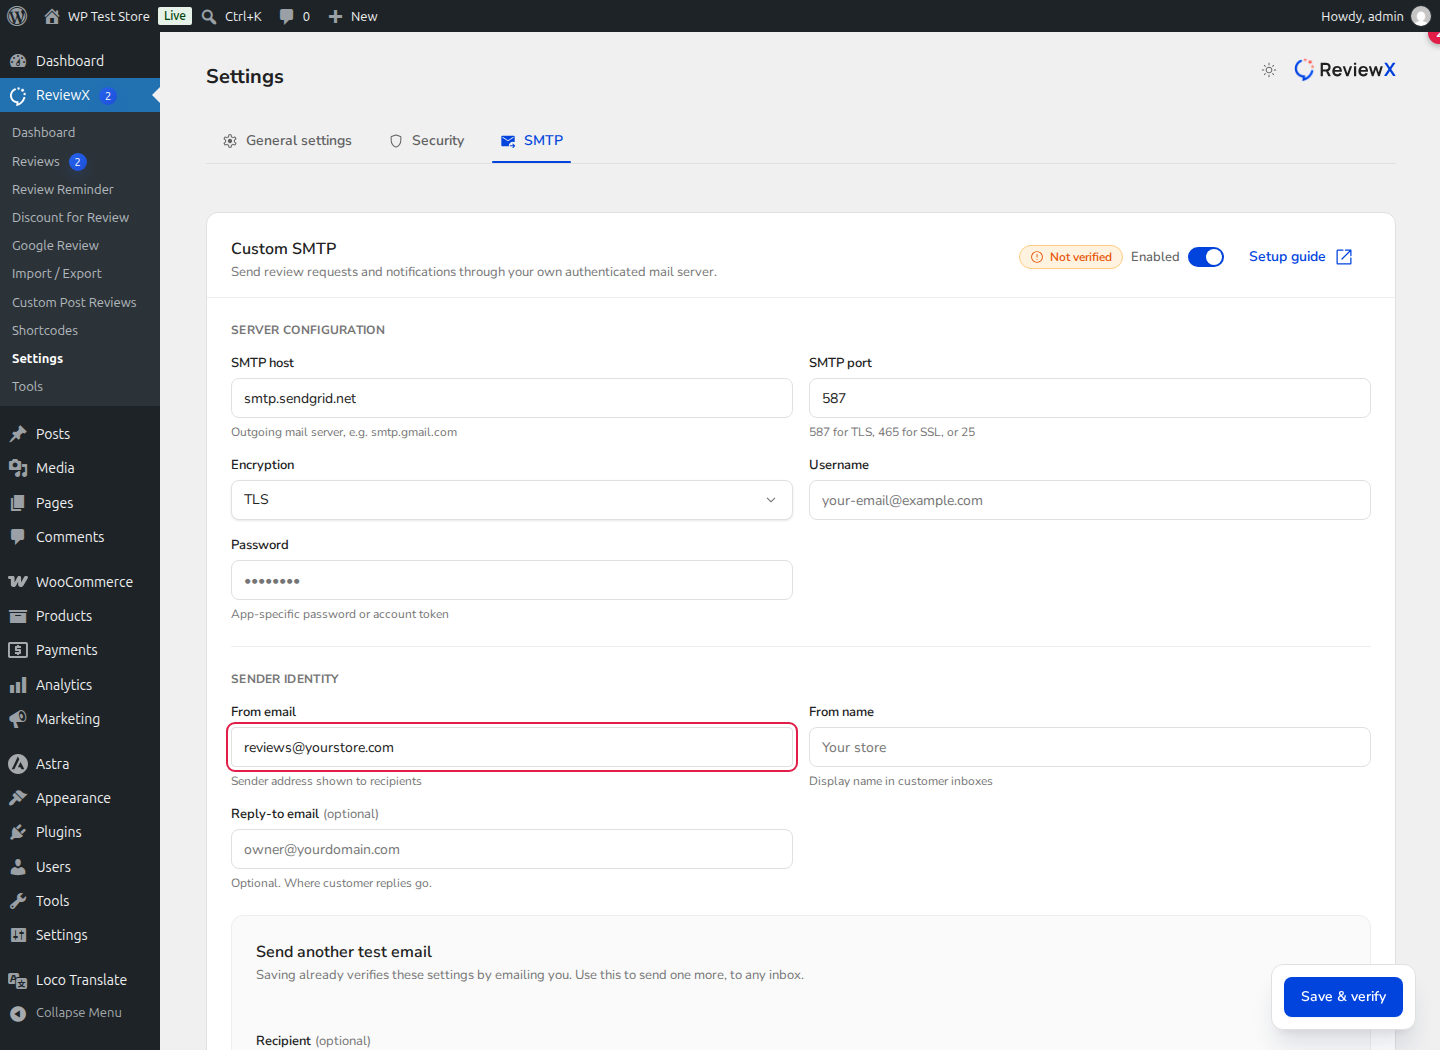
Cloud-Native Email Queueing Architecture
ReviewX sends review reminders and discount emails through its robust SaaS cloud dispatch engine—completely independent of WordPress cron. When you configure your Sender Identity and Custom SMTP, ReviewX Cloud uses your exact authenticated credentials to deliver emails directly to your customer’s inbox.
ReviewX Sender Identity Configuration Fields
Within ReviewX settings, you can customize the following sender identity parameters:
| Field | Example Value | Function & Best Practice |
|---|---|---|
| From Email | reviews@yourdomain.com |
The authenticated sending email address. Must be aligned with your domain’s SPF and DKIM records. |
| From Name | Your Store Team |
The recognizable brand or company name displayed in the recipient’s email inbox header. |
| Reply-To Email | support@yourdomain.com |
The destination inbox where customer responses, inquiries, or feedback replies will be delivered. |
Step-by-Step Setup Guide
Step 1: Open SMTP Settings
In your WordPress sidebar, navigate to ReviewX → Settings and select the SMTP tab.
Step 2: Enable Custom SMTP
Ensure the Custom SMTP toggle is switched to Enabled. Configure your outbound mail host, port, and authentication credentials (such as SendGrid, Mailgun, Brevo, or Google Workspace).
Step 3: Configure Sender Identity
Scroll down to the Sender identity section (marked with Badge 1):
- Enter your authenticated domain address in the From email field (marked with Badge 2).
- Provide your store brand name in the From name field.
- Optionally specify a customer support email in the Reply-To field.
Step 4: Save & Test Delivery
Click Save changes. Use the built-in Send test email tool to send a diagnostic test message to your personal inbox. Verify that the received email displays your exact branded sender name and address.
Essential Deliverability Guidelines (SPF, DKIM & DMARC)
To ensure review reminder emails reach inboxes and avoid spam filters:
- Match Sending Domain: Ensure your From Email domain matches the domain configured in your SMTP provider.
- Verify SPF Records: Include your SMTP provider’s sending servers in your domain’s DNS
TXTSPF record (e.g.,include:sendgrid.net). - Enable DKIM Signatures: Authenticate outgoing emails with cryptographic DKIM keys provided by your mail provider.
- Enforce DMARC: Publish a DMARC policy (e.g.,
v=DMARC1; p=quarantine;) to prevent domain spoofing.


