


Email branding is one of the most critical elements in establishing customer trust and driving high post-purchase review response rates. When a customer receives an automated review reminder or discount coupon in their inbox, seeing your official high-resolution shop logo prominently displayed at the top immediately reassures them that the message originates from a legitimate, trusted store.
ReviewX makes it simple to brand all outbound customer communications—including Review Reminder Emails, Follow-Up Requests, Photo/Video Review Invitations, and Discount Delivery Emails—with your official store logo and custom retina header banners.
The Power of Branded Email Headers
E-commerce email marketing research shows that branded emails featuring verified store logos achieve up to a 28% higher open rate and 35% higher click-through rate compared to generic unbranded text notifications.
Methods to Configure Your Shop Logo in ReviewX
ReviewX provides two flexible approaches for integrating your brand logo into customer communications:
Method 1: Global Shop Icon in General Settings (Recommended)
Configuring a global Shop Icon ensures that your verified store branding appears consistently across all admin notifications, email communications, and storefront merchant replies:
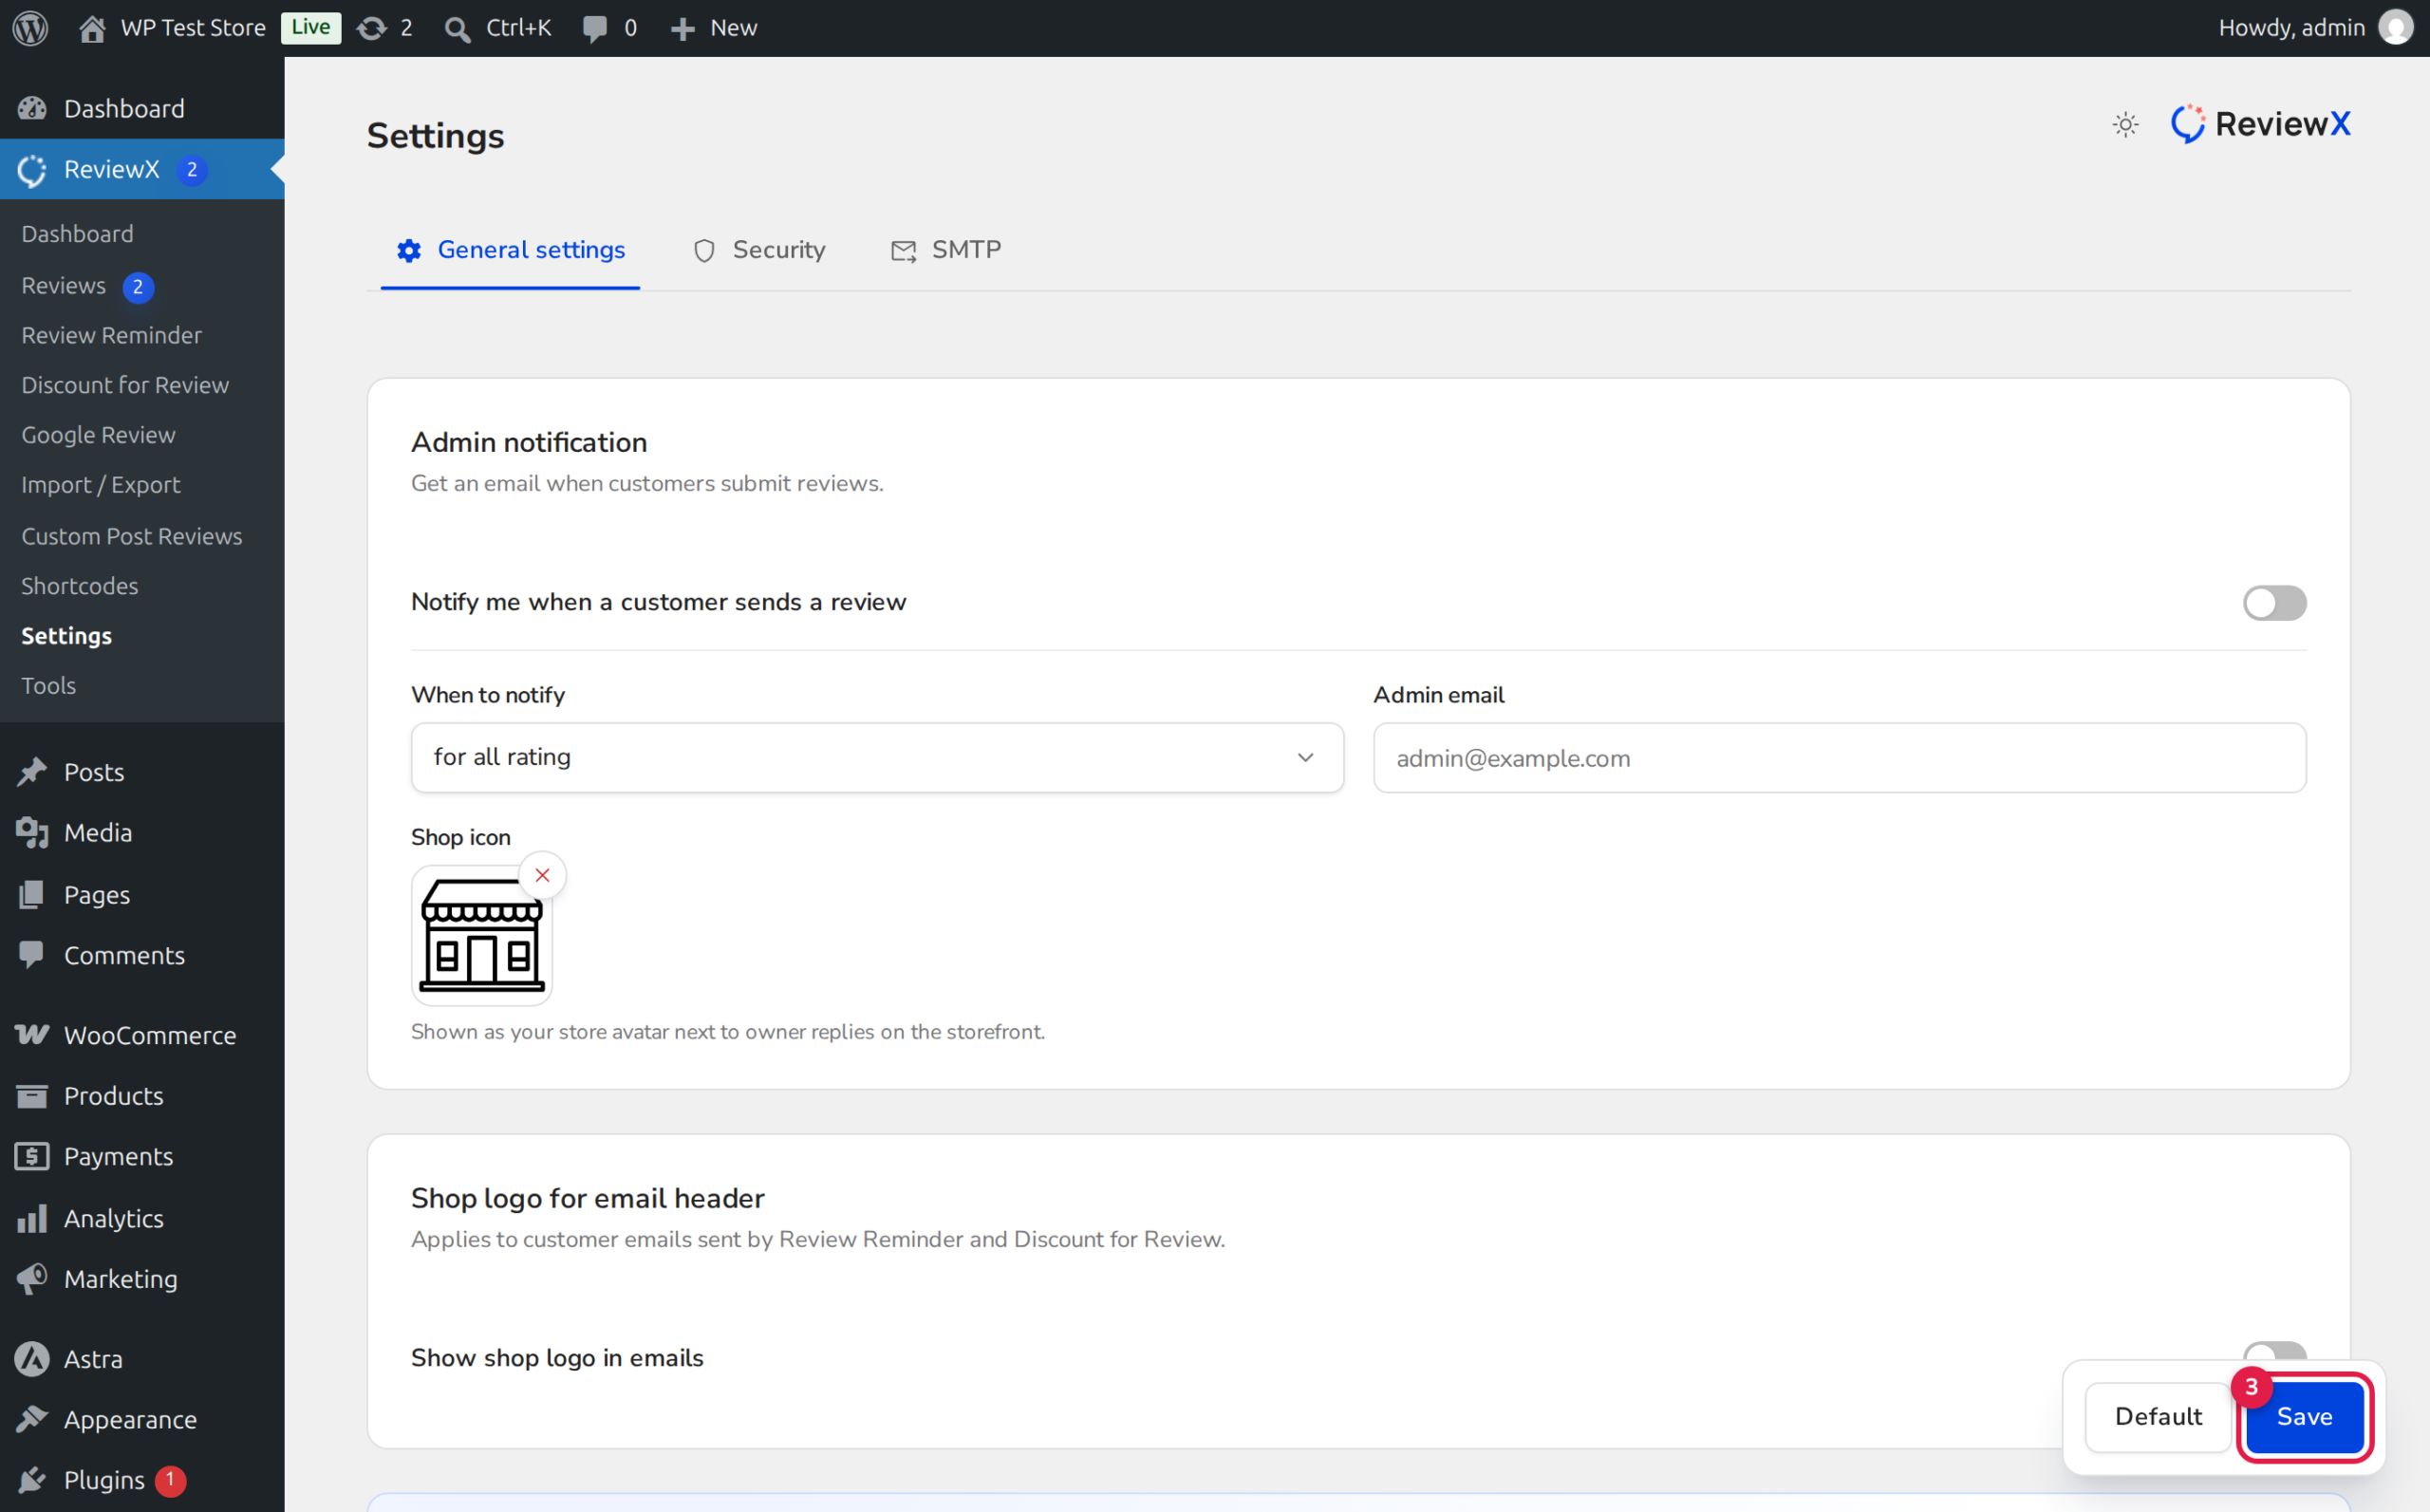
- Navigate to ReviewX → Settings → General Settings.
- Scroll down to the Admin notifications configuration card.
- Find the Shop icon field and click the Upload button.
- Select your official square store logo (recommended 200x200px PNG or SVG with transparent background).
- Click Save at the bottom of the page.
Method 2: Custom Retina Header Banners in Email Templates
For a more expansive, promotional presentation, ReviewX allows you to upload bespoke header banners for each individual email template:
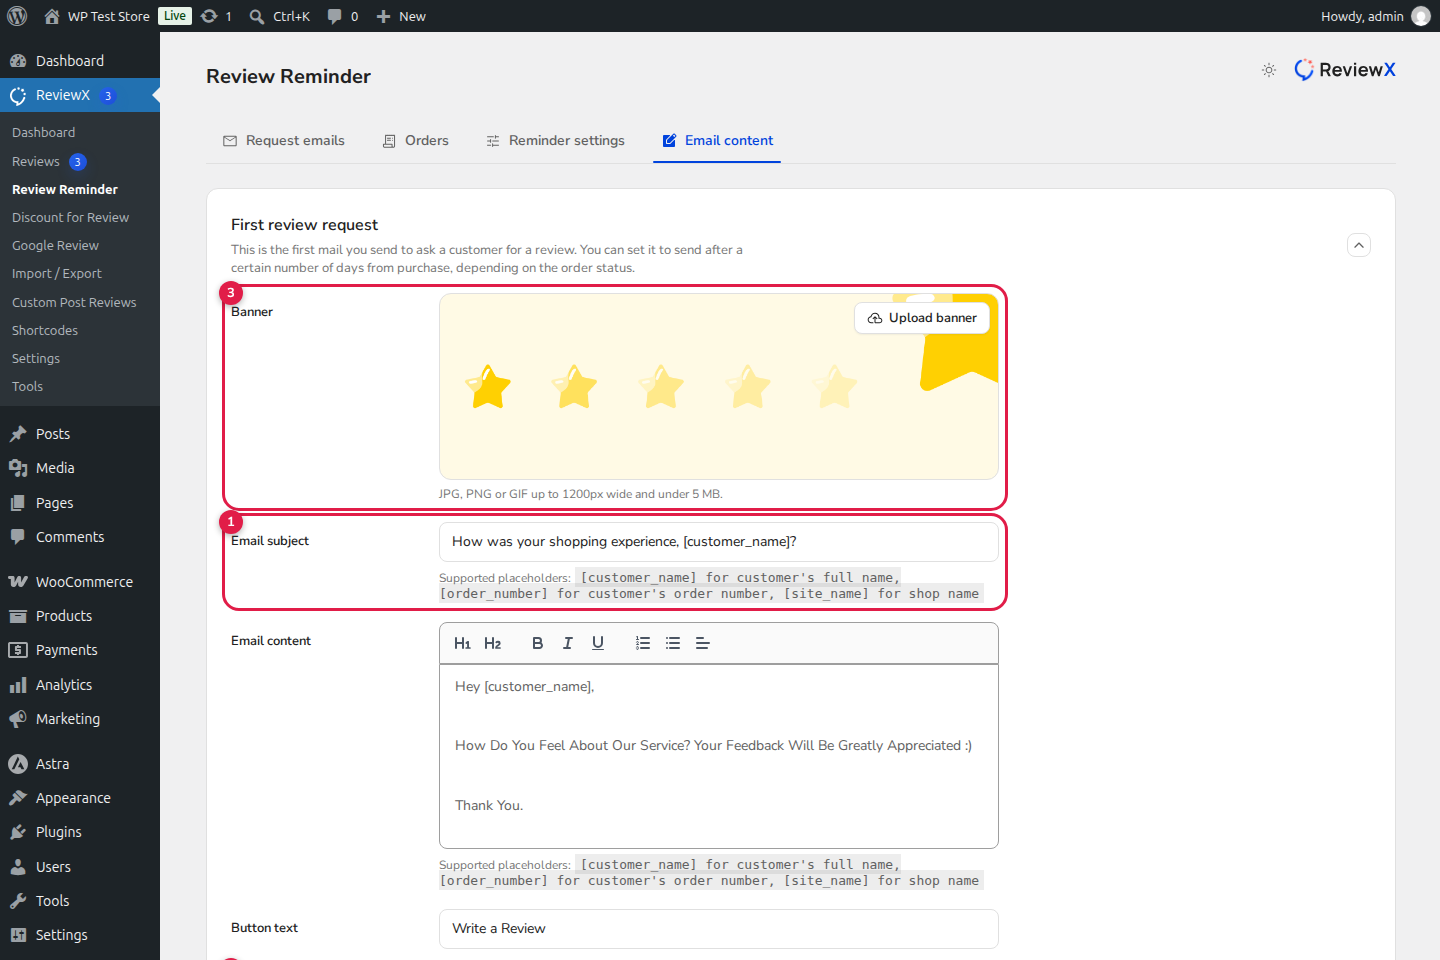
- Navigate to ReviewX → Review Reminder → Email content (or Review for discount → Email content).
- Select the target template (e.g., First Review Request).
- Hover over the header graphic area and click Change Banner.
- Upload a branded banner image incorporating your store logo, brand colors, and welcoming typography.
- Click Save to deploy the banner live.
Recommended Image Specifications for Email Banners
| Image Type | Recommended Dimensions | File Format & Size |
|---|---|---|
| Shop Logo / Icon | 150x150px to 300x300px (1:1 square) | PNG with transparency, under 50KB |
| Full Email Header Banner | 1200x400px (scales to 600px width on email clients) | JPG or PNG, under 300KB (for fast inbox loading) |
Verifying Your Logo with a Test Email
After uploading your logo or banner, always verify its appearance across different email clients (Gmail, Apple Mail, Outlook, mobile inboxes):
- In ReviewX → Review Reminder → Email content, click Send test mail.
- Enter your personal email address and click Send.
- Inspect the received email on both desktop and mobile devices to verify crisp image scaling and proper dark mode rendering.
Frequently Asked Questions
What happens if I don’t upload a custom shop logo?
If no custom image is configured, ReviewX gracefully falls back to your WordPress Site Icon (set in Appearance → Customize → Site Identity) or displays clean text branding using your store name.
Do email logos support dark mode on mobile devices?
Yes. Using a transparent PNG logo with adequate contrast or uploading a full-width header banner ensures your branding looks stunning in both light and dark mode inboxes.
Can I use different logos for different email templates?
Yes. While the Shop Icon is global, header banners can be customized individually for each email type (First Request, Follow-Up, Photo Review, and Thank You).


