


While ReviewX Cloud provides high-deliverability transactional email delivery, you can also connect your own custom SMTP mail server to send automated review reminders and discount incentive emails directly through your company domain.
Step 1: Open SMTP Settings
From your WordPress admin panel, go to ReviewX → Settings and click on the SMTP tab.
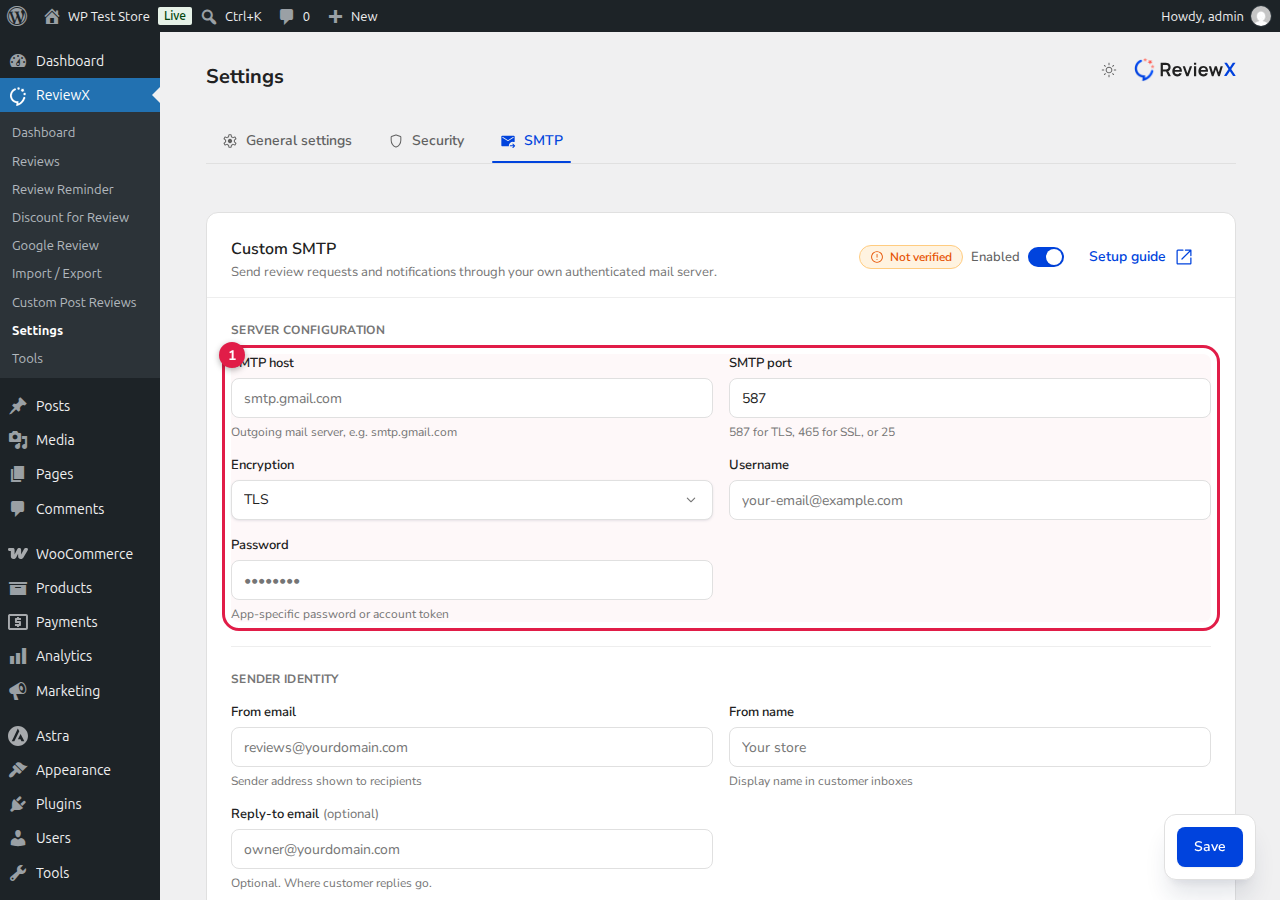
Step 2: Configure Mail Server Parameters
Fill in your SMTP credentials:
- Host: Enter your mail server hostname (e.g.,
smtp.gmail.comorsmtp.mailgun.org). - Port & Encryption: Select your port (usually
587for TLS or465for SSL). - Authentication: Provide your SMTP username and password.
- Sender Details: Enter the From email, From name, and Reply-to email matching your verified business domain.
Step 3: Test and Save Connection
Click Test connection to send a verification ping. Once verified, click Save. All outgoing review reminders and discount emails will route through your custom mail server.


