


A high-converting product page layout requires strategic placement of social proof. In modern ecommerce design, reviews shouldn’t simply sit at the bottom of the page; social proof should be woven into the shopper’s decision-making journey — from the above-the-fold star badge down to the in-depth photo reviews section.
With ReviewX and Elementor Theme Builder, you can construct bespoke WooCommerce single product templates with complete freedom over review placement and visual architecture.
The High-Converting Review Placement Architecture
Top ecommerce stores structure social proof across three key touchpoints:
- Above the Fold (Header Proof): Place a compact star rating and review count badge right below the product title and price. Clicking this badge smoothly scrolls the shopper down to the full review section.
- Middle Section (Qualitative Insights): Display multi-criteria breakdown bars (e.g. Quality, Fit, Comfort) near sizing charts or specifications.
- Bottom Section (Comprehensive Social Proof): Render the full review list, customer photo gallery, and interactive submission form.
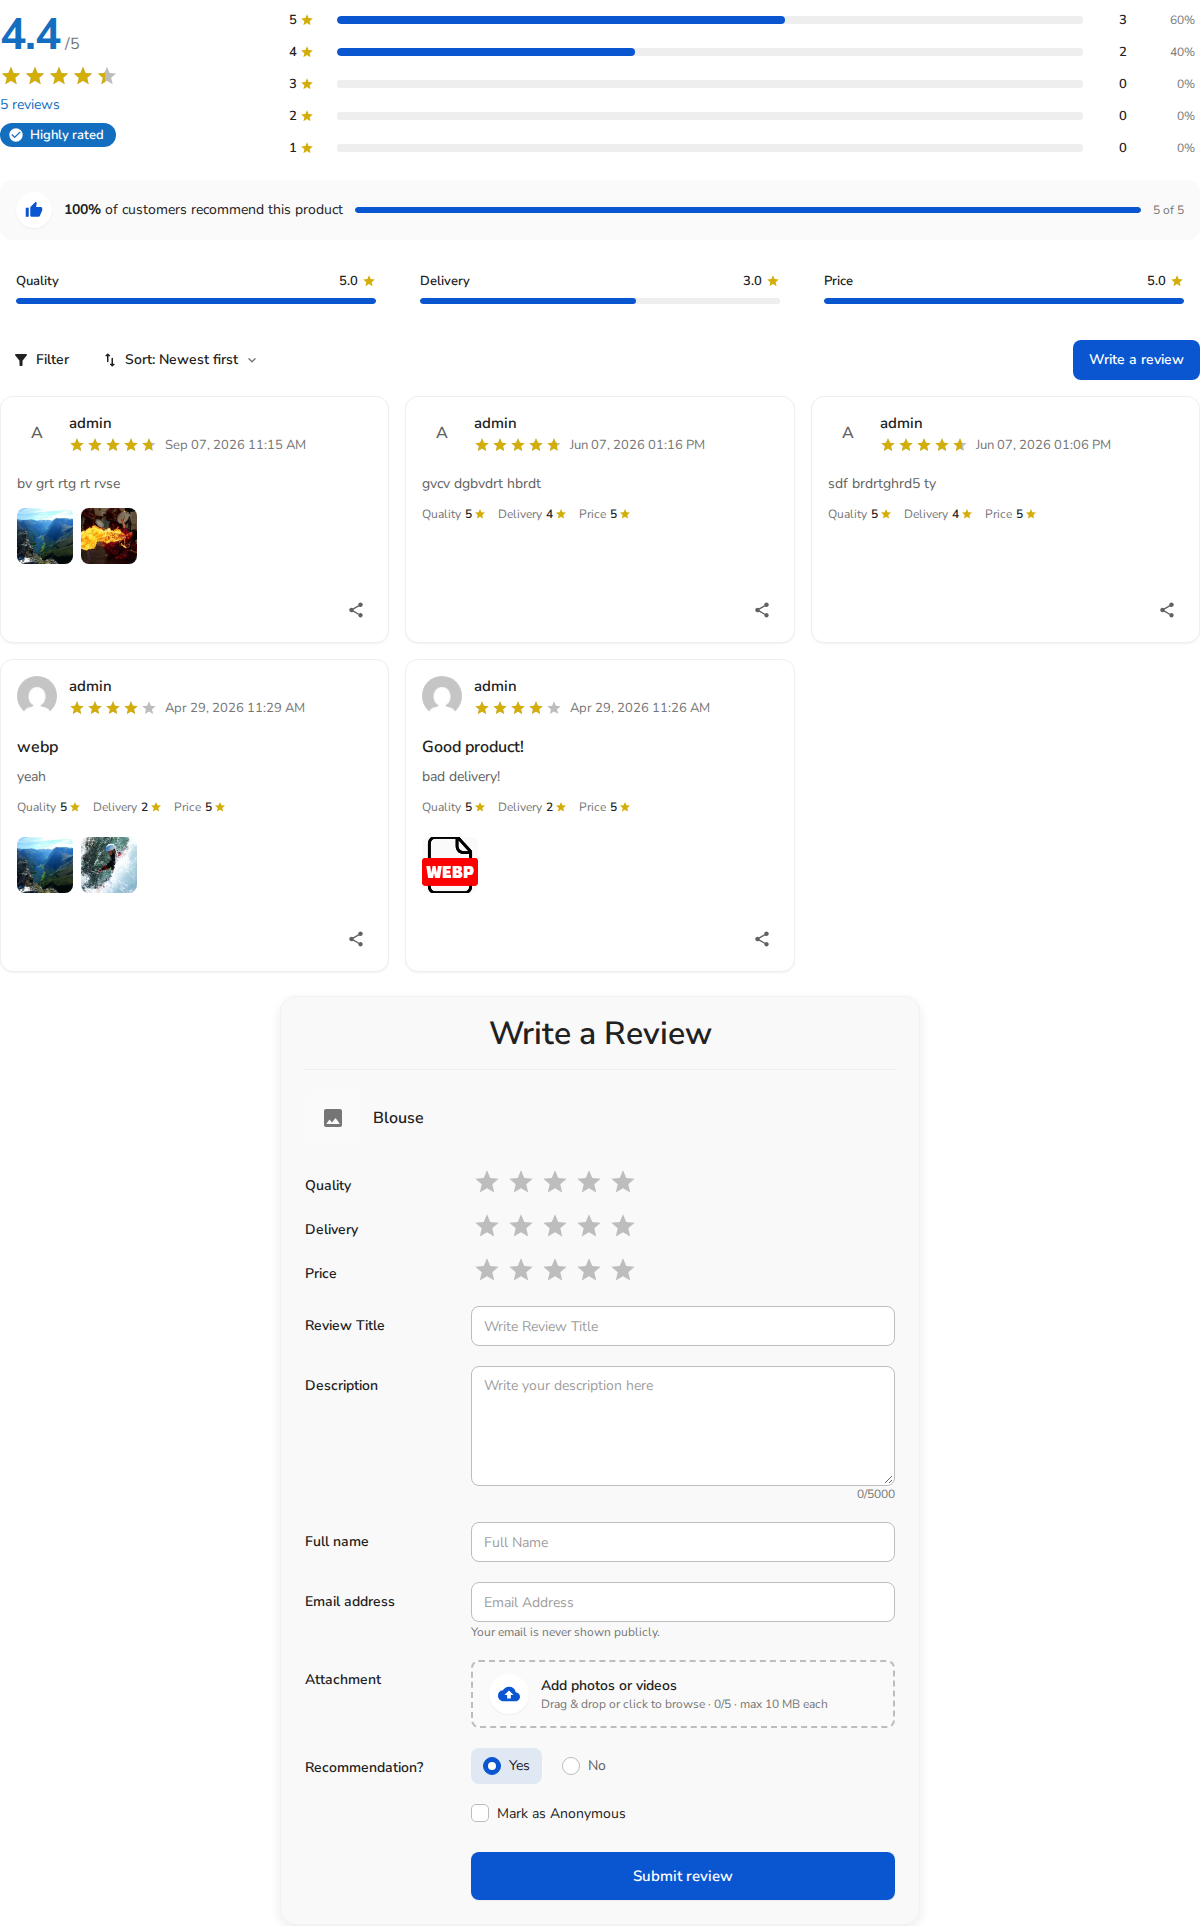
Figure 1: Complete ReviewX social proof layout integrated into an Elementor Single Product template.
Step-by-Step Blueprint in Elementor Theme Builder
1. Creating or Editing the Single Product Template
- Go to Templates → Theme Builder → Single Product in your WordPress admin.
- Click Edit with Elementor on your existing template, or click Add New to build one from scratch.
2. Adding the Above-the-Fold Rating Badge
- Beneath the Product Title widget, insert an Elementor Shortcode widget.
- Enter
[rvx-star-count]. - This displays a compact rating score (e.g. ★ 4.9 (84 reviews)) that reassures shoppers immediately upon landing.
3. Choosing Between Tabbed vs Stacked Review Layouts
- Option A: Tabbed Layout (Compact Design): If your product has extensive technical specifications, drag the ReviewX Product Data Tabs widget into the content area. Reviews will sit cleanly alongside the Description and Additional Info tabs.
- Option B: Stacked Hero Layout (Maximum Social Proof): If visual proof drives your conversions (e.g. fashion, jewelry, home decor), drag the ReviewX Woo Review widget into its own dedicated full-width container below the product details.
Optimizing for Mobile Devices
More than 65% of ecommerce shoppers purchase on smartphones. When designing your Elementor review layout:
- Switch to Responsive Mode: In Elementor, click the computer icon at the bottom of the side panel and select Mobile.
- Stacking Columns: Ensure rating distribution bars and summary scores switch from multi-column rows to clean single-column cards.
- Touch-Friendly Buttons: Increase the padding on “Write a Review” and review filter buttons to ensure effortless tapping on touchscreens.
Publishing & Assigning Display Conditions
- Click Update in Elementor.
- In the Publish Settings modal, define your Display Conditions:
- All Products: Applies the layout globally across your catalog.
- In Category: Assign custom review templates to specific product categories (for example, a photo-heavy layout for Apparel, and a tabbed criteria layout for Electronics).
- Save and preview live on your storefront.


