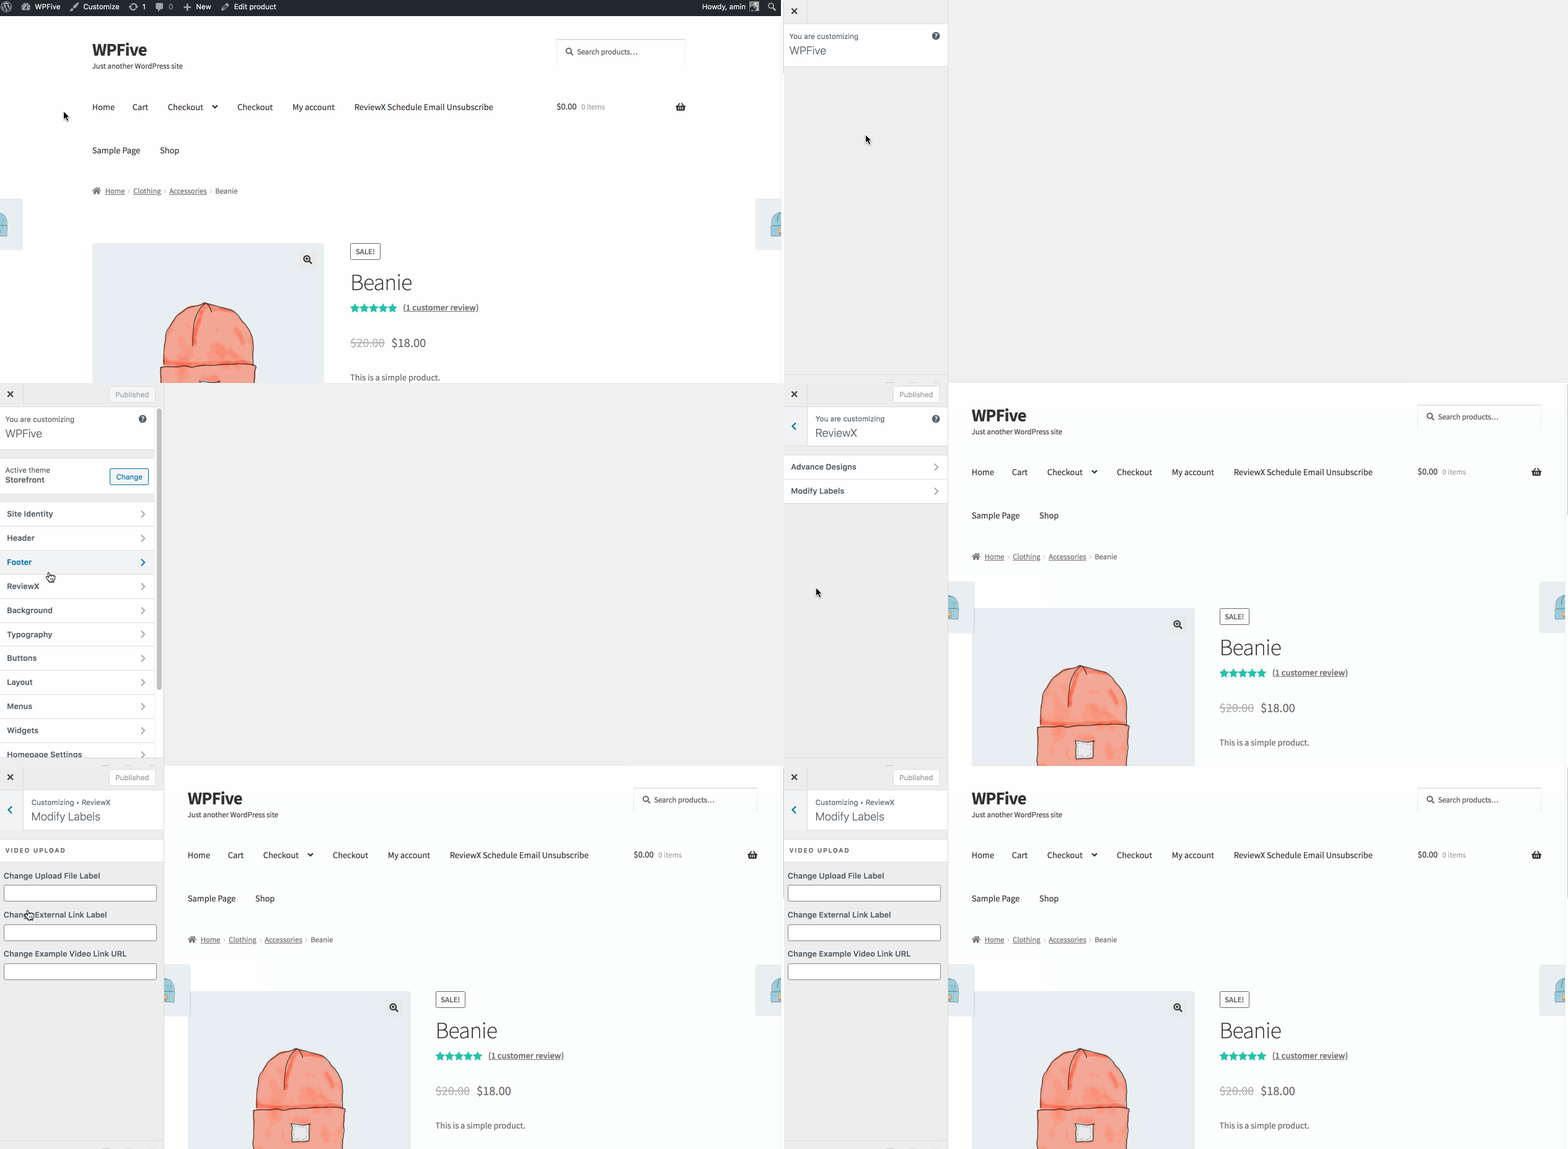
ReviewX offers you the flexibility to change different labels for specific sections in WordPress customizer. You can have a full customization option starting from changing the label text to modifying the design.
Before you start, make sure you have activated the WooCommerce plugin on your website. Follow these step-by-step guidelines to find out how to change default labels from live WordPress Customizer.
Step 1: Modify Labels From ReviewX Tab
First, you have to install and activate ReviewX on your WordPress website. Then go to your WordPress Dashboard and navigate to the single product page. Click on the Customizer–> ReviewX Tabs–> Modify Labels as shown below.

Step 2: Add Different Label In the Input Field
Next you can add any type of text in the input field. You can be more precise while changing the label text for each section and customize it any way you want. You can change the labels for “Reply to this review” section, the “Update” button, the “Edit this reply” link and even the “Share On” button for sharing the reviews on social media.

Step 3: Save Your Changes And Publish
If you are happy with your new labels, you can simply hit the ‘Publish’ button. Your changes will be saved and your new labels will automatically appear on your WooCommerce product page and its review section.

This is how you can easily change different labels from WordPress customizer.
Need assistance? Feel free to reach out to our Dedicated Support Team and join our Facebook Community for more updates.


