

Do you have a WooCommerce store and are struggling with how to customize WooCommerce emails? With WooCommerce, you can already send automated transactional emails to all customers for more than ten actions, such as placing an order, completing an order, creating an account, and many more. If you want to make those emails unique, you’ll probably want to customize them.
Here’s a step-by-step tutorial on why you should customize your emails and how to use WooCommerce’s built-in settings to customize it to gain more control over your store.
Why Do You Need To Customize WooCommerce Emails?
An email that’s well-crafted will make you feel special, and it will strengthen your relationship with the website. Just imagine what it would be like to receive an email that had only a logo and plain text in it. It is undoubtedly that you will judge the website based on that email. As a result, you need to adopt the perfect email marketing solution, and WooCommerce customize emails could be one of the solutions.
Let’s get into a list of benefits customized WooCommerce emails can offer.
👉🏻 Make the email appearance visually appealing and impressive
👉🏻 Enhance the professional outlook of your business
👉🏻 Send gorgeous-looking emails to increase engagement and conversions
Based on the above-mentioned importance of customized emails, there is no doubt that it’s a fundamental part of your WooCommerce store. Once you customize WooCommerce emails, it can drive more traffic to your store and boost your sales. Not only just these, but with customized WooCommerce emails you can increase open, click-through, and reply rates too.
A List Of Default WooCommerce Email Types
WooCommerce, the popular eCommerce plugin for WordPress, has several default email types that are automatically sent to customers and/or store administrators. Some of the most common ones include:

- New Order: When a new order is placed, it is sent to the customer and store administrator.
- Processing Order: During the processing of an order, this message is sent to the customer.
- Completed Order: Notification sent to the customer when the order is complete.
- Customer Invoice/Order Details: A statement of the invoice and order details is sent to the customer when an invoice is created for an order.
- Customer Note: Notification sent to the customer when a note is added to their order.
- Reset Password: This is what the customer receives when they request that their password be reset.
- New Account: Upon creating an account, the customer receives this email.
- Canceled Order: A notification sent to the customer after an order has been canceled.
- Failed Order: A message sent to the customer when an order fails.
- Order On-hold: Email sent to customers when orders are on hold.
- Refunded Order: Notifies the customer that their order has been refunded.
Note: It is possible to customize these email types and add additional emails as needed and this is our main goal here to let you know how you can customize WooCommerce emails.
Customize WooCommerce Emails: A Complete Step-By-Step Guide
Using the built-in settings of WooCommerce, you can customize several parts such as email sender options, email theme, and specific email content of your WooCommerce emails. Let’s jump into the step-by-step guide on how you can customize WooCommerce emails effortlessly.
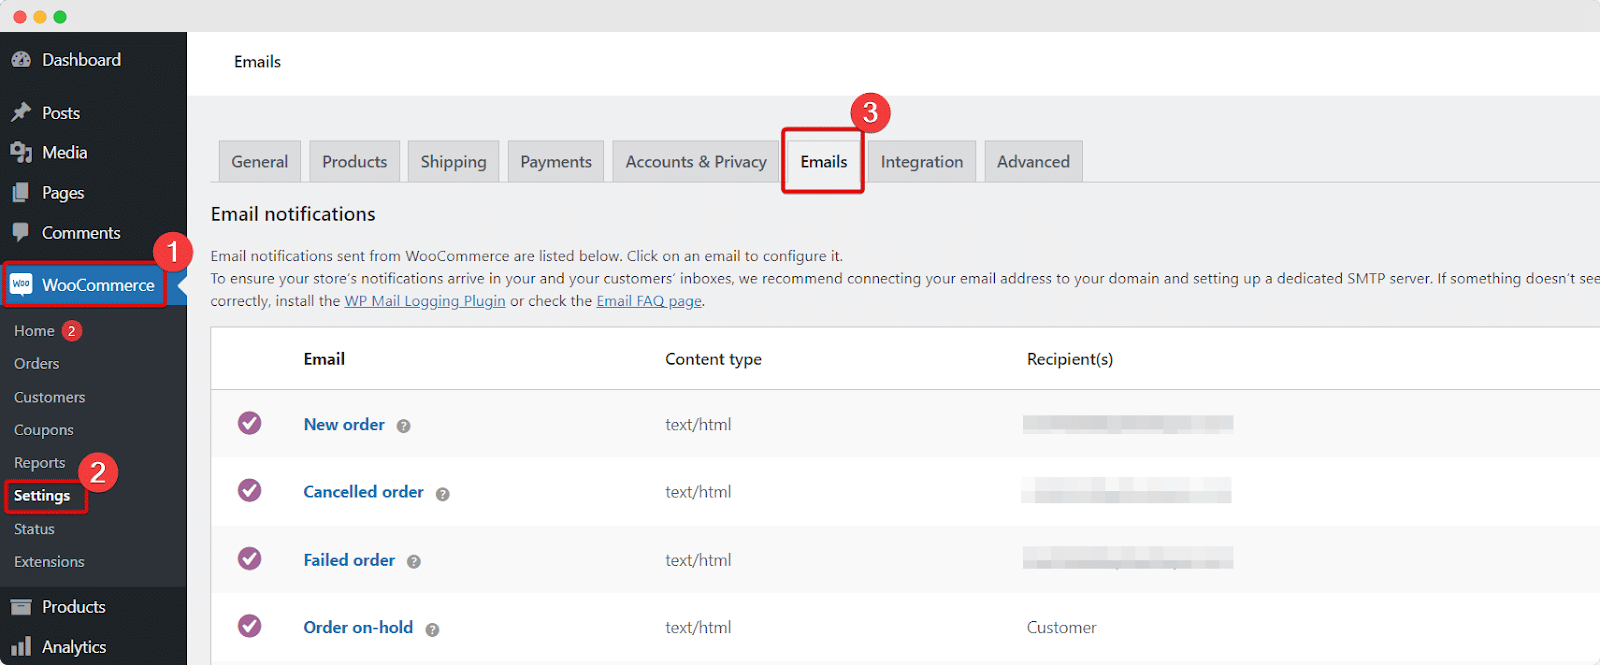
Step 1: Explore Email Settings In WooCommerce
After successful installation of WooCommerce on WordPress log into your WordPress dashboard and navigate WooCommerce → Settings → Emails. Here you’ll see a headline section named ‘Emails’ that holds all the WooCommerce default notification emails.
Step 2: Customize As You Want (Email Sender Options & Template)
Using these built-in settings, you can customize things like templates, and email sender options as you want easily. All you have to do is scroll down a bit and find Email sender options, and you’ll get two different options “From” name, and “From” address.
- “From” name: This refers to the name that customers see when they get an email. It could be the business name or a person who holds the marketing position.
- “From” address: This refers to the email address of the users with whom customers can contact for any further information.
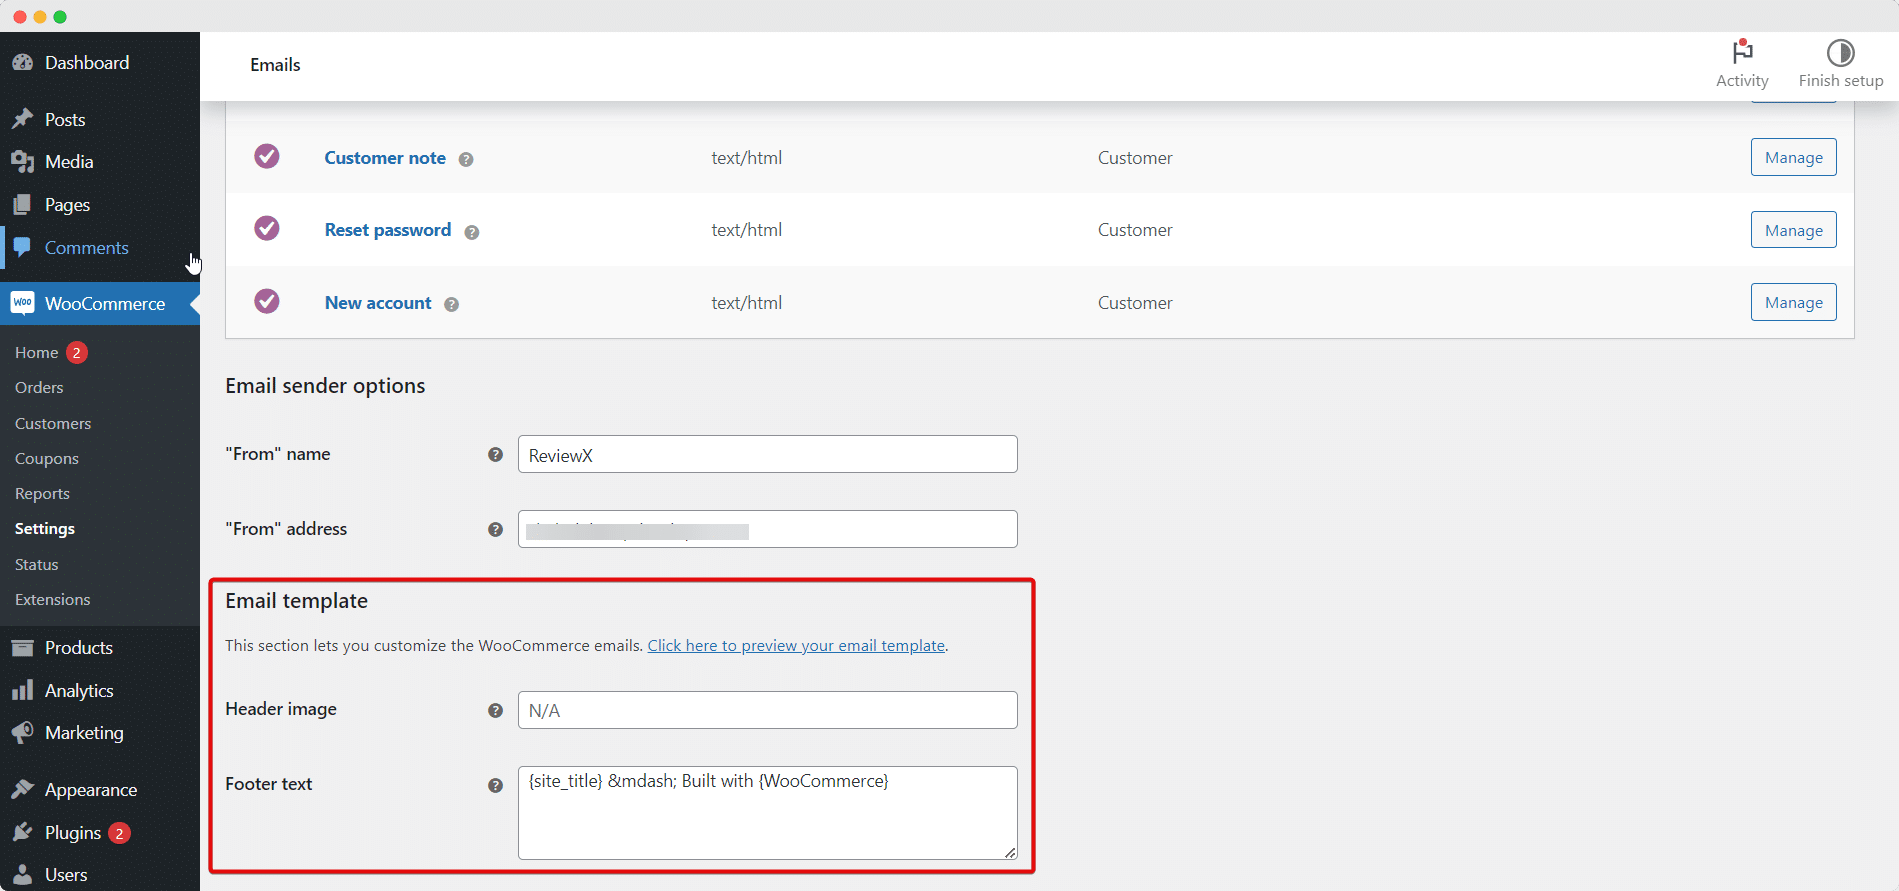
So, make changes to these fields according to your needs. Now, let’s move on to the next customization option ‘Email template’ that you’ll find right under the ‘Email sender options’.
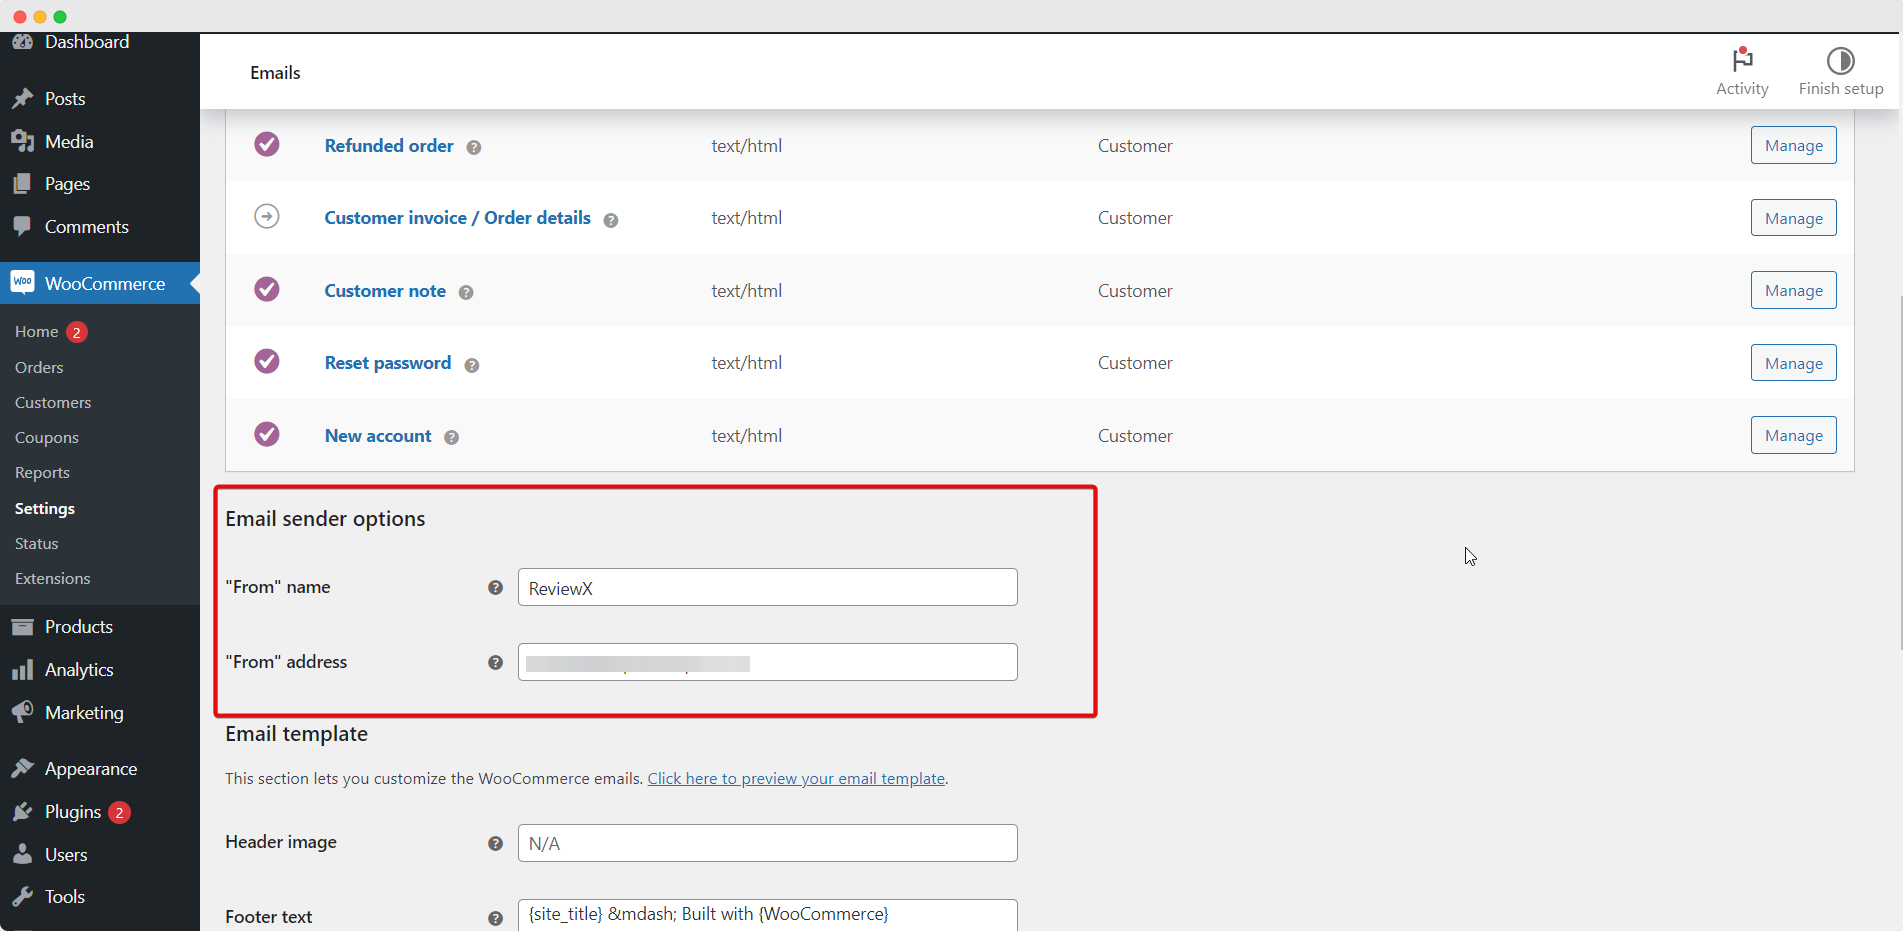
In this section, you can change the header image or footer text you want. Obviously, you would like to have your own business logo in the header. To get so, just copy the image URL, and paste it into the ‘Header Image’ box.
Moreover, click on the ‘Footer text’ box, and put your desired text instead of Built with {WooCommerce}.
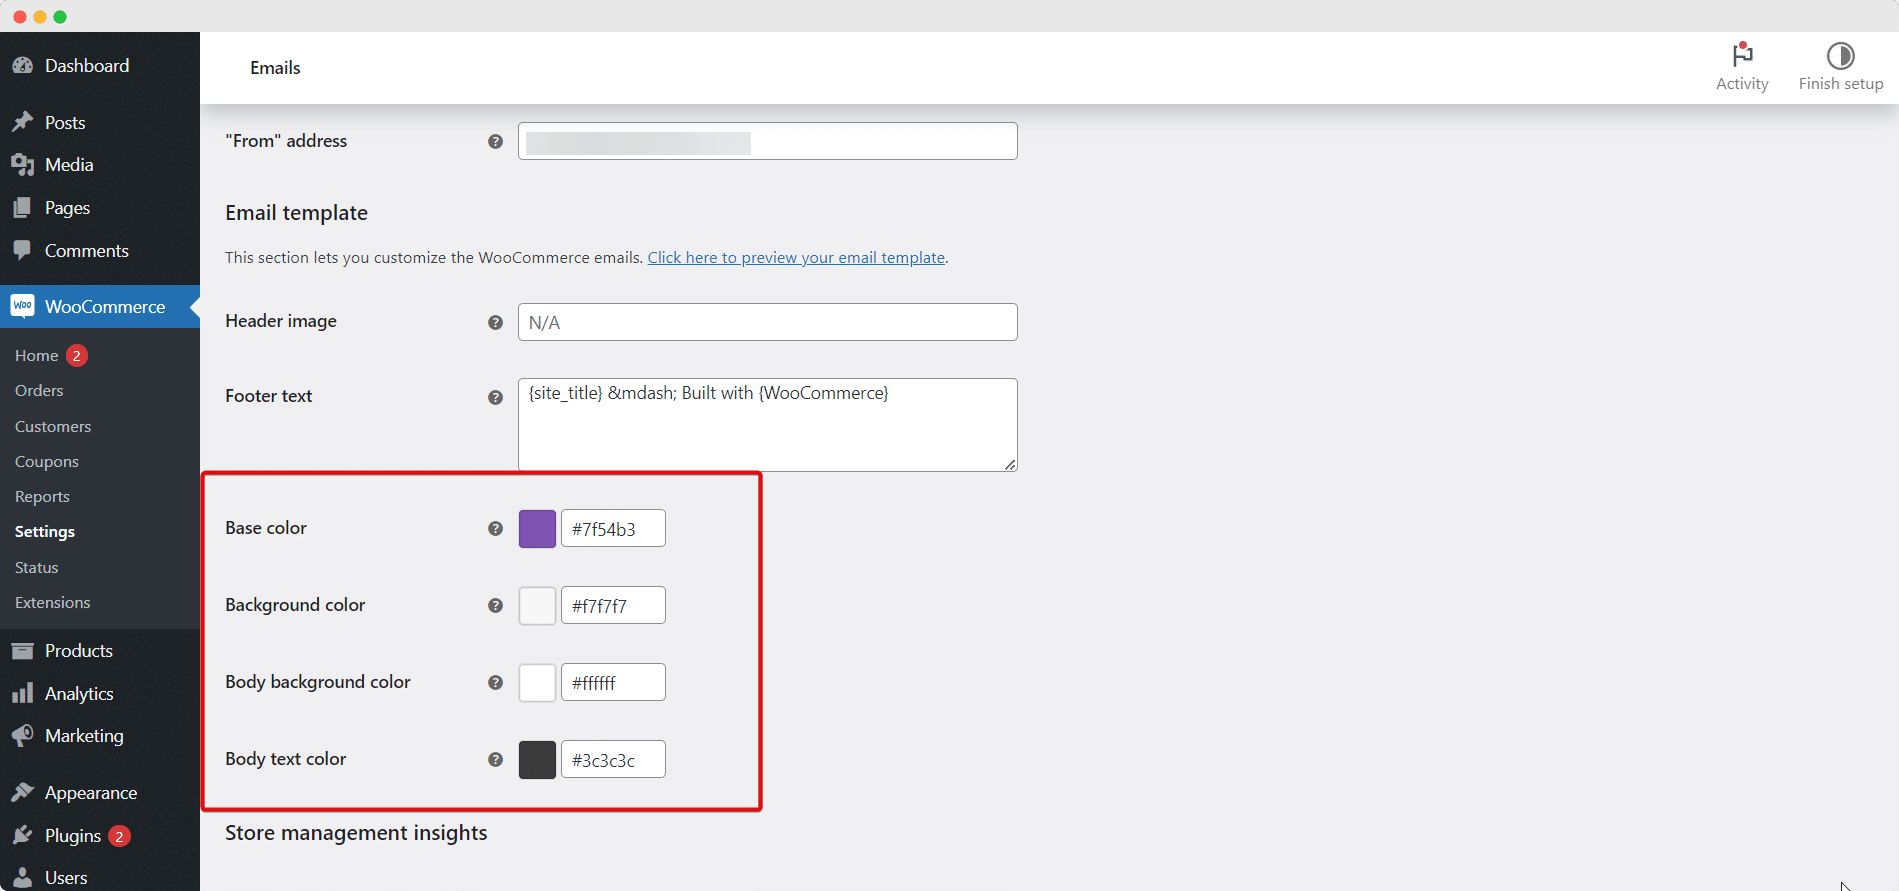
Are we done? No, there are other customization options you’ll get here. Just have a slight scroll down for the last time. And you’ll see options like base color, background color, body background color, body text color, etc. Customize everything as you want and have your email template ready the way you wanted.
Step 3: Modify Specific WooCommerce Emails
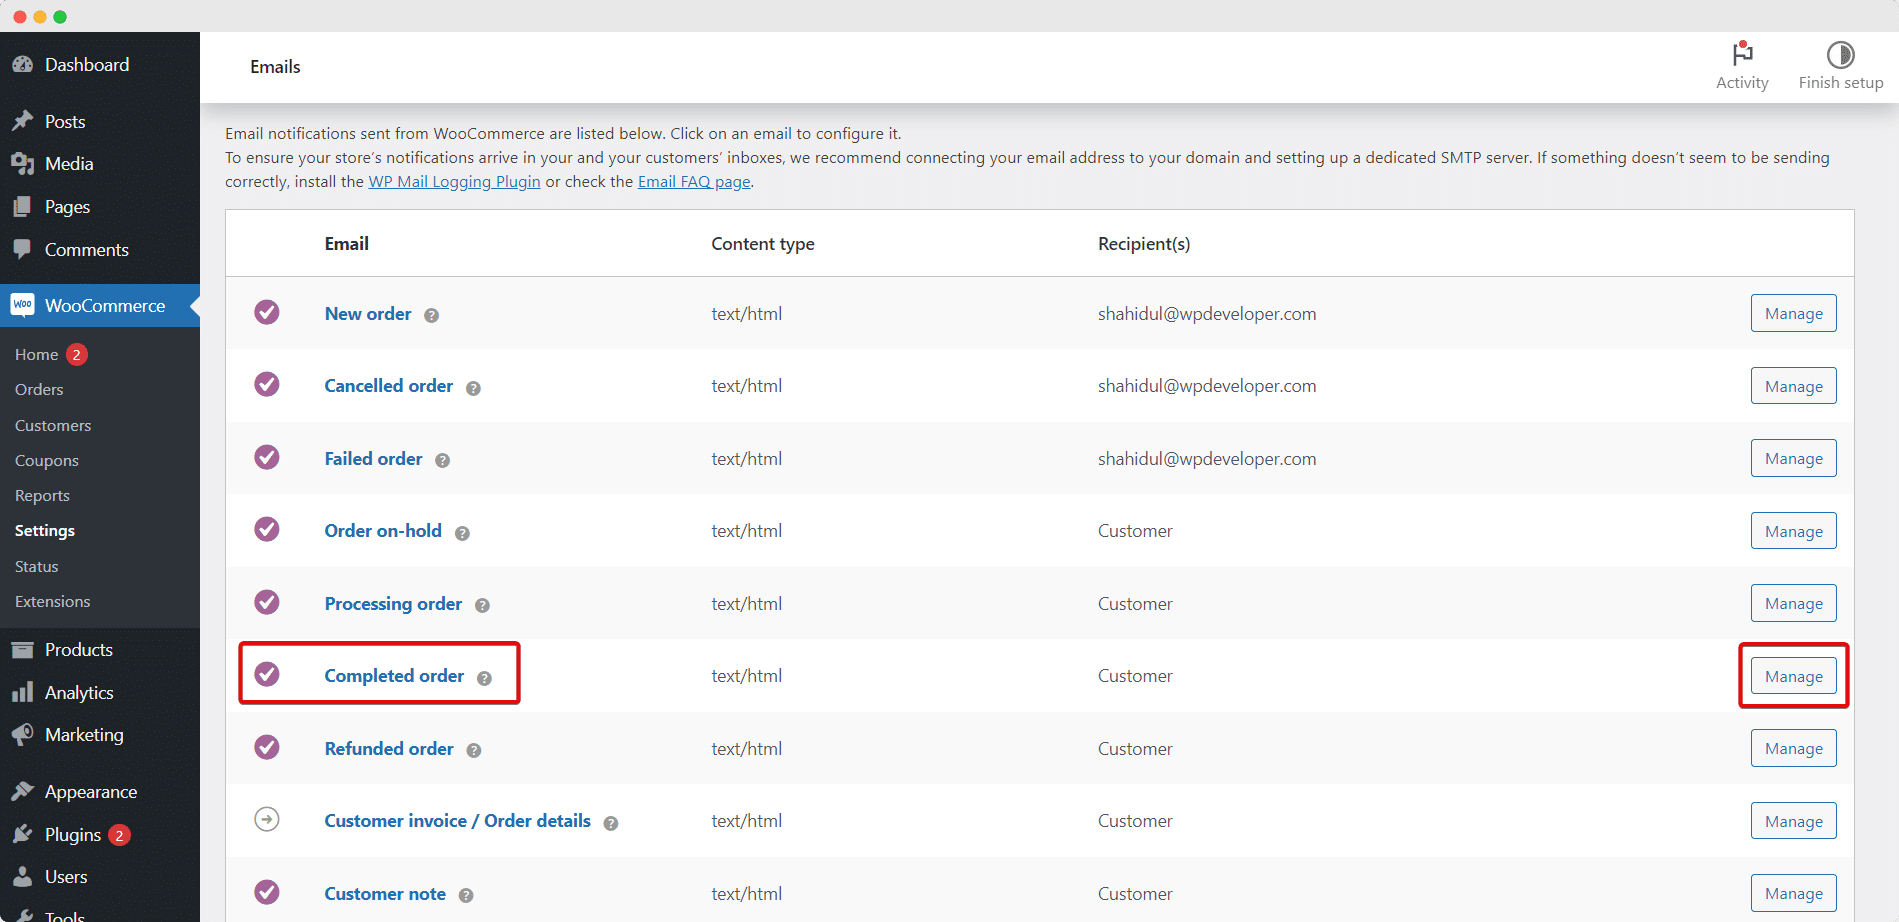
WooCommerce provides preset templates for emails to keep site admins and customers informed about orders, such as notifications about New Orders and Completed Orders. Nevertheless, you will want to delete some unnecessary WooCommerce defaults and customize some of these emails.
If you would like to customize WooCommerce email: individually, click Manage next to the email you would like to make the change. Considering that customers are most likely to see the ‘Processing Order’ and ‘Completed Order’ emails, it is a good idea to begin with those emails. Let’s start with the Completed order.
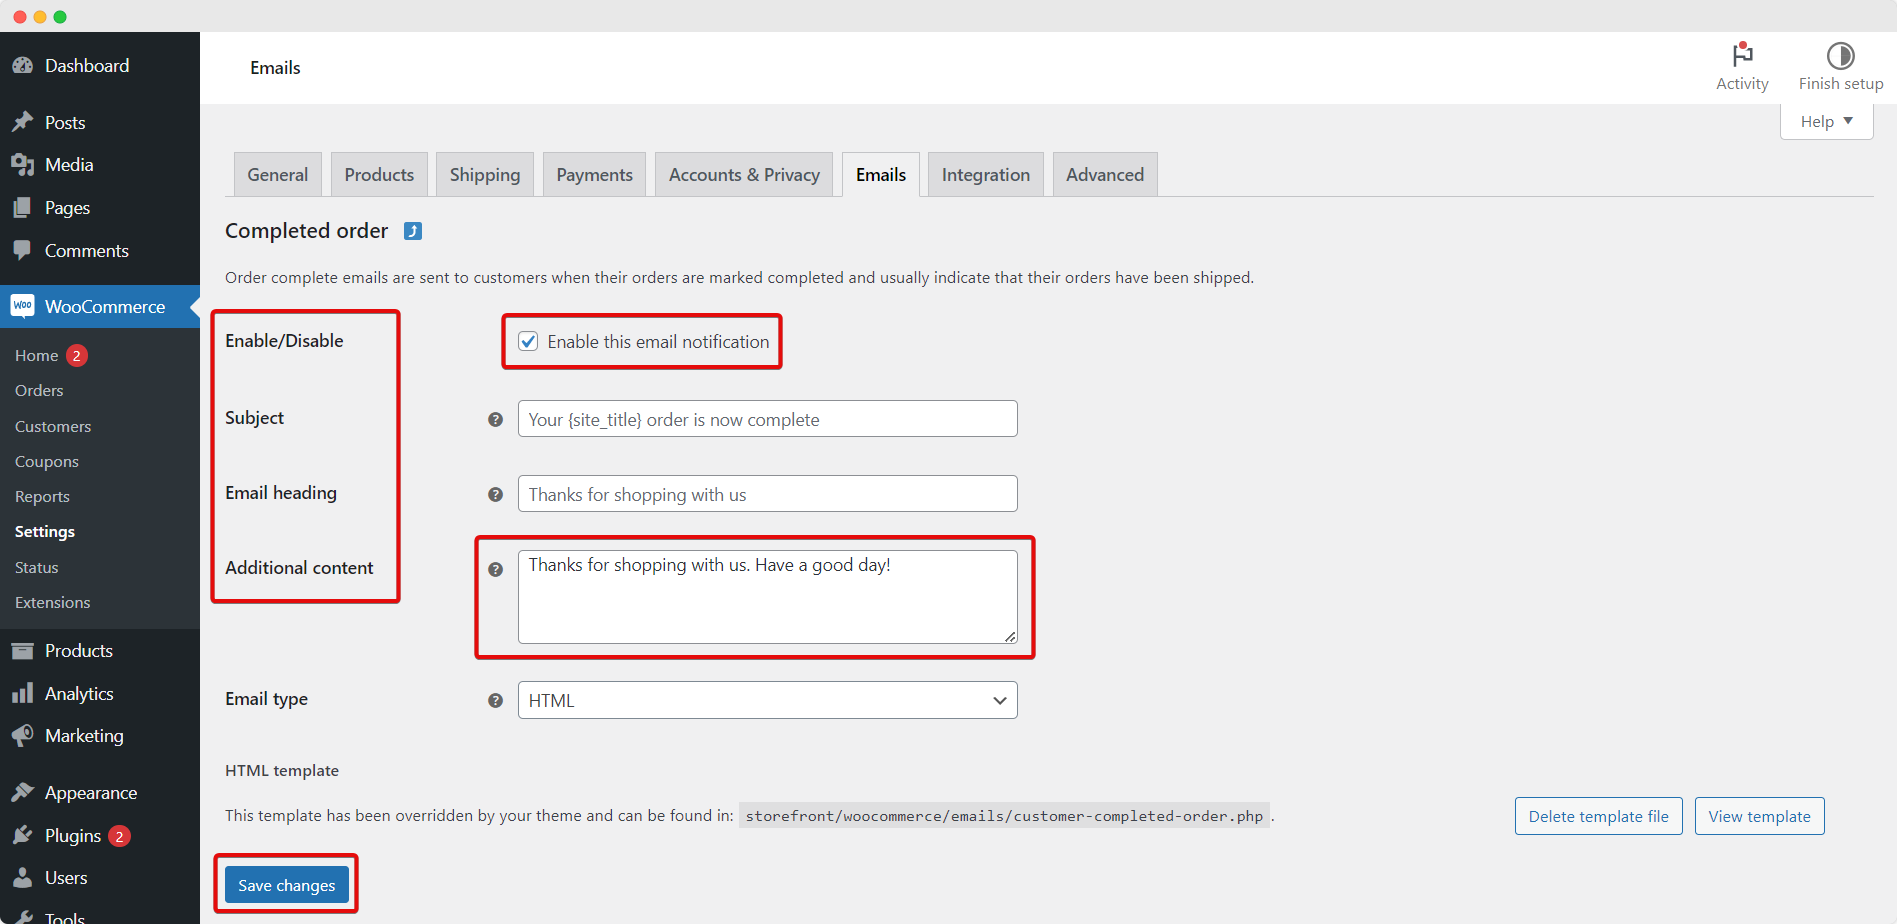
Once you click on Manage, you’ll get several customization options on the resulting page. Fields like Enable/Disable, Subject, Email Heading, and Additional Content are all about your email content. So make changes the way you prefer.
Besides, if you’re confused about what each field means, just hover your mouse over the ‘?’ icon and click. By doing so you’ll get placeholders for each field.
Step 4: Write HTML/Plain Text Email
To see the options, click the Email Type field. Choose from the following options:
Plain text: Emails that don’t contain any graphics or formatting
HTML: A formatted email that includes images, tables, and other rich content
Multipart: The user’s email client can decide whether to send an HTML or plain text email since some do not support HTML
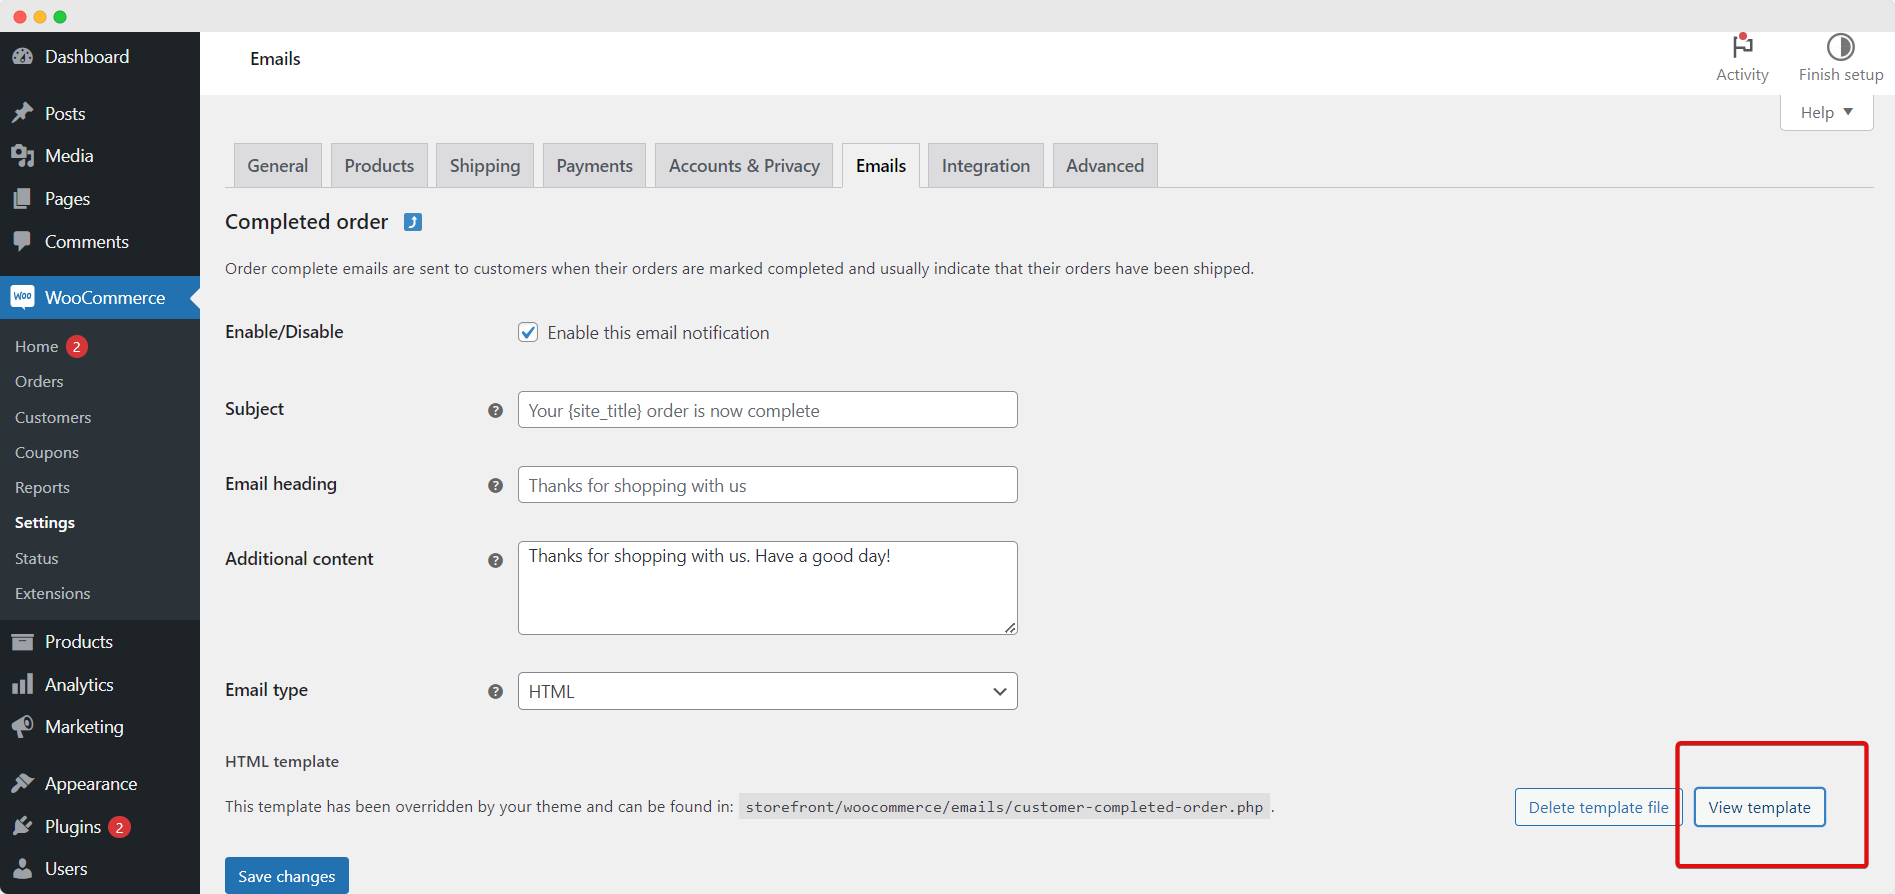
Step 5: Consider Editing The HTML Template
When you reach the very bottom of the page, you can see a section called ‘HTML template.’ From here you can customize your emails’ HTML code. First, click on the View template to see the code.
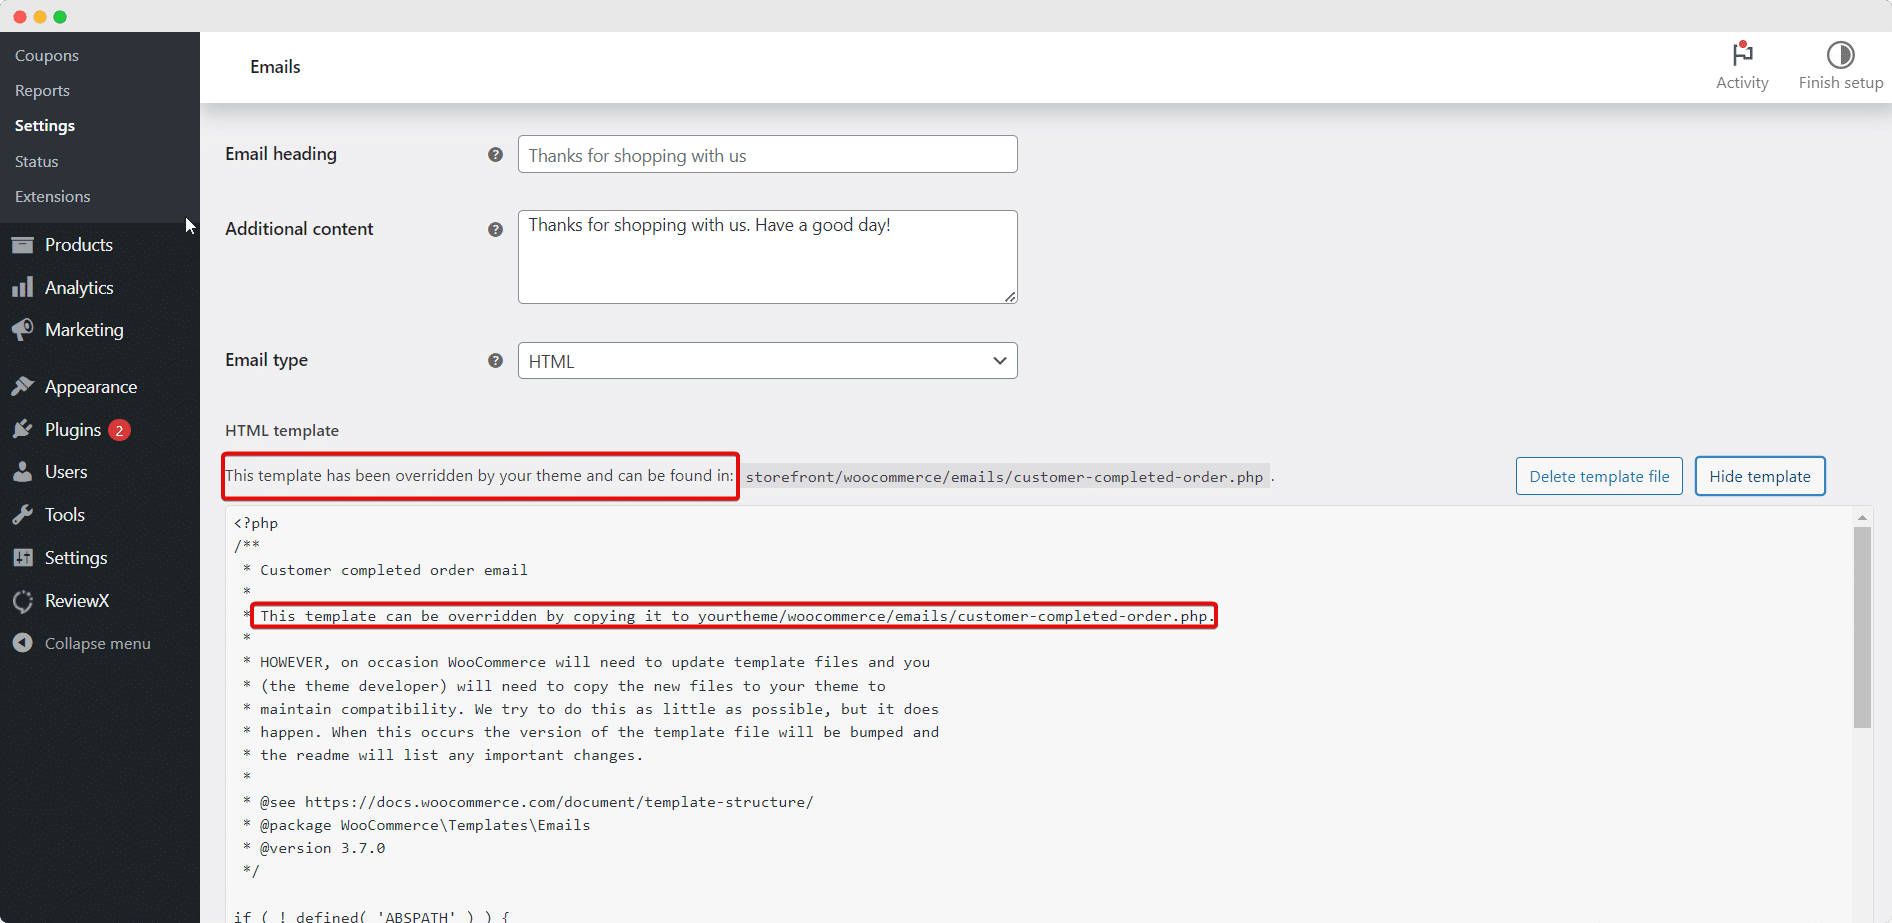
There is no way to edit the default HTML template of WooCommerce, so you can’t customize it. Overriding and editing the template is possible by clicking Copy File To Theme.
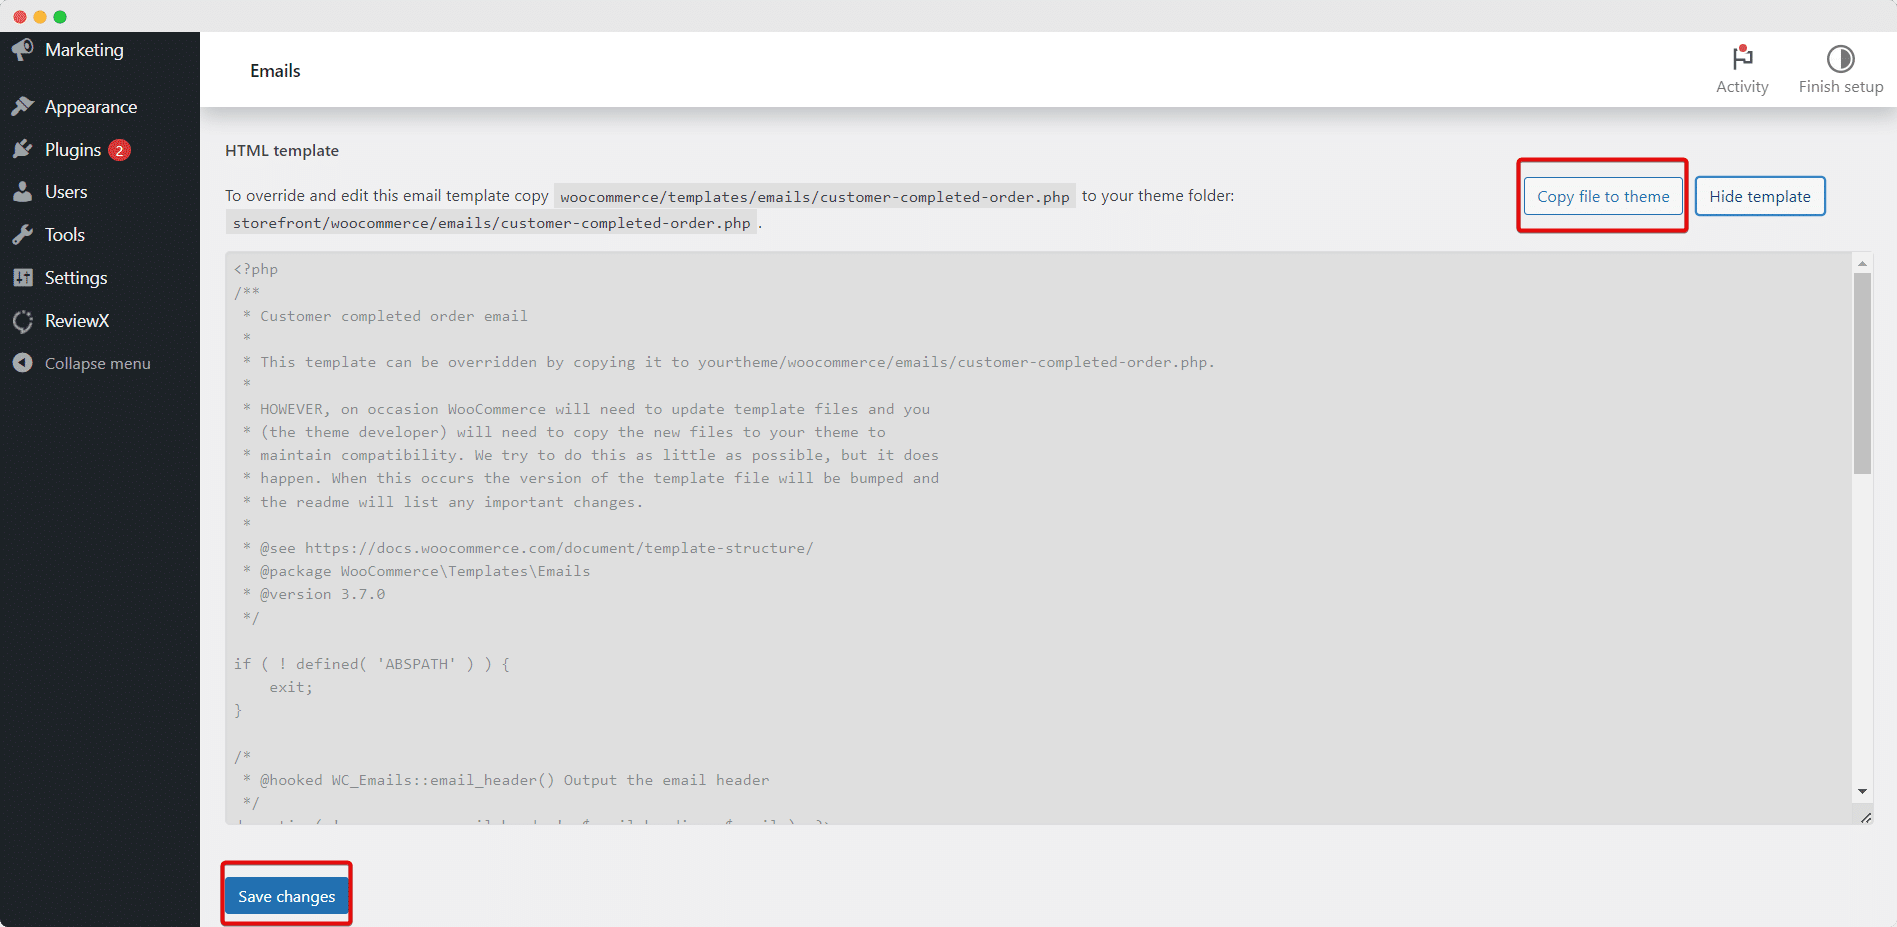
Once that’s done, you can put your cursor in the text editor and make changes there. If you are familiar with and skilled with HTML beforehand, we recommend you use this section.
Here you have it all on how to customize WooCommerce emails! To complete the process, click ‘Save Changes.’
How To Preview Your Customize WooCommerce Emails
Before sending Customize WooCommerce emails to customers, you must preview them. It allows you to see if there are any misspellings, WooCommerce branding that needs to be changed, or promotions or upsells that may be possible.
To view a visual preview of your general email template, navigate WooCommerce → Settings → Emails, and find the Email Template section as you did above. Lastly, click on the hyperlink with the text ‘Click here to preview your email template.’

Once you click on the hyperlink, a new window will open on your browser displaying the email with all the customization (new colors, a header image, and an edited footer) if you did. The content will be generic for the template preview.
Bonus: How To Send Automatic Review Request Emails To Customers?
To accelerate your WooCommerce sales, reviews can play an important role. And that’s where you need ReviewX, a WooCommerce review plugin for your online store. It will help you to collect product reviews, showcase reviews statistics, improve SEO positioning, and engage customers to the utmost.
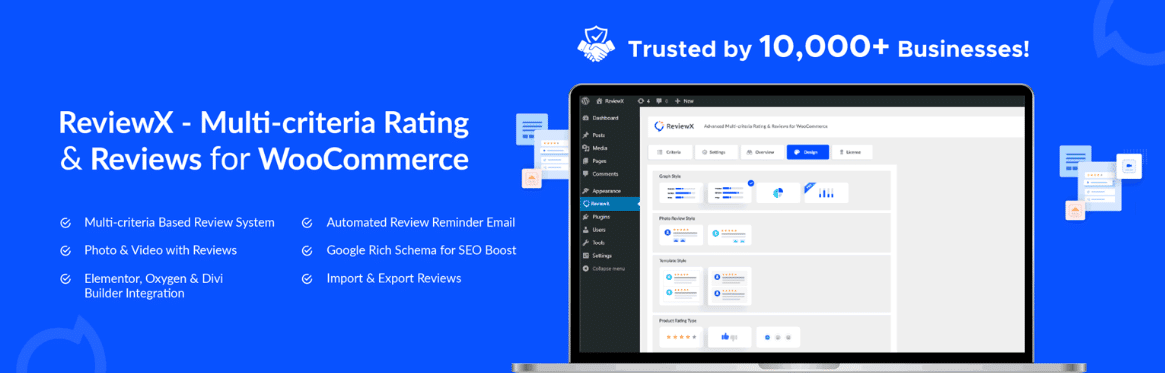
What more? Using this plugin, you can send automatic review request emails to customers. Those reviews will help you to add authentic customer reviews for your WooCommerce products that result in gaining credibility and speed up WooCommerce performance. Plus, you can look at this guide on how you can convince your customers to write reviews.
Customize WooCommerce Emails & Increase Engagement
As we already said emails are vital to analyzing your customer experience with your products. Customer responses do matter, so you need to be careful about sending your emails.
Make sure that you’re not sending the same emails to a particular customer. That could make a negative impression. That’s where you need to customize your emails before sending them. The blog can help you to customize WooCommerce emails easily. Say goodbye to repetitive emails and increase your WooCommerce sales.
Did you find this guide helpful? Let us know your thoughts with us in our Facebook community and subscribe to our blogs for more WooCommerce insights and guidelines.

Best Tool for WordPress Web Agencies
Finding the best tools for WordPress agencies can feel overwhelming – last Tuesday, I watched one of my

Best Cyber Monday Deals of 2025 for WordPress Web Agencies
Looking for the best Cyber Monday deals of 2025 for WordPress web agencies? You’re in the right place.

Judge.me is Leaving WordPress – Here’s the Best Judge.me Alternative (and How to Migrate Easily)
If you’re using Judge.me on your WooCommerce store, there’s an important update you can’t ignore: Judge.me is officially