How To Enable The Gutenberg Editor For WooCommerce? [2023]
- Published
- ReviewX Team
The Gutenberg editor is the latest and greatest addition to the WordPress platform, offering a sleek and intuitive way to create and manage content. Especially when it comes to WooCommerce, the block editor can bring a host of benefits that can improve the overall user experience and simplify eCommerce store design-related tasks. Still, if you are not sure why you should enable the Gutenberg editor for WooCommerce, continue reading this blog. We walk you through all the reasons you should explore and utilize the default block editor for your store.

Why Should You Enable The Gutenberg Editor For WooCommerce?
The Gutenberg block editor is a powerful tool that can revolutionize the way you create and manage content on your WordPress site. It is designed to be simple and intuitive, so you can easily bring your ideas to life with a few clicks. Whether you are a seasoned user or just starting out, this default WordPress block editor is the perfect choice for anyone looking for an easy way to manage their content.
And it’s no different for WooCommerce websites. Although WooCommerce is a powerful platform for building and managing eCommerce websites, it can often be overwhelming and complicated for non-technical users. That’s where the Gutenberg editor comes in – the block editor is a good choice for WooCommerce. So, if you have not already started, why not give it a try today and see for yourself just how amazing the block editor can be for your online store?

For starters, as mentioned before, the Gutenberg editor offers an easier and more user-friendly way to manage your content. No more navigating through confusing menus or using clunky drag-and-drop tools. Instead, you can add, edit, and arrange content blocks as you see fit directly from the editor with a few clicks.
Additionally, the Gutenberg editor makes it uncomplicated to personalize the appearance of your WooCommerce website. With its wide range of customization options, you can create a unique look that perfectly reflects your brand and helps you stand out from the crowd. And being the default block editor for WordPress, Gutenberg is constantly getting updates and dedicated plugins that make it easier to work with.
So why settle for a complicated and outdated eCommerce solution when you can have one that’s easy to use, customizable, and designed to make your life easier? Enable the Gutenberg editor for your WooCommerce site today and start enjoying a better and more efficient eCommerce experience.
How To Enable The Gutenberg Editor For WooCommerce?
It is super easy to enable the Gutenberg editor for WooCommerce. There are several plugins available that can help you make the switch in just a few simple steps. Here is a basic overview of the process:
Step 1: Choose Your Preferred Plugin
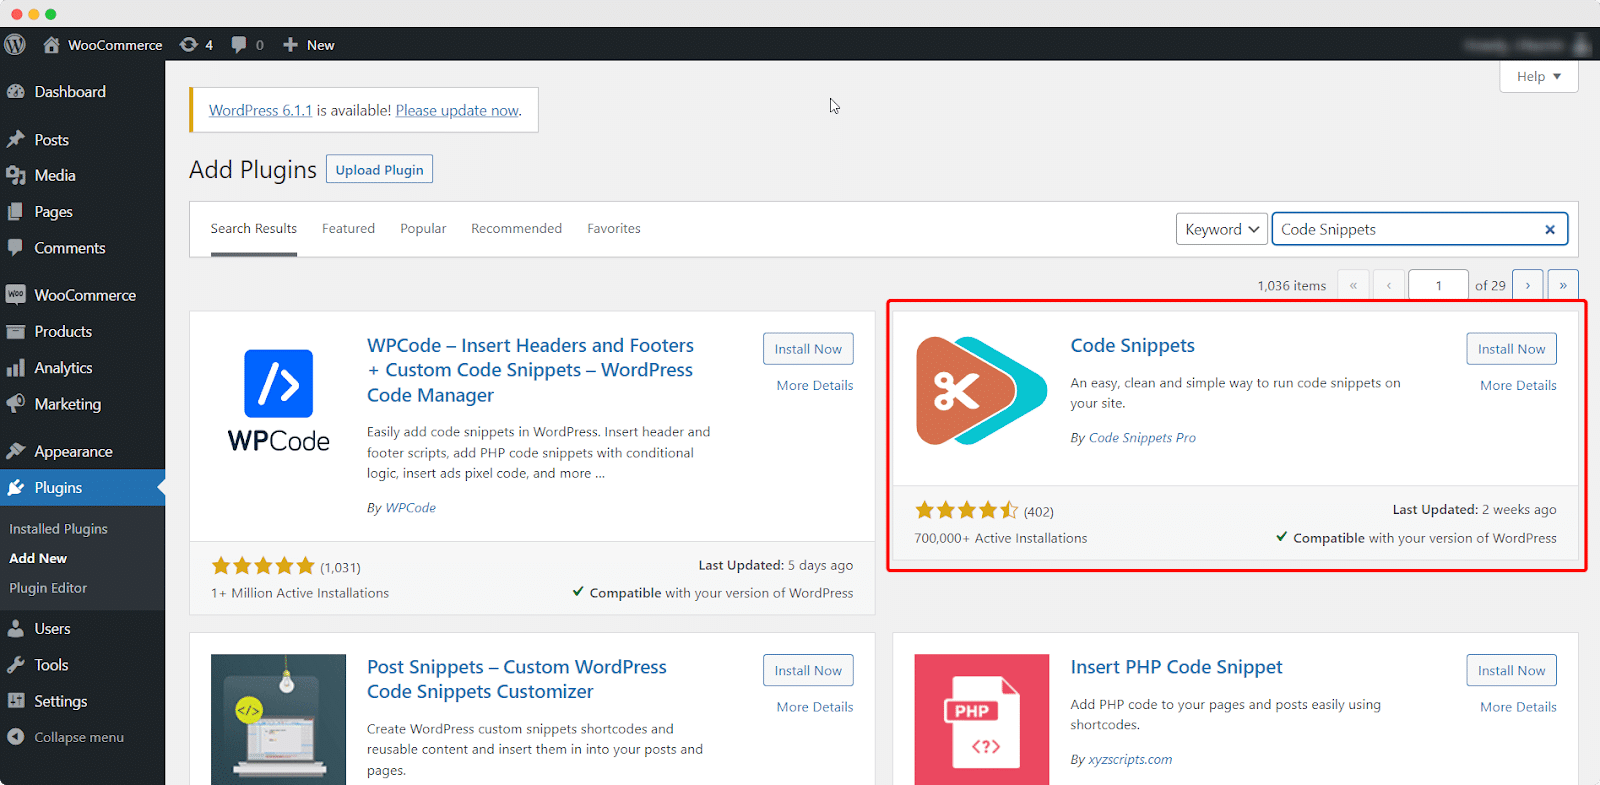
First, you need to install a plugin you want to use. We are using the Code Snippets Plugin to enable the Gutenberg editor here. Adding the code directly to your theme files may cause you to lose the code if you update or switch your theme files.
When you use the Code Snippets plugin to add code to your website, the code will always be there, even if you update or switch your themes. Consider your needs and choose the plugin that’s right for you.

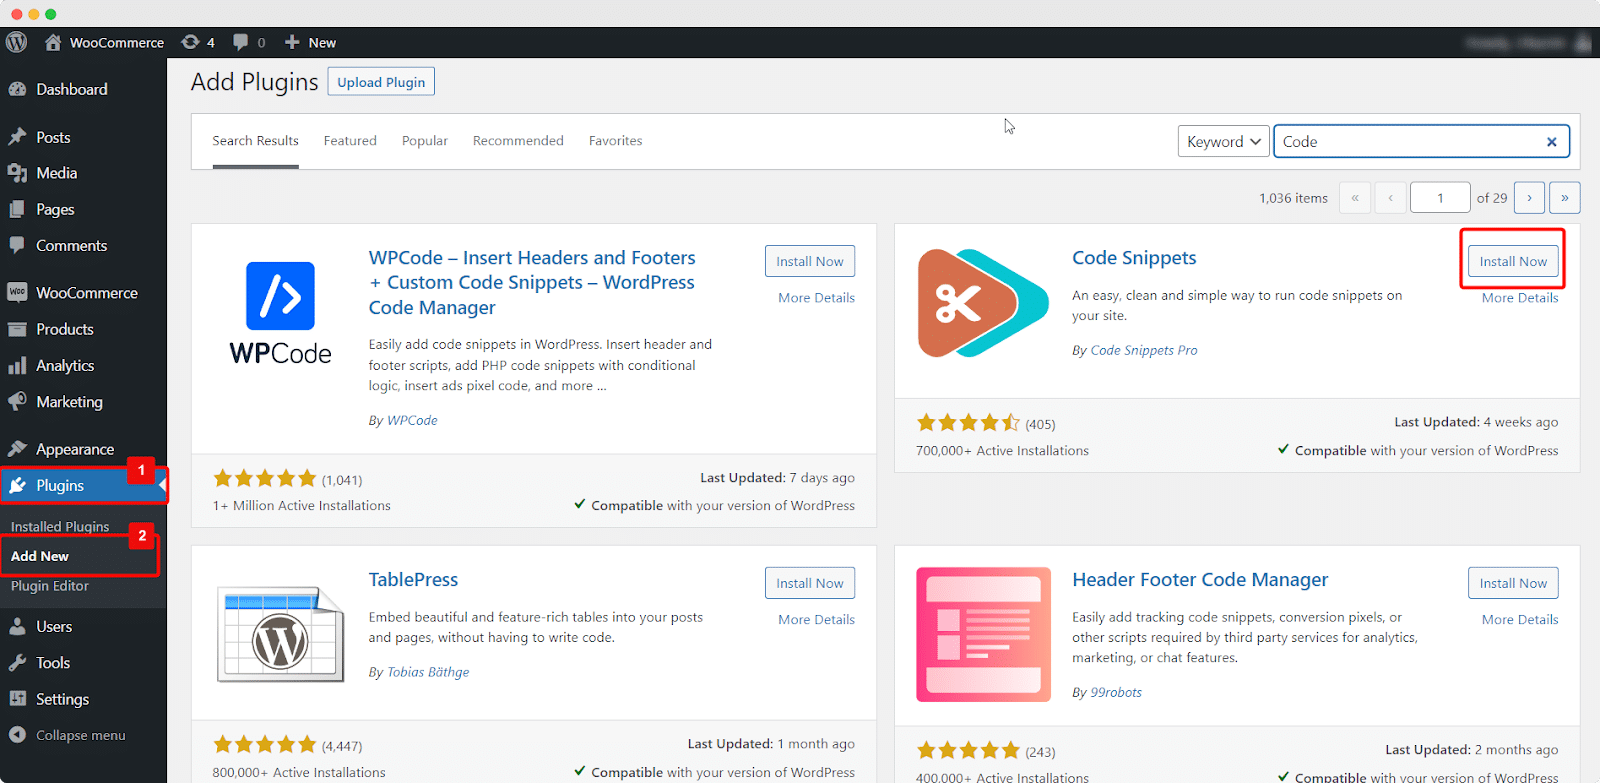
Once you’ve chosen a plugin, simply login to your WordPress dashboard and navigate to the ‘Plugins’ → ‘Add New.’ Search for your chosen plugin in the search bar and click ‘Install Now.’

Step 2: Activate The Plugin
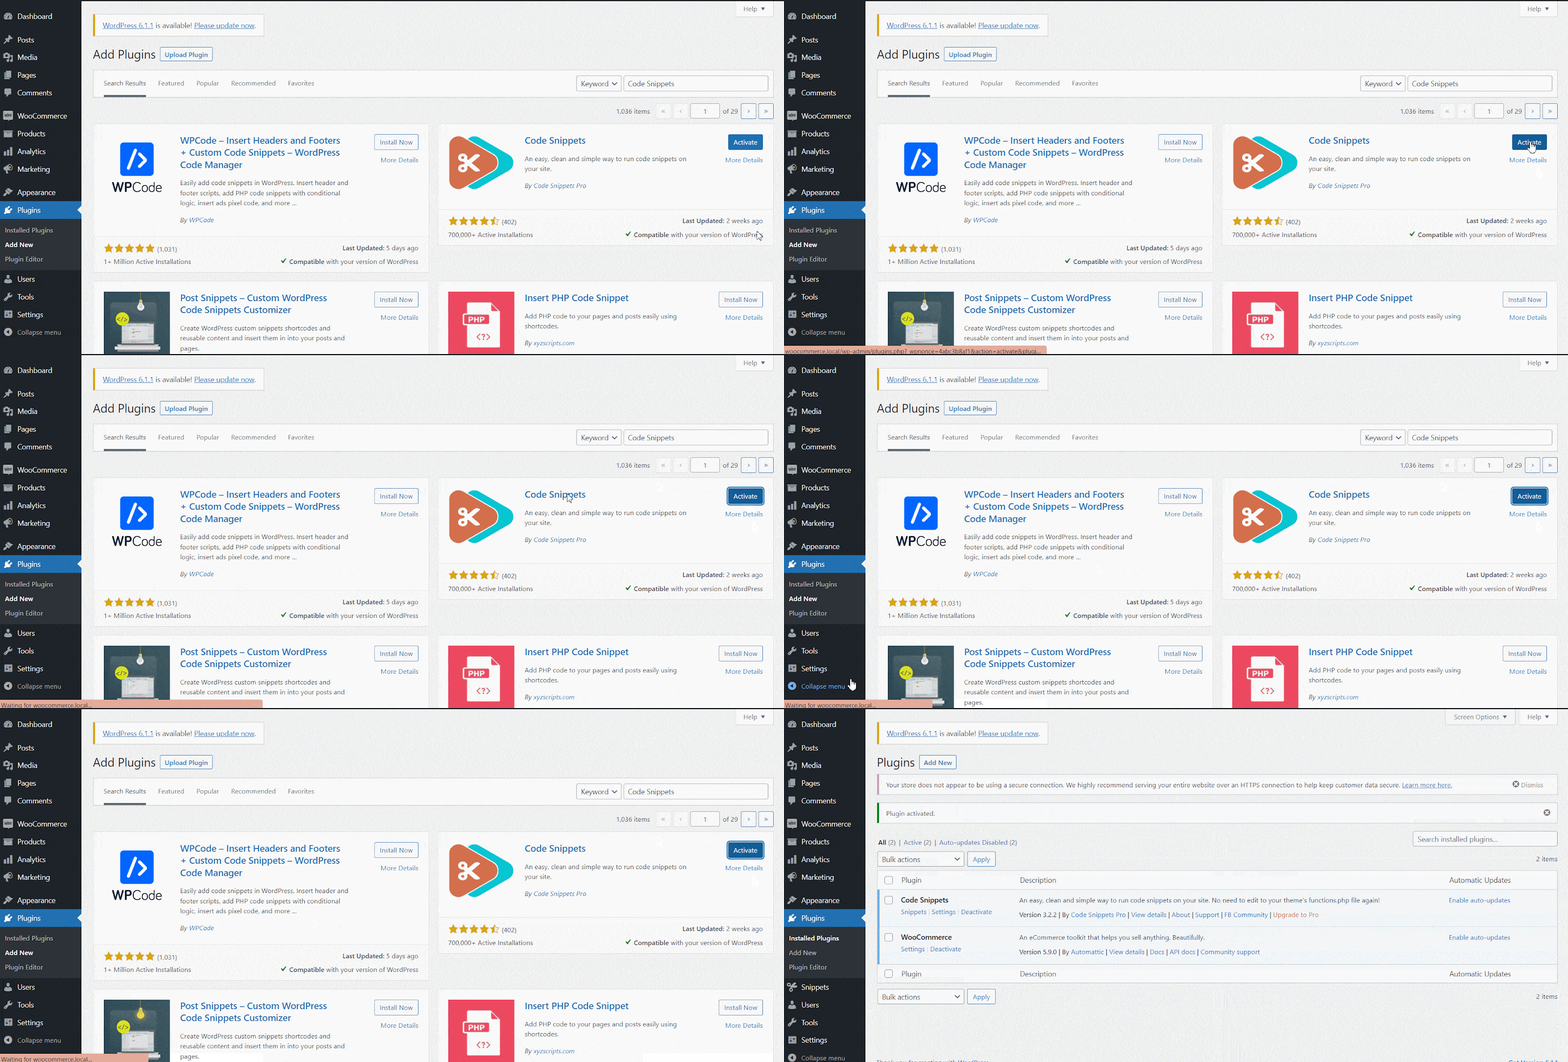
Now you need to activate the plugin: After the plugin has been installed, click ‘Activate’ to enable it. That’s it. You should now be able to access the Code Snippets plugin from your WordPress dashboard and start enjoying all the benefits it has to offer.

Step 3: Create & Add Code To The Snippet
Now, you need to add a new code to the snippet. To add a new snippet, go to ‘Snippets’ → ‘Add New.’ Enter a suitable snippet title and put the code in the respective field. However, you can copy and paste the code linked here.

Step 4: Save Your Changes
Once you are done adding your code, it’s time to save the changes & activate the snippets. Scroll down and hit the ‘Save Changes and Activate’ button. That’s it. Thus, you can enable/use the Gutenberg editor for WooCommerce.
With just a few simple steps, you can upgrade your WooCommerce product pages and enjoy the streamlined and intuitive editing experience the Gutenberg editor offers. So why wait? Make the switch today and start reaping the benefits!
Top Tips For Using Gutenberg With WooCommerce

Maximizing the benefits of using the Gutenberg editor with WooCommerce requires a bit of know-how and some best practices. Here are some tips to get you started:
👉🏻 Familiarize yourself with the available blocks. The Gutenberg editor offers a wide range of blocks that you can use to create and customize your content. Take some time to explore the different options and learn what each block can do.
👉🏻 Customize The Layout. Take advantage of the Gutenberg editor’s layout options to create a unique look for your site that perfectly reflects your brand.
👉🏻 Keep it simple. When it comes to customizing your site, less is often more. Do not be afraid to keep things simple and focus on creating a clean, easy-to-use interface.
By following these tips, you can make the most of the Gutenberg editor and enjoy a more efficient and effective WooCommerce experience.
Enable Gutenberg Editor & Manage Your WooCommerce Site With Ease
Enabling the Gutenberg editor for your WooCommerce site can bring many benefits that make managing your e-commerce site easier and more efficient. With its user-friendly interface, customization options, and wide range of available blocks, the Gutenberg editor is the perfect choice for any WooCommerce site. So do not wait. Make the switch today and start enjoying the benefits!
Was this blog helpful for you? Subscribe to our blogs for all the latest guides and insights on WooCommerce, and join our Facebook community to stay connected.
Increase sales with customer reviews
Showcasing customer experiences helps build trust and drive higher sales.
Related Articles

Judge.me is Leaving WordPress – Here’s the Best Judge.me Alternative (and How to Migrate Easily)
If you’re using Judge.me on your WooCommerce store, there’s an important update you can’t ignore: Judge.me is officially
![10 Best WooCommerce Review Plugins for Your Store [FREE & Paid]](https://reviewx.io/wp-content/uploads/2025/03/10-Best-WooCommerce-Review-Plugins-for-Your-Store-FREE-Paid-300x169.jpg)
10 Best WooCommerce Review Plugins for Your Store [FREE & Paid]
Choosing the best review plugin for your store can be a hassling job. You have to do a

Free vs. Paid WooCommerce Reviews Plugin: Which One to Use?
Review plugins make your WooCommerce work easier and WordPress gives you numerous options in the market. Some of